



This cinnamon roll recipe makes truly soft, gooey bakery-style rolls that actually stay soft for days. The secret is a simple technique used by professional bakers to create exceptionally soft breads and rolls, but it’s surprisingly easy to recreate at home! Best of all, you don’t need a single unusual ingredient, just one easy but game-changing step that may forever change the way you make cinnamon rolls. Recipe includes a step-by-step video tutorial.
The Secret to Truly Exceptional Cinnamon Rolls
Have you been searching without success for truly the best cinnamon roll recipe? One that is not only soft, gooey and tender but stays that way even the next day (and beyond!). This. Is. It. I know I’ve shared quite a few cinnamon rolls over the years, but this one has officially earned the top spot (even over my Amish cinnamon rolls — that one was tough to beat!).
These cinnamon rolls are exceptionally soft and pillowy, with gooey brown sugar-cinnamon centers and a thick blanket of cream cheese frosting. They are everything you could want from a bakery-quality cinnamon roll, and they stay soft and tender.
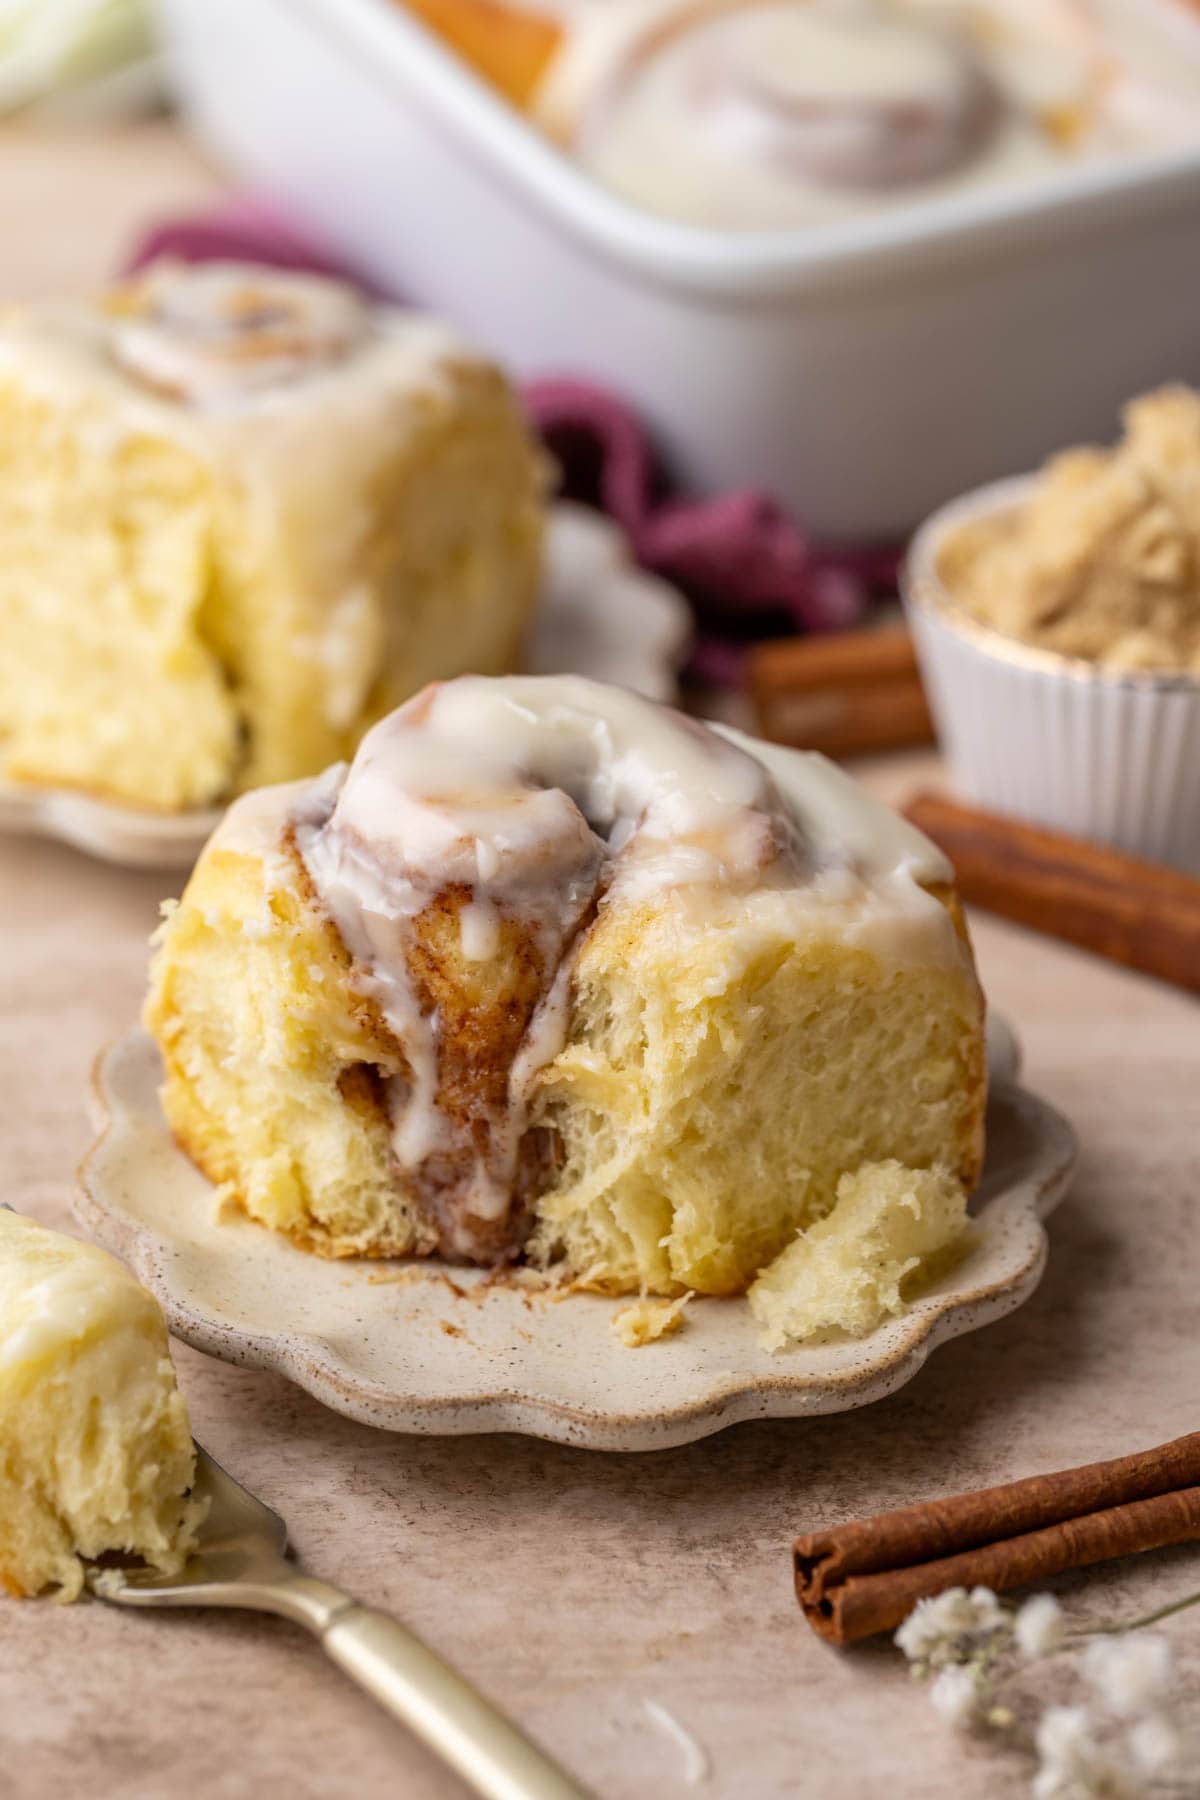
Most cinnamon roll recipes start off soft and tender while they’re warm, but they’re noticeably drier and stiffer the next day. This recipe not only creates rolls that are immediately more soft and plush than their typical counterparts, but also solves that problem with one incredibly simple technique that many pro bakers use (but that you can absolutely do at home!): tangzhong.
What is Tangzhong?
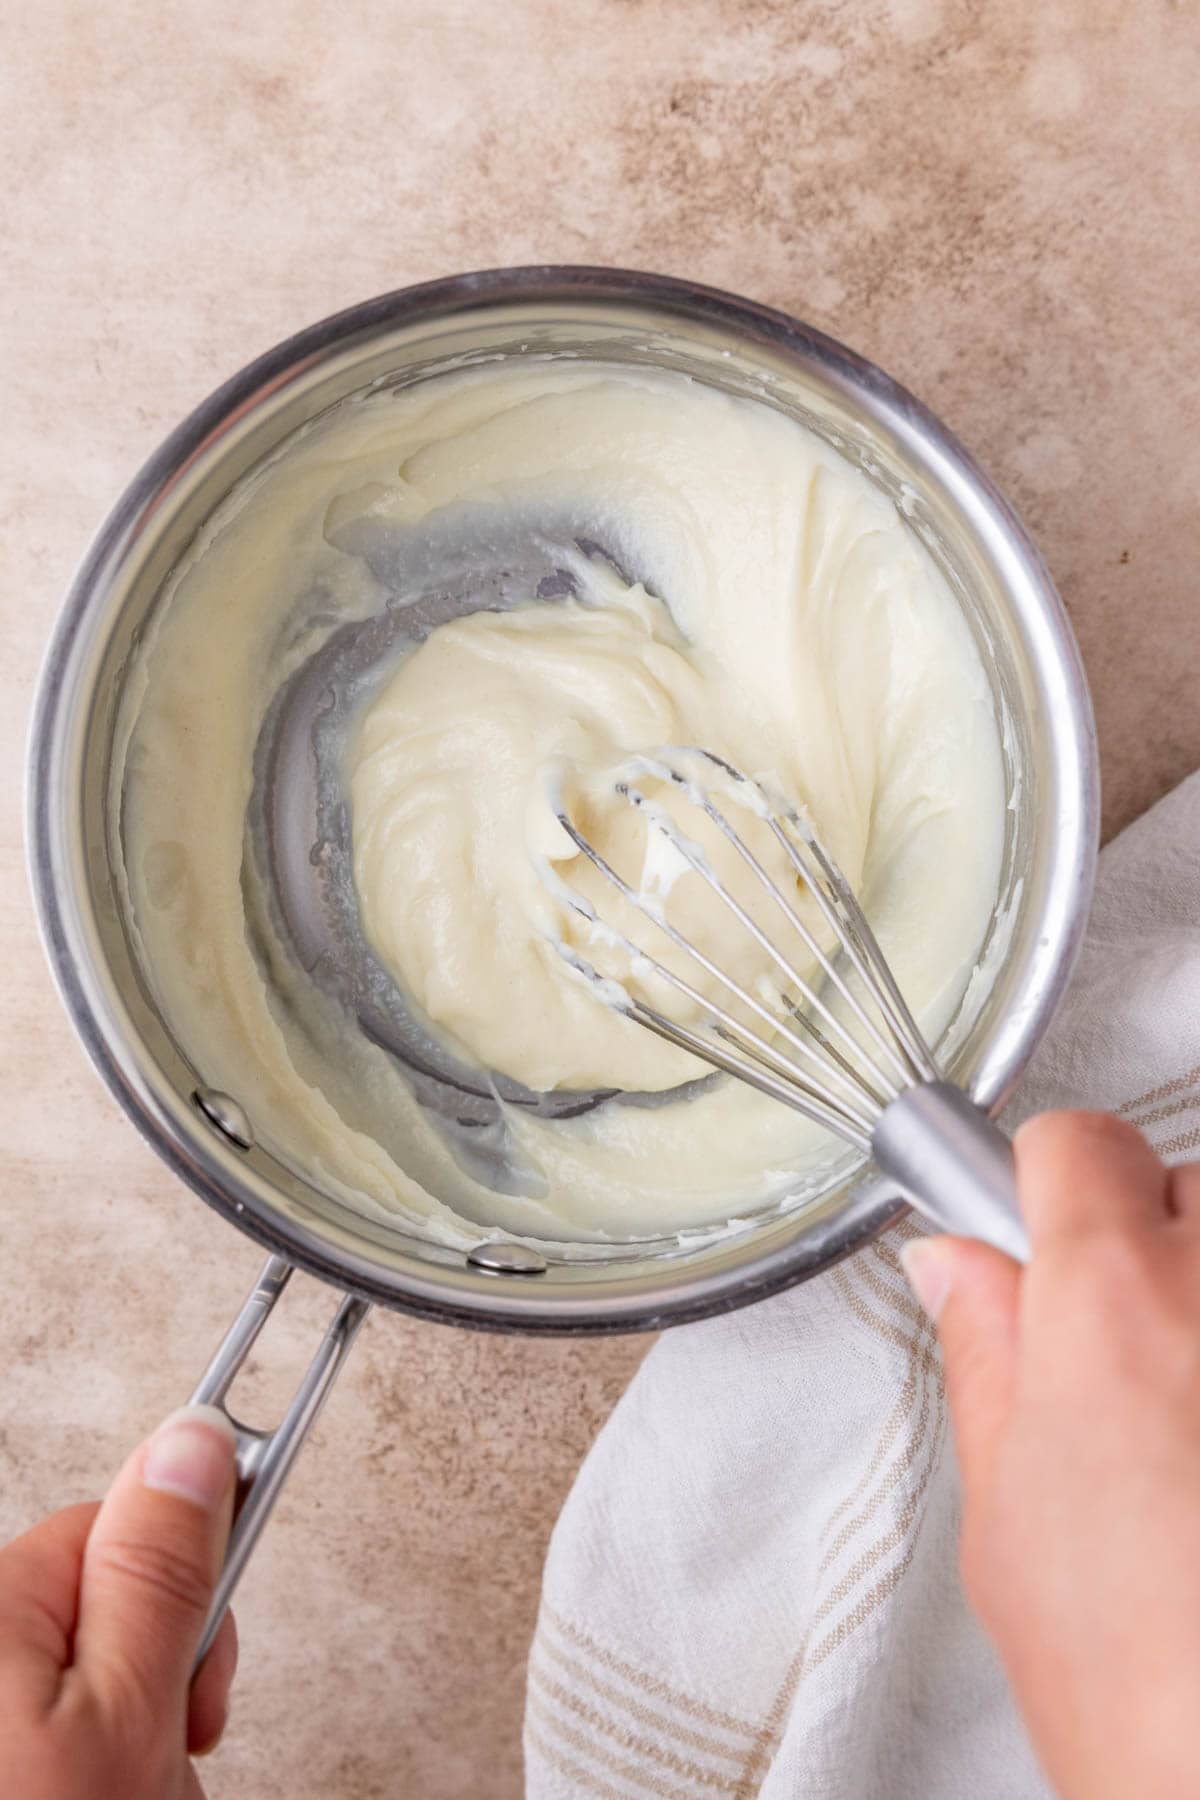
Tangzhong sounds technical, but it’s just flour and milk!
This Asian breadmaking technique involves cooking a small amount of flour and liquid (in our case, milk) from the recipe into a paste before adding it into the dough. If you’ve ever made my ermine frosting, or even a simple roux for my mac and cheese recipe, you’ve basically done this already. It takes only minutes and just uses standard ingredients that are already part of the recipe.
So, how does it make such a big difference? This method gelatinizes the flour starches, which helps them to absorb and hold on to more liquid than they normally could. Sounds technical, but basically it means we’re adding more moisture to our cinnamon rolls without turning the dough into a sticky mess.
This extra moisture gives the cinnamon rolls an exceptionally soft, springy texture and helps them stay soft for days. Think of tangzhong as a cheat code for bakery-quality cinnamon rolls. Once you see and taste the difference, you may never want to make them another way.
What You Need
The ingredients for this cinnamon roll recipe are, perhaps surprisingly, quite standard. It’s how we are using them that makes such a difference.
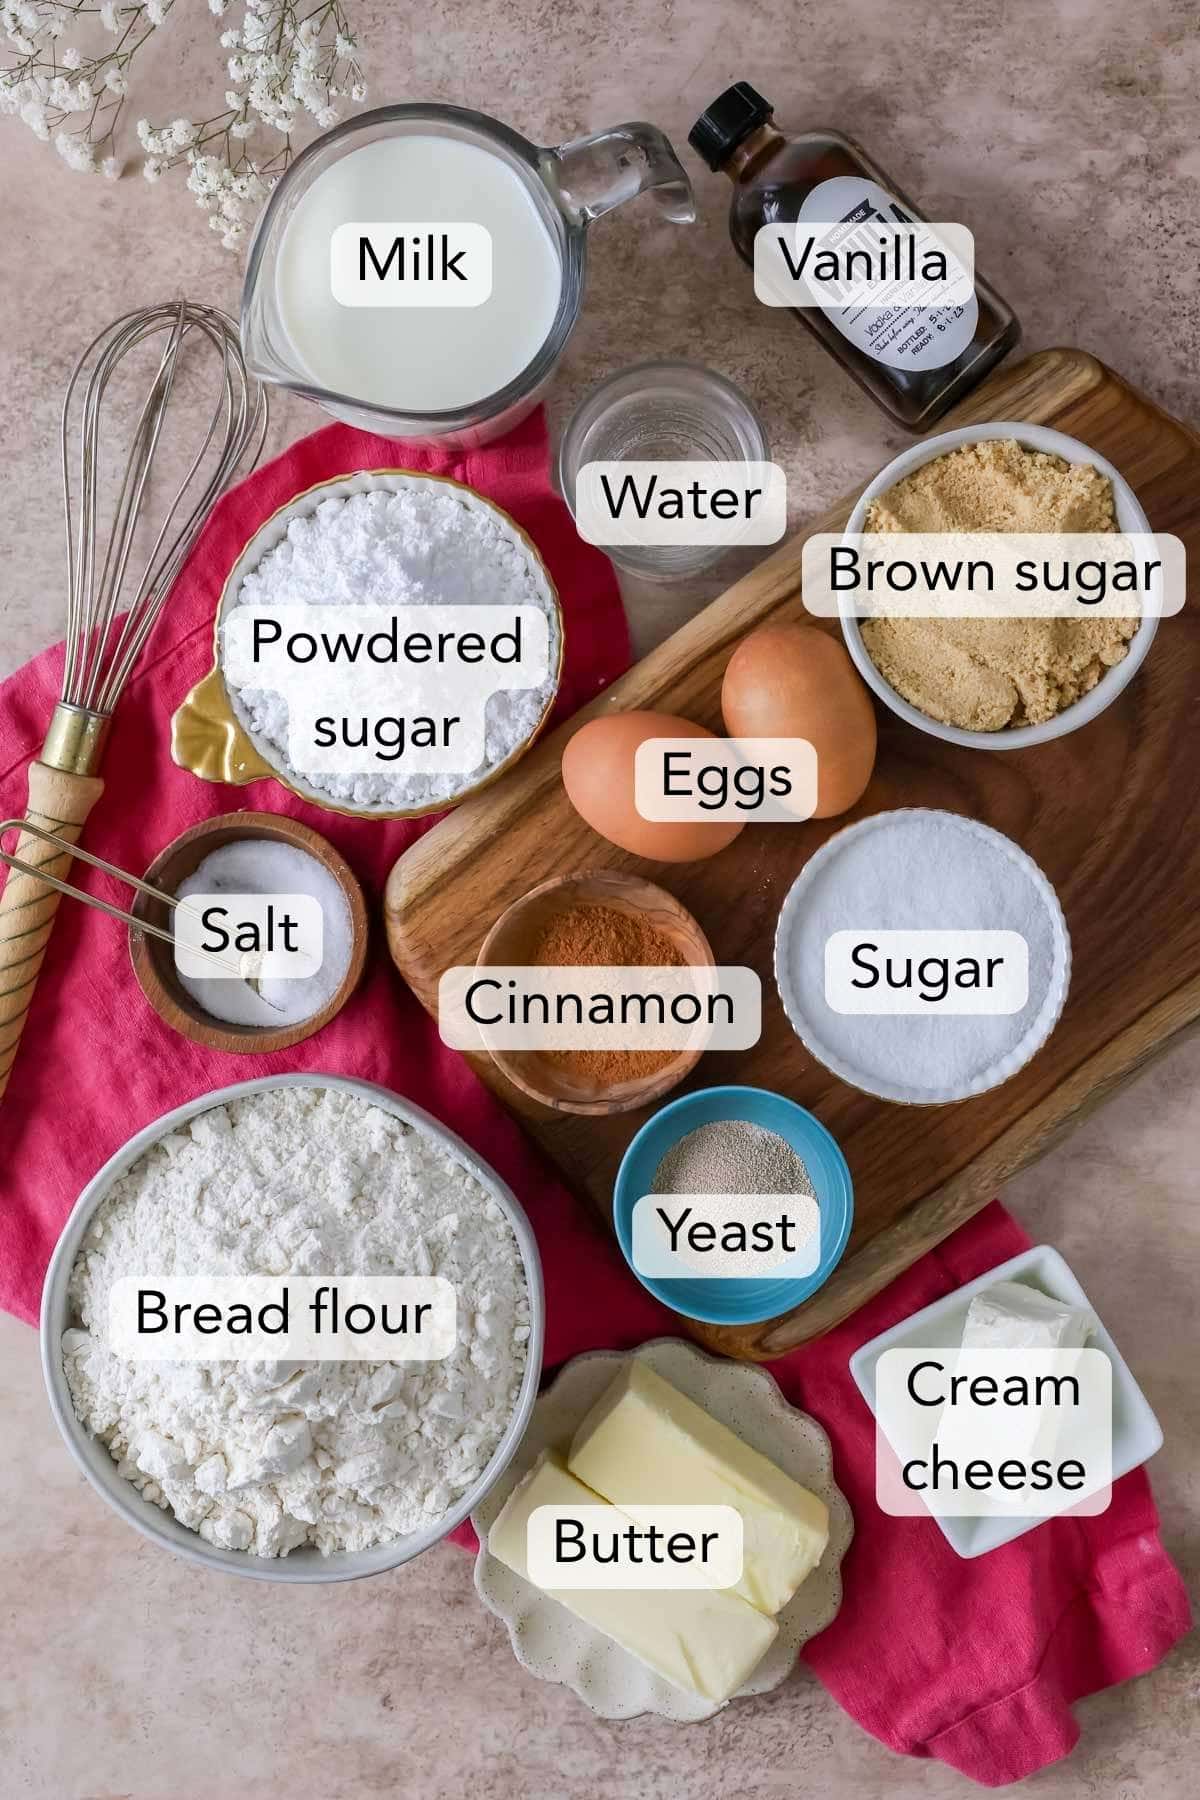
- Milk & flour, for the tangzhong. Tangzhong isn’t something fancy you need to buy. We simply cook a small bit of the milk and flour already in the recipe until we have a soft paste. Make this first so it can cool a bit while you prepare the dough.
- Bread flour. Bread flour has a higher protein content than all-purpose flour, so it absorbs more liquid while giving a very soft dough the strength and structure it needs to rise. All-purpose would work in a pinch, but bread flour is best if you have it!
- Yeast. You’ll need active dry yeast, and check the expiration date to ensure it’s still good. If your yeast doesn’t foam after a few minutes in the warm milk mixture, you will need to start over.
- Egg + egg yolk. Adding an extra egg yolk gives the dough a lovely soft, tender texture. Don’t even think about adding the whole second egg–it will make the rolls too fluffy (in a not good way… I tried it!) and dry. If you don’t want to waste the extra egg white, save it to make candied pecans!
- Butter. Rather than adding melted butter with the sugar and eggs in the beginning, we will gradually knead softened butter into the partially developed dough. Another simple technique that makes a huge difference: doing it this way gives the flour a chance to build structure before we add the fat and ultimately gives us a softer and better-structured dough that bakes up perfectly.
- Brown sugar and cinnamon. Our filling is all brown sugar, not granulated, which lends itself to soft, gooey, and perfectly rich centers with the present (but not overpowering) warmth of cinnamon
- Cream cheese. This doesn’t go into the dough! Instead, tangy cream cheese frosting is the perfect balance to the rich filling. If you aren’t a cream cheese fan, try my easy cinnamon roll icing, made without cream cheese.
This is just an overview of the ingredients I used and why. For the full recipe, please scroll down to the bottom of the post!
Sam’s Tip
The exact amount of flour in yeast doughs can vary from kitchen to kitchen and even from day to day. Using a specific, exact amount is less important than the consistency and texture of your dough, so you may use slightly less or slightly more than called for.
Once all of the ingredients have been added, the dough should cling to itself in a ball around the dough hook, pulling away from the sides of the bowl, though it may stick slightly to the bottom. If you touch it with a clean finger, it should feel soft and tacky but shouldn’t leave much (or any) dough on your finger. Don’t continue adding flour until the dough feels completely dry. We specifically want a soft and slightly tacky dough.
How to Make the Best Cinnamon Rolls
- Make the tangzhong. Whisk together the milk and flour in a small saucepan. Cook over medium heat until a paste forms and the whisk leaves trails. Don’t overcook the tangzhong, or the paste will be too tight and difficult to incorporate into the dough; I personally aim for a temperature of around 165F (74C). Pour this a heatproof bowl to stop the cooking and speed up the cooling process.
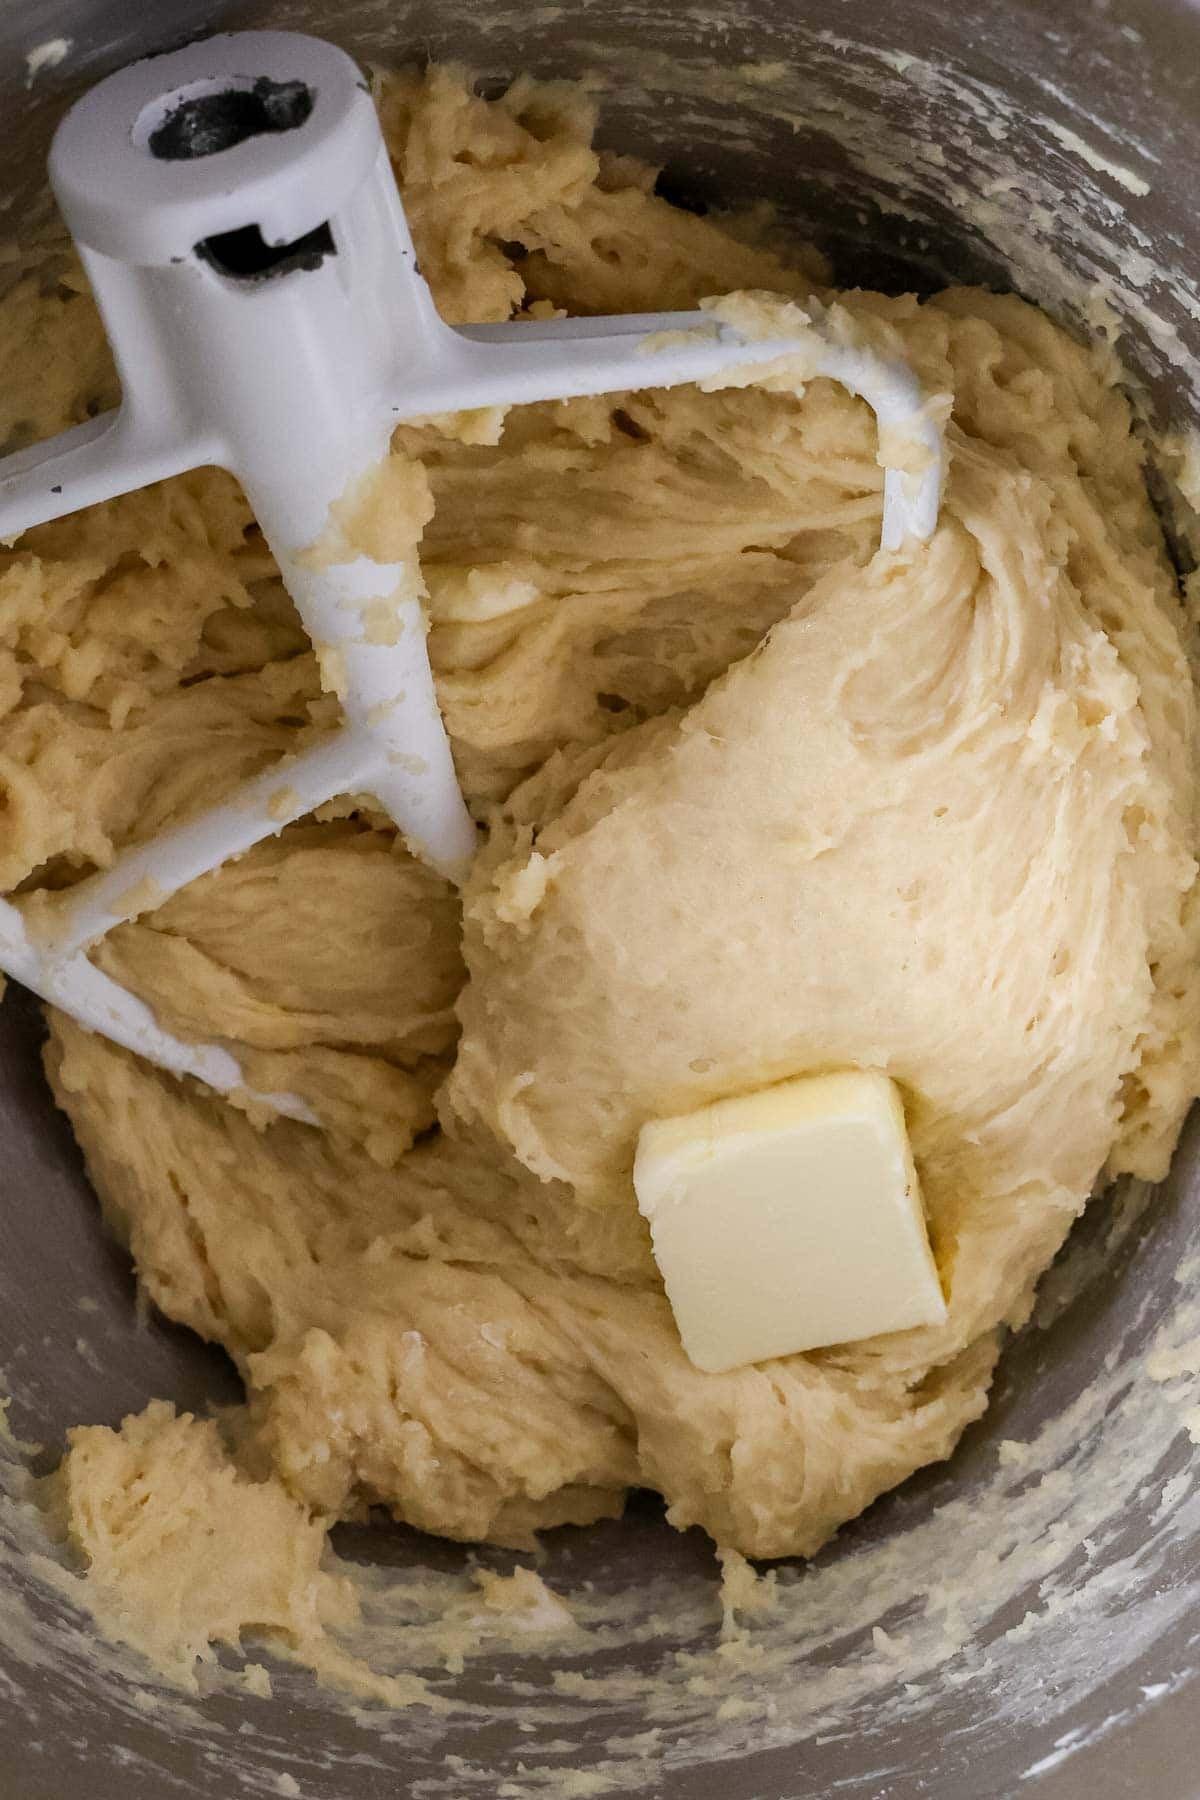
- Make the dough. Bloom the yeast, then add the sugar, tangzhong, and egg and egg yolk. Add a little more than half the flour and all of the salt. Next, add the butter about a tablespoon at a time. Finally, continue adding more flour until the dough starts to cling to itself and pull away from the bowl; it should be tacky, not sticky.
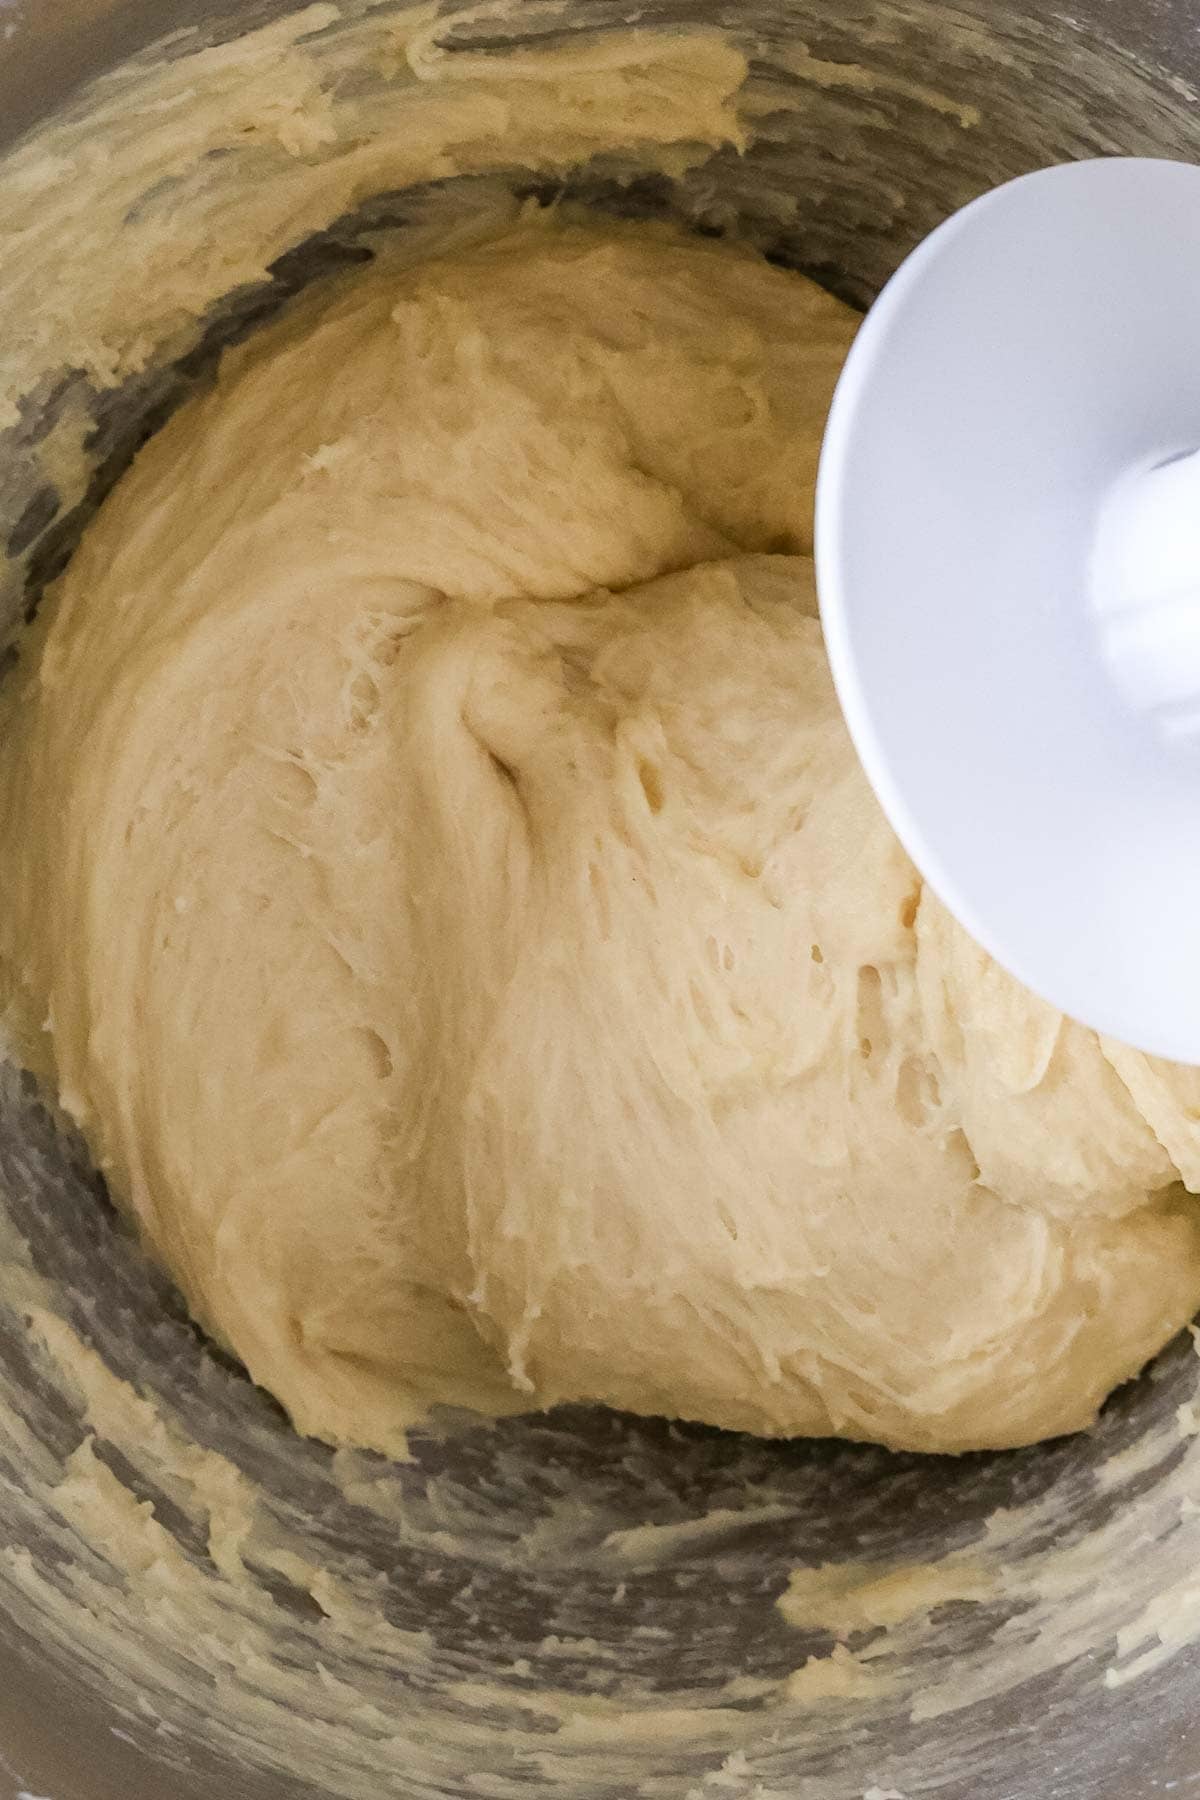
- Knead. Using your hands or a stand mixer with a dough hook, knead the dough until smooth and elastic. It’s very important to knead the dough long enough; even using a stand mixer it usually takes me over 10 minutes to fully knead it to the proper point.
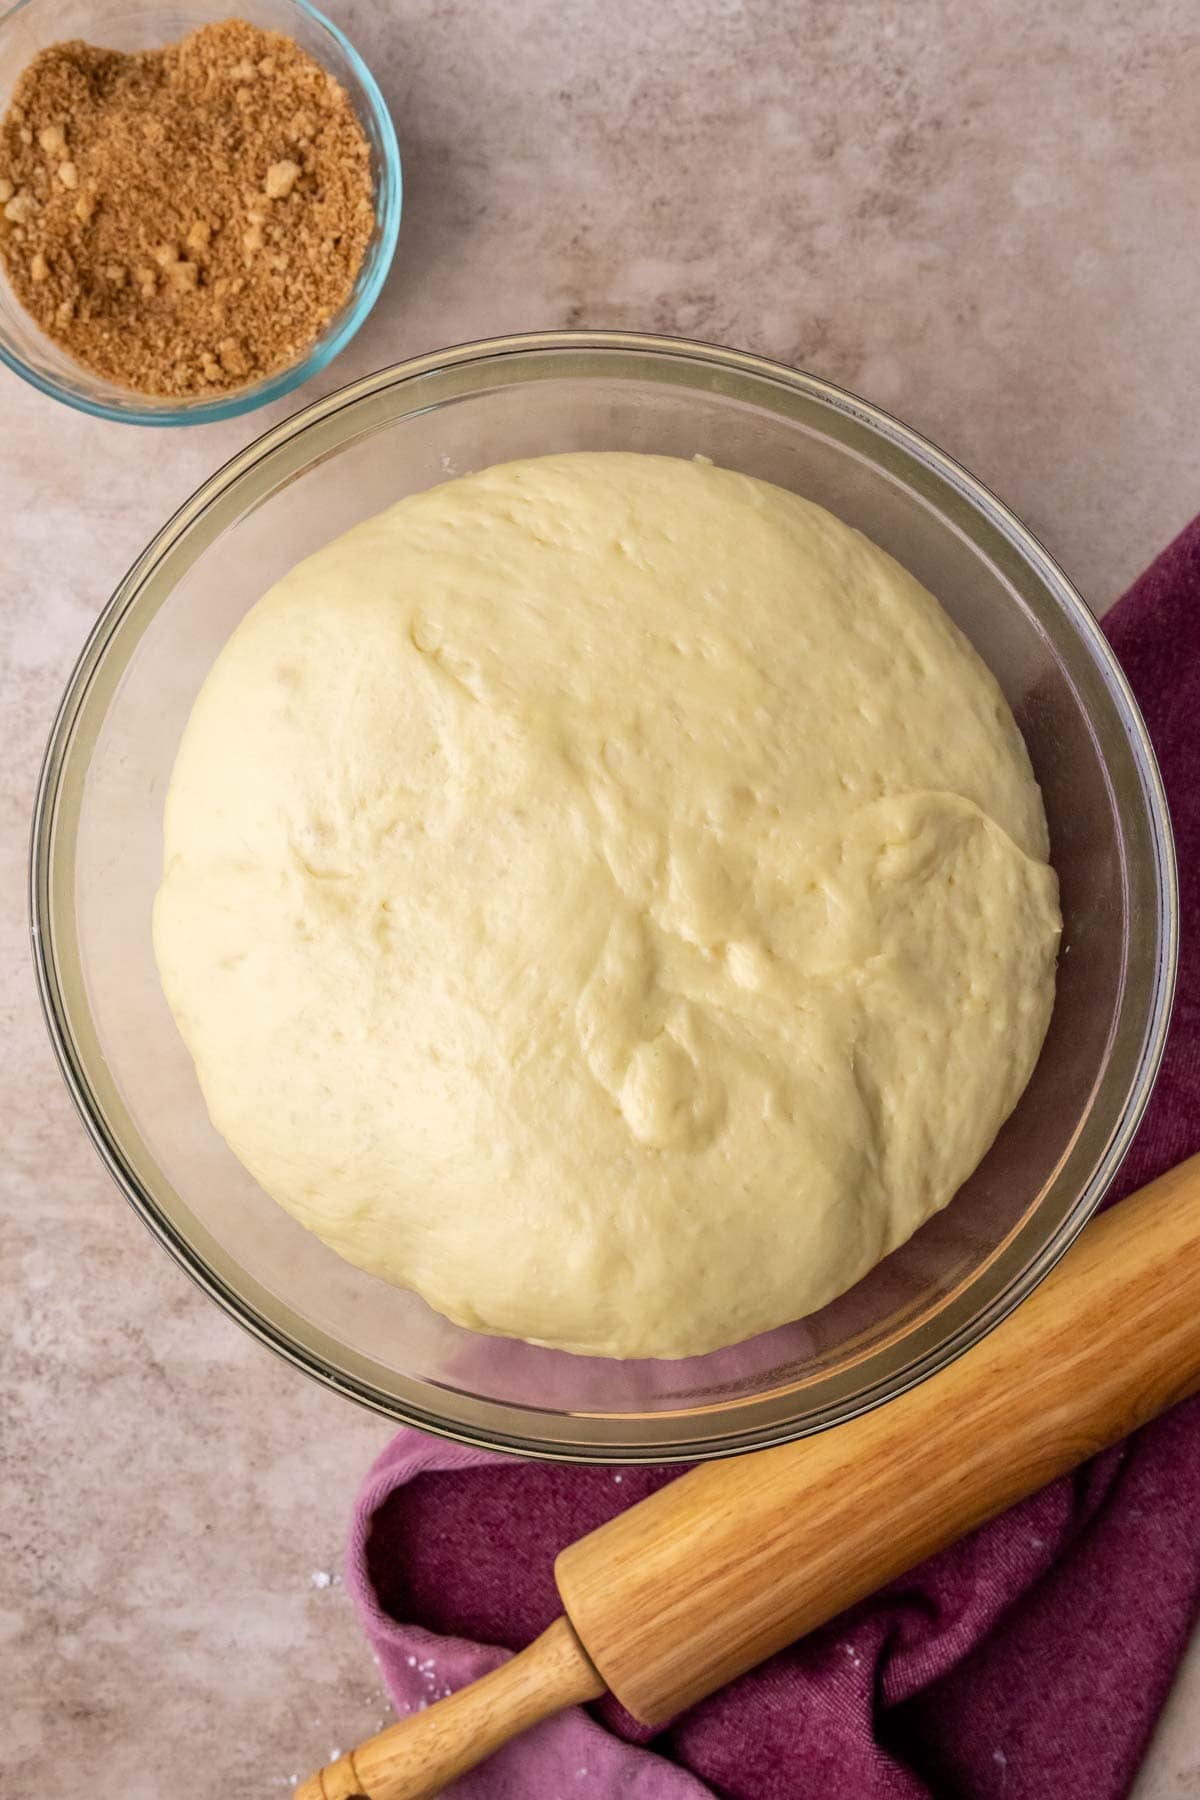
- First rise. Transfer the dough to a greased bowl, cover, and let rise until doubled in size.
Sam’s Tip: Stand Mixer vs. Kneading by Hand
You can make this cinnamon roll dough by hand, bit I prefer and recommend using a stand mixer, if you have one. This is an intentionally soft, slightly tacky dough, and a mixer makes it much easier to knead properly without adding more flour than is strictly necessary.
When kneading by hand, the dough may feel stickier and more difficult to manage, which makes it tempting (and sometimes even necessary) to keep adding flour. Add as little flour as you can get away with and just know it will take longer than it would with a mixer (typically around 15 minutes or longer). Adding too much flour will reduce the moisture we worked so hard to incorporate into the dough and can make the finished rolls drier than is ideal.
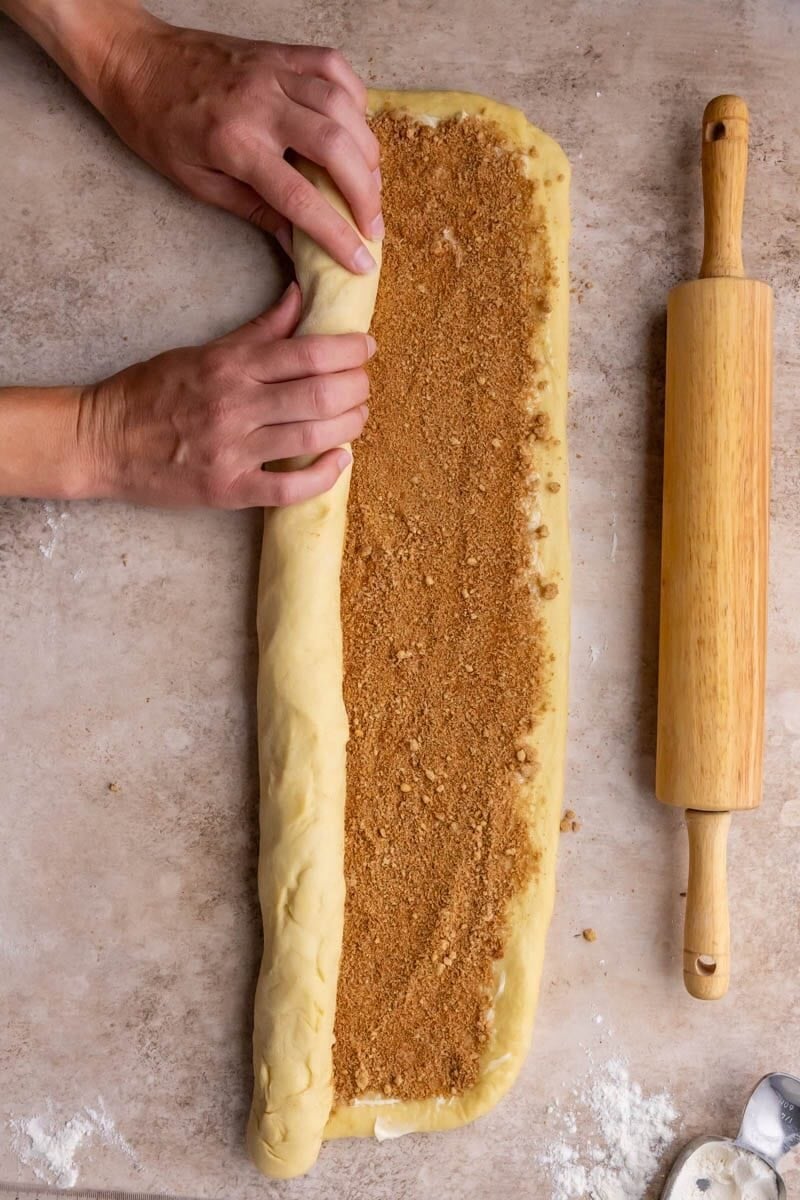
- Add the filling. Roll the dough into an 8×20″ rectangle. Spread butter evenly over the surface, add the filling on top, and roll into a log. Roll snugly, but don’t roll too tight as doing so can cause gapping in the finished rolls. Pinch the seam firmly to seal.
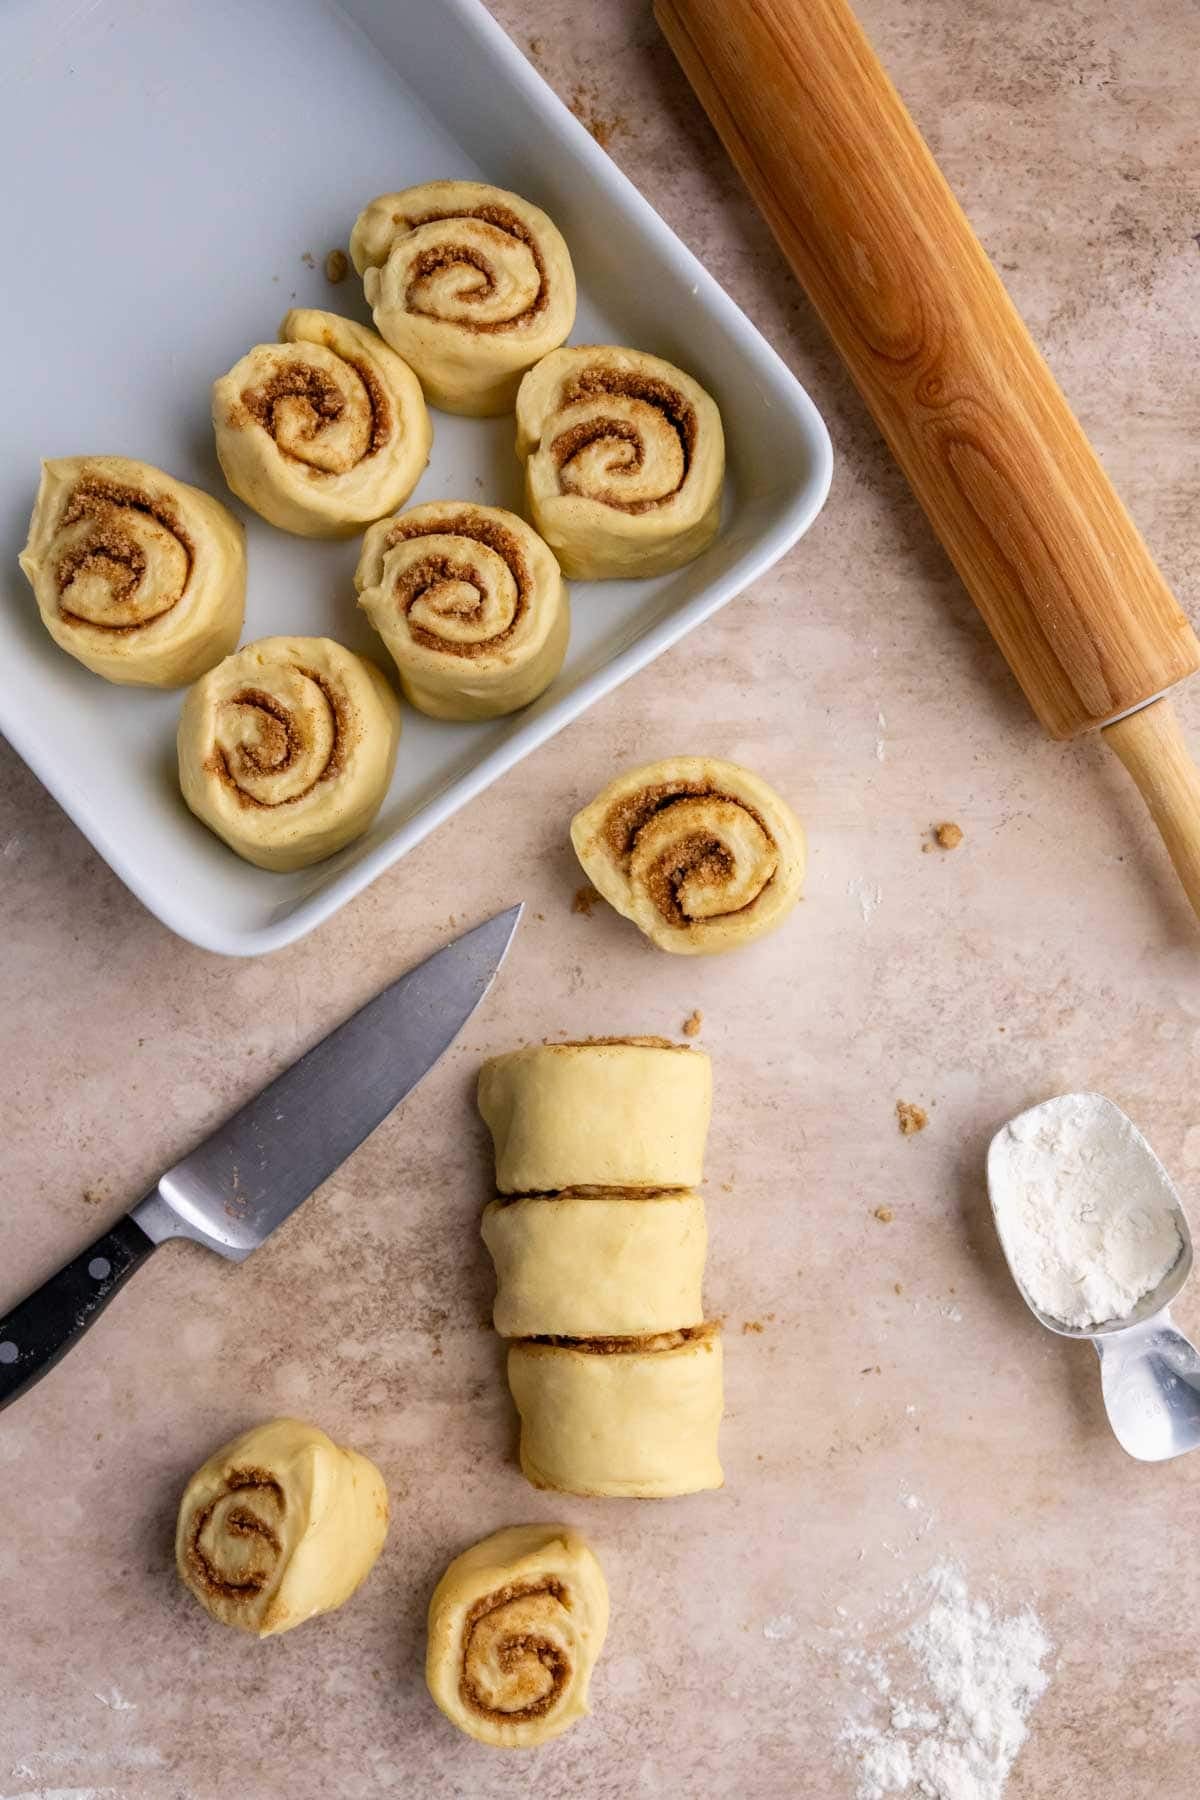
- Cut & second rise. Cut into 12 even rolls and transfer to a greased baking dish. Cover and let rise again.
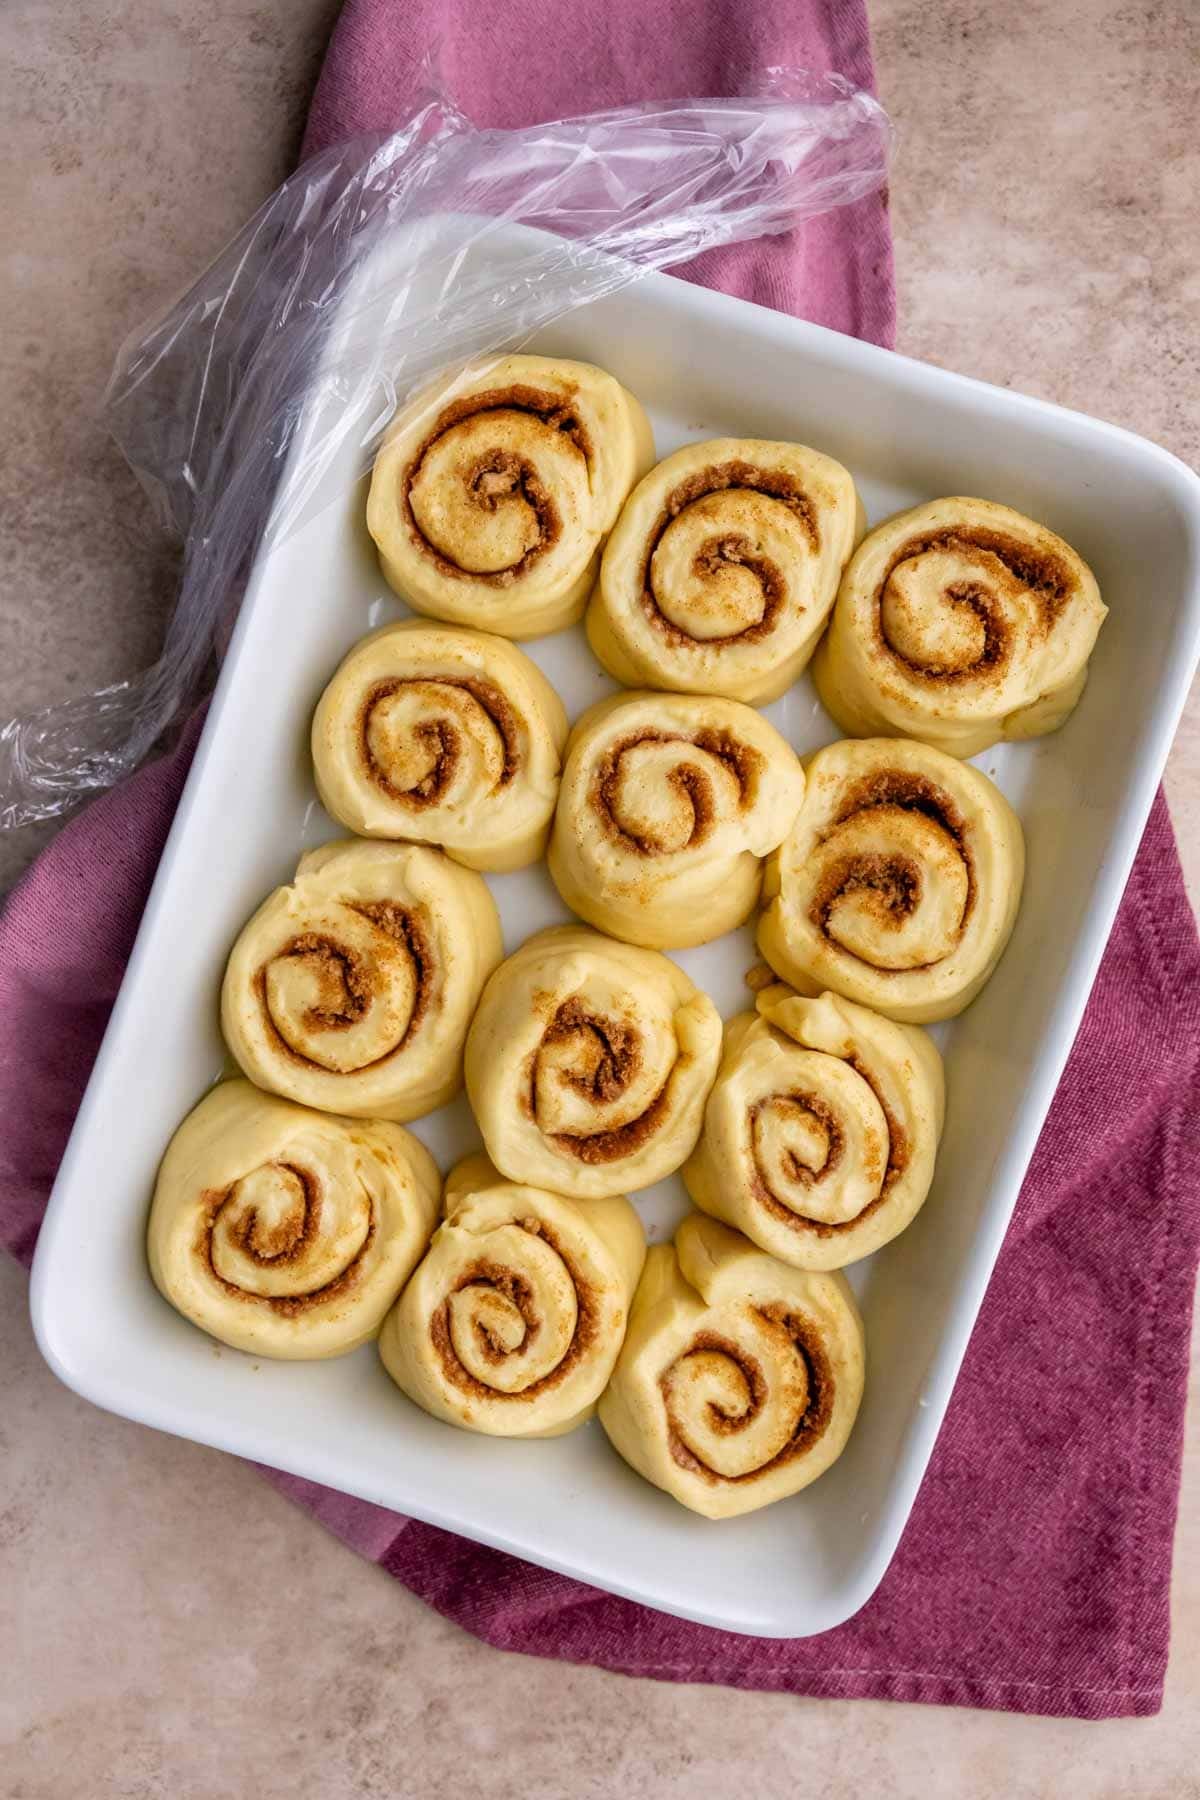
- Bake. Once the rolls are nice and puffy (typically after about 30 minutes), uncover and bake. Be sure not to overbake or they’ll be dry. For best results, use an instant-read thermometer to test the bread portion of an interior roll. You’re aiming for a temperature of 185F (85C). An instant read thermometer is such an easy and effective way to test that all of your breads are done!
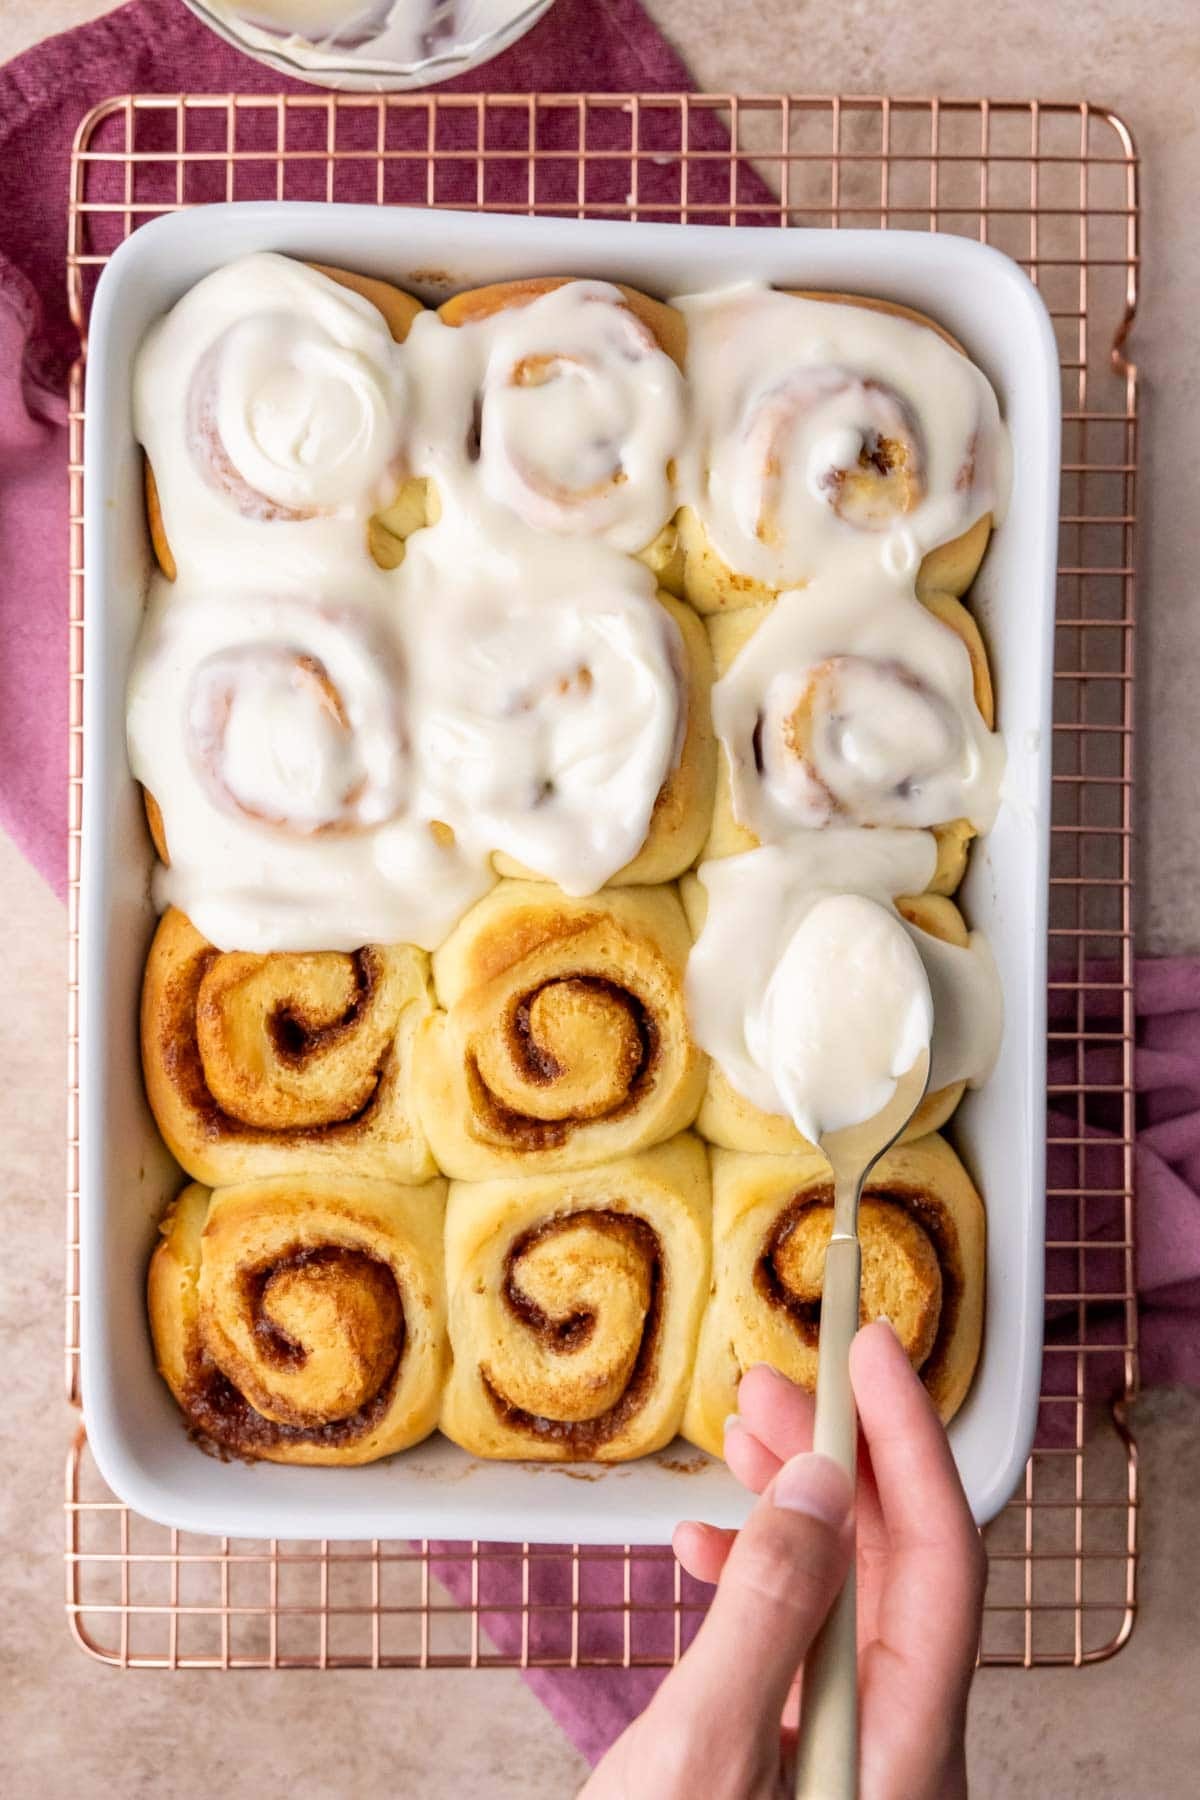
- Frosting. Prepare your frosting then spread it over warm or cooled rolls and enjoy!
Sam’s Tip
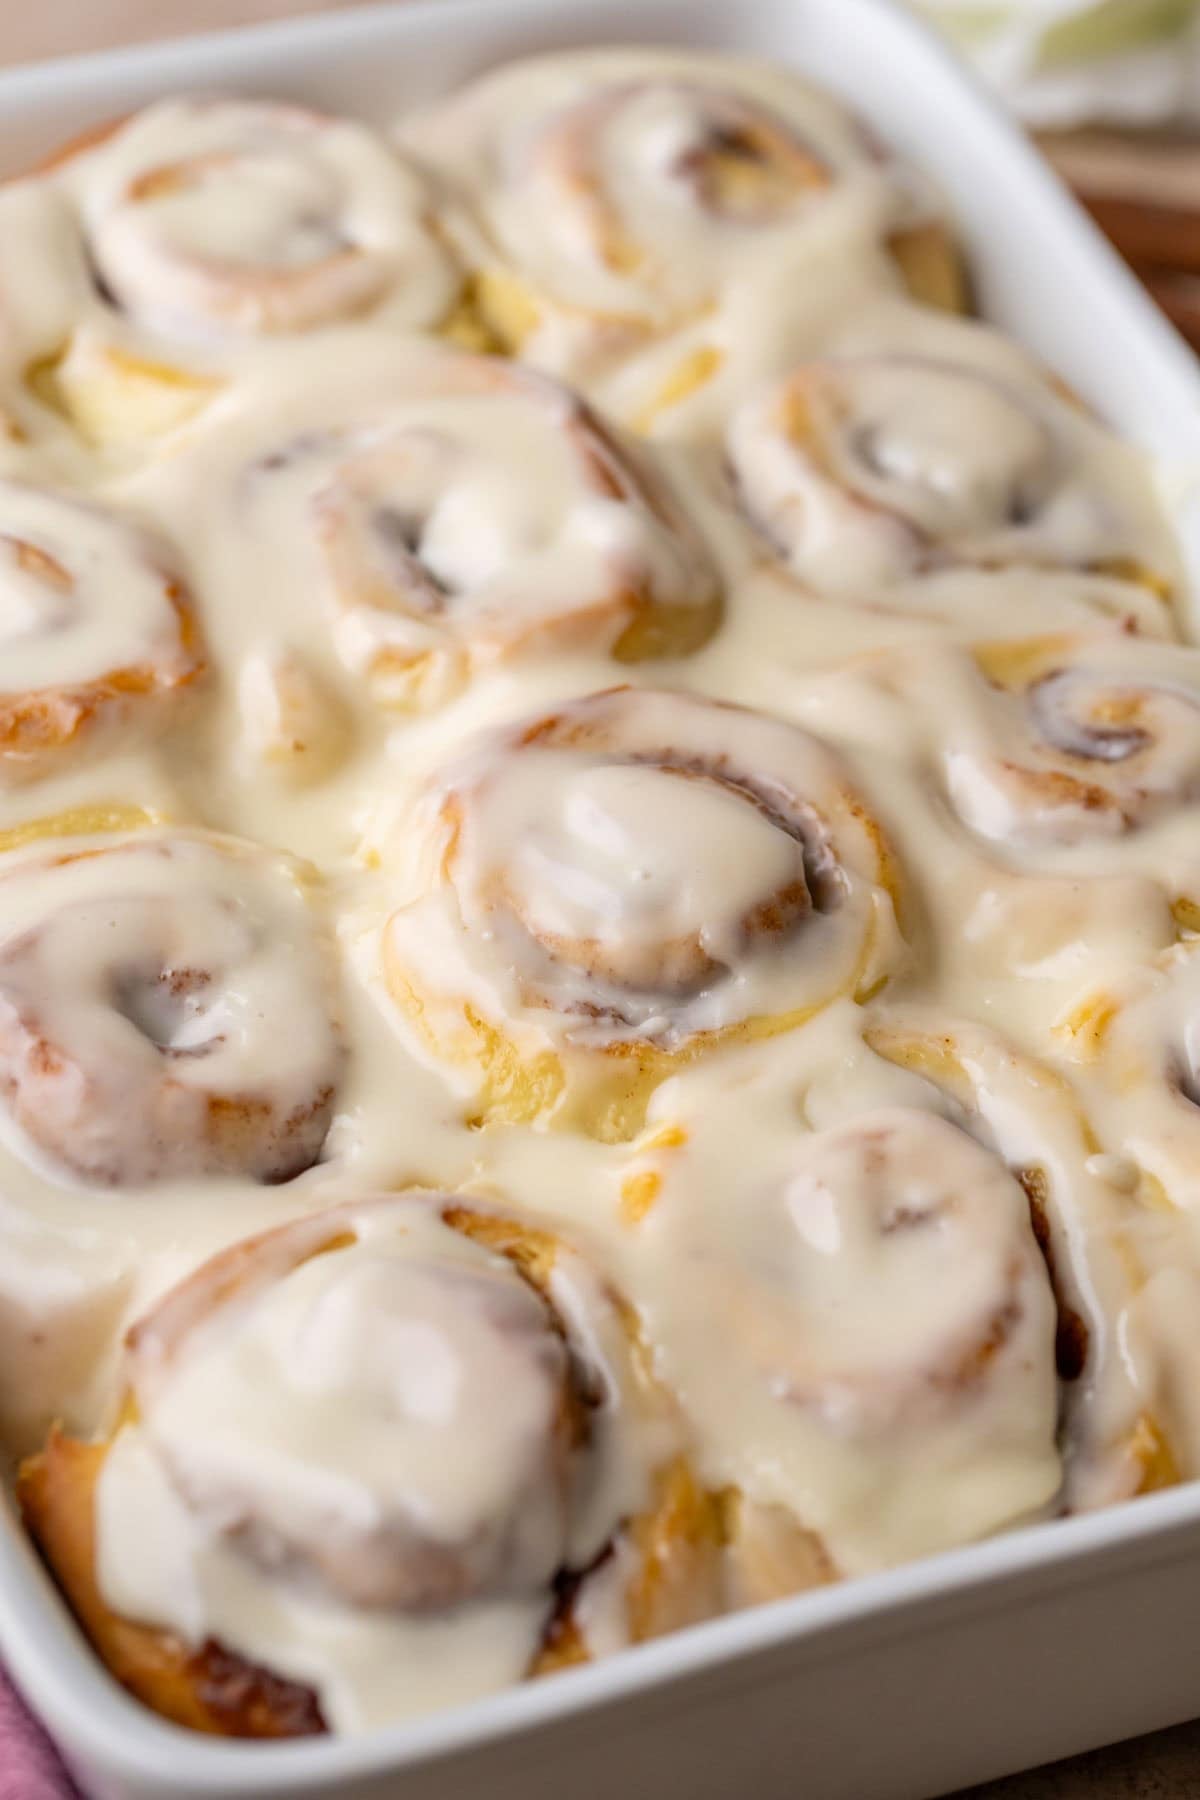
If you add the frosting while the rolls are still warm, it will be thinner, more of a glaze. If you prefer a thicker frosting, let the rolls cool down before adding.
Frequently Asked Questions
The most important secret is to use tangzhong, a simple technique that enables the dough to hold more moisture while still being manageable. It gives the rolls a soft, springy texture and helps them stay soft, and is a cheat code many pro bakers use. Other helpful secrets include adding an extra egg yolk to the dough, incorporating the butter gradually to allow for proper gluten development, using a mixer to avoid adding extra flour, going brown sugar-heavy with the filling, and of course, properly (and patiently — it takes time!) kneading the dough.
If you’re looking for the ultimate cinnamon roll recipe, make this one. Tangzhong takes a few extra minutes, but the results are worth it. These rolls have the softest, most bakery-like texture and are the ones I’d be happiest to serve the next day.
Short on time? Try my one-hour cinnamon rolls, which are very beginner-friendly and ready fast.
Want to prepare everything the night before? My overnight cinnamon rolls are specifically developed for that. Most of the work happens the day before, so you can bake them fresh the next morning. However, this recipe also includes make-ahead instructions in the recipe notes, which is exactly what I’ll be doing for Christmas morning!
Nervous about baking with yeast? Try my no-yeast cinnamon rolls, which have a biscuit-y texture and require no rising whatsoever.
Looking for a light, pillowy roll with an especially rich dough? My Amish cinnamon rolls use a completely different technique and an actual secret ingredient (potato!). They’re still my brother’s favorite and are most similar to today’s recipe, though these days I reach for this tangzhong recipe (and I think it’s a smidge faster and easier than the Amish version).
Pouring a small amount milk (or heavy cream) over cinnamon rolls before baking adds extra moisture and richness, which can help create softer, gooier rolls. However, I firmly believe a good cinnamon roll should be able to stand on its own! Tangzhong builds extra moisture right into the dough while still allowing it to maintain its structure, so these cinnamon rolls always bake up perfectly soft and tender without a milk or cream bath. I don’t recommend adding one here, but if you really want to try it anyway, use no more than 1/4 cup and drizzle it evenly over all of the rolls just before baking.
Alternative Frosting Options
If you try this one, let me know what you think: is it the best cinnamon roll recipe you’ve ever tried? 🌟
Enjoy!
Let’s bake together! Subscribe to my newsletter to be notified of all the newest recipes, and find my free recipe tutorials on YouTube 💜
-
Make the tangzhong: In a small saucepan, whisk together the milk and flour. Cook, whisking constantly, over medium heat until it thickens to a paste (temperature should reach about 165F (74C)). Remove from heat and transfer to a separate bowl to cool. Tangzhong can be warm when you add it to the dough but should not be hot (I prefer it below 110F/43C).
⅔ cup (158 ml) whole milk, ¼ cup (30 g) bread flour
-
Bloom the yeast: Combine ⅓ cup each of milk and water and heat to 110-115F (43-46C). Pour into the bowl of a stand mixer (or a large mixing bowl, if making by hand). Stir in the yeast along with a teaspoon of sugar. Allow to sit for 5-10 minutes, until yeast is foamy and activated
⅓ cup (80 ml) whole milk, ⅓ cup (80 ml) water, 2 ½ teaspoons active dry yeast, 1 teaspoon granulated sugar
-
Make the dough: Add the sugar, cooled tangzhong, egg, and egg yolk to the yeast mixture. Stir briefly (by hand or using the paddle attachment of your mixer) to combine.
½ cup (100 g) granulated sugar, Flour paste/tangzhong, 1 egg + 1 large egg yolk
-
Add about 2 ½ cups (312g) of your flour and then sprinkle the salt evenly over the flour. Stir well, until everything is well combined
2 teaspoons table salt
-
Add the butter: Add the butter, 1 Tablespoon at a time, stirring until completely incorporated into the dough before adding the next. Continue mixing until all butter has been completely combined.
⅓ cup (76 g) unsalted butter
-
Add remaining flour, as needed: Switch the paddle attachment for your dough hook attachment and gradually add the remaining flour while mixing on low-speed. If making by hand, continue stirring with a wooden spoon. Continue to add flour until the dough clings to itself and pulls away from the side of the bowl, it may be tacky but should not be very sticky or stick to your fingers. You may need to add slightly less or slightly more flour than called for.
-
Knead: Knead the dough with the dough hook attachment of your mixer (or by hand on a clean, lightly floured surface) until smooth and elastic, about 10-12 minutes with the dough hook or 12-15 minutes by hand.
-
First rise: Lightly grease a large bowl with oil and transfer the dough to the bowl. Cover tightly with plastic wrap and allow to rise in a warm, draft-free place until doubled in size (usually about 1-2 hours).
-
Prepare the filling: While the dough is rising, set out your butter to soften (you could also pop it in the microwave for a few seconds, it should be very soft and spreadable). Whisk together brown sugar, cinnamon, and salt. Generously grease a glass or ceramic 9×13” (33 x 23cm) baking dish with butter and set this aside as well.
½ cup (100 g) light brown sugar, 1 Tablespoon ground cinnamon, ¼ teaspoon table salt, 4 Tablespoons (56 g) salted butter
-
Assembly: Gently punch down your risen dough and turn out onto a clean, lightly floured surface. Use a rolling pin to roll out to a 8×20” (20 x 50cm) rectangle and spread your softened butter evenly over the surface, leaving about ½” (1.3cm) perimeter around the edge. Sprinkle the cinnamon sugar mixture evenly over the butter and gently press this into the butter with your hands.
-
Form into rolls: Starting with a longer side, roll the dough into a log and pinch the seam firmly at the end to seal. Use a sharp knife to cut into 12 even slices and transfer to prepared baking dish, spacing evenly.
-
Second rise: Cover the baking dish with plastic wrap and allow to rise in a warm, draft-free space until puffed and increased in size by about 50% (most of the gaps between the rolls will be filled, typically around 30 minutes). While rolls are rising, preheat your oven to 350F (175C).
-
Bake: Once rolls have puffed, uncover the dish and transfer to the center rack of your 350F (175C) preheated oven. Bake 25-27 minutes, until edges are light golden brown and internal temperature of a second-row, center roll reaches 180-185F (82-85C). While the rolls cool, prepare the icing.
-
Icing: In a medium-sized mixing bowl, stir together softened cream cheese and butter until smooth. Stir in powdered sugar until well-combined, then stir in milk and vanilla extract. If your frosting looks lumpy, use a whisk to stir until smooth.
2 oz (56 g) cream cheese, 2 Tablespoons (28 g) salted butter, 1 cup (125 g) powdered sugar, 1 Tablespoon milk, ½ teaspoon vanilla extract
-
Decorate: Icing can be applied when rolls are cooled or still warm (warm rolls will make the frosting melt some and be a bit more like a glaze, this is fine and a matter of preference). Spread frosting evenly over rolls. Best served warm or re-heated.
Flour
Bread flour is best for the most tender best-textured rolls with just the right chew. However, an equal amount of all-purpose flour can be substituted if it’s all you have.
Mixer
While this dough can be made by hand (without a stand mixer) it typically requires a bit more flour this way (as it is quite sticky and difficult to knead). This dough benefits from being a bit more on the sticky side, and it’s easier to properly knead it this way with a stand mixer. Rolls made by hand may be a bit more dry due to the added flour that is typically necessary (they’ll still be good, though!)
Storing
Store leftover rolls in an airtight container at room temperature for up to 24 hours or in the refrigerator for up to 5 days (refrigeration recommended due to the cream cheese frosting, otherwise they could keep at room temperature for up to 4 days). Rolls will become a bit firmer in the fridge, so I recommend reheating (10-20 seconds in the microwave) before enjoying.
Making in advance
Follow recipe through step 11 (forming into rolls and assembling in baking dish – do not proof a second time), cover tightly with plastic wrap and place in the refrigerator. Refrigerate overnight or up to 18 hours. The next day, remove from the fridge, leave covered, and allow to rise at room temperature for 45-75 minutes,/until rolls are puffed (toward the end of the rising time, preheat your oven to 350F/175C ). Bake as indicated.
Serving: 1roll | Calories: 401kcal | Carbohydrates: 62g | Protein: 7g | Fat: 14g | Saturated Fat: 8g | Polyunsaturated Fat: 1g | Monounsaturated Fat: 4g | Trans Fat: 0.4g | Cholesterol: 50mg | Sodium: 514mg | Potassium: 113mg | Fiber: 2g | Sugar: 29g | Vitamin A: 454IU | Vitamin C: 0.03mg | Calcium: 58mg | Iron: 1mg
Nutrition information is automatically calculated, so should only be used as an approximation.