



Freezer Meals Series
· Protein
We love a good melt-in-your-mouth beef recipe, and braised beef tips may be at the top of that list. They are cooked low and slow in a Dutch oven until they fall apart with a fork, which makes them perfect fordinner tonight or as part of your Duplo dinners, where you freeze them and save them for later.
We tested this specifically for the GC Freezer Meal System, where vegetables, proteins, and starches are portioned separately and mixed together for quick dinners later. The one thing that makes this work in the freezer is the thickener. Skip flour or a butter-based roux here, both break down and turn grainy after a freeze-thaw cycle, and reach for tapioca starch instead. It holds its structure through freezing and comes back smooth when you reheat.
Short on time but still want beef tips? We’ve got a slow cooker version that’s almost hands off and works perfectly for freezer meal prep too.
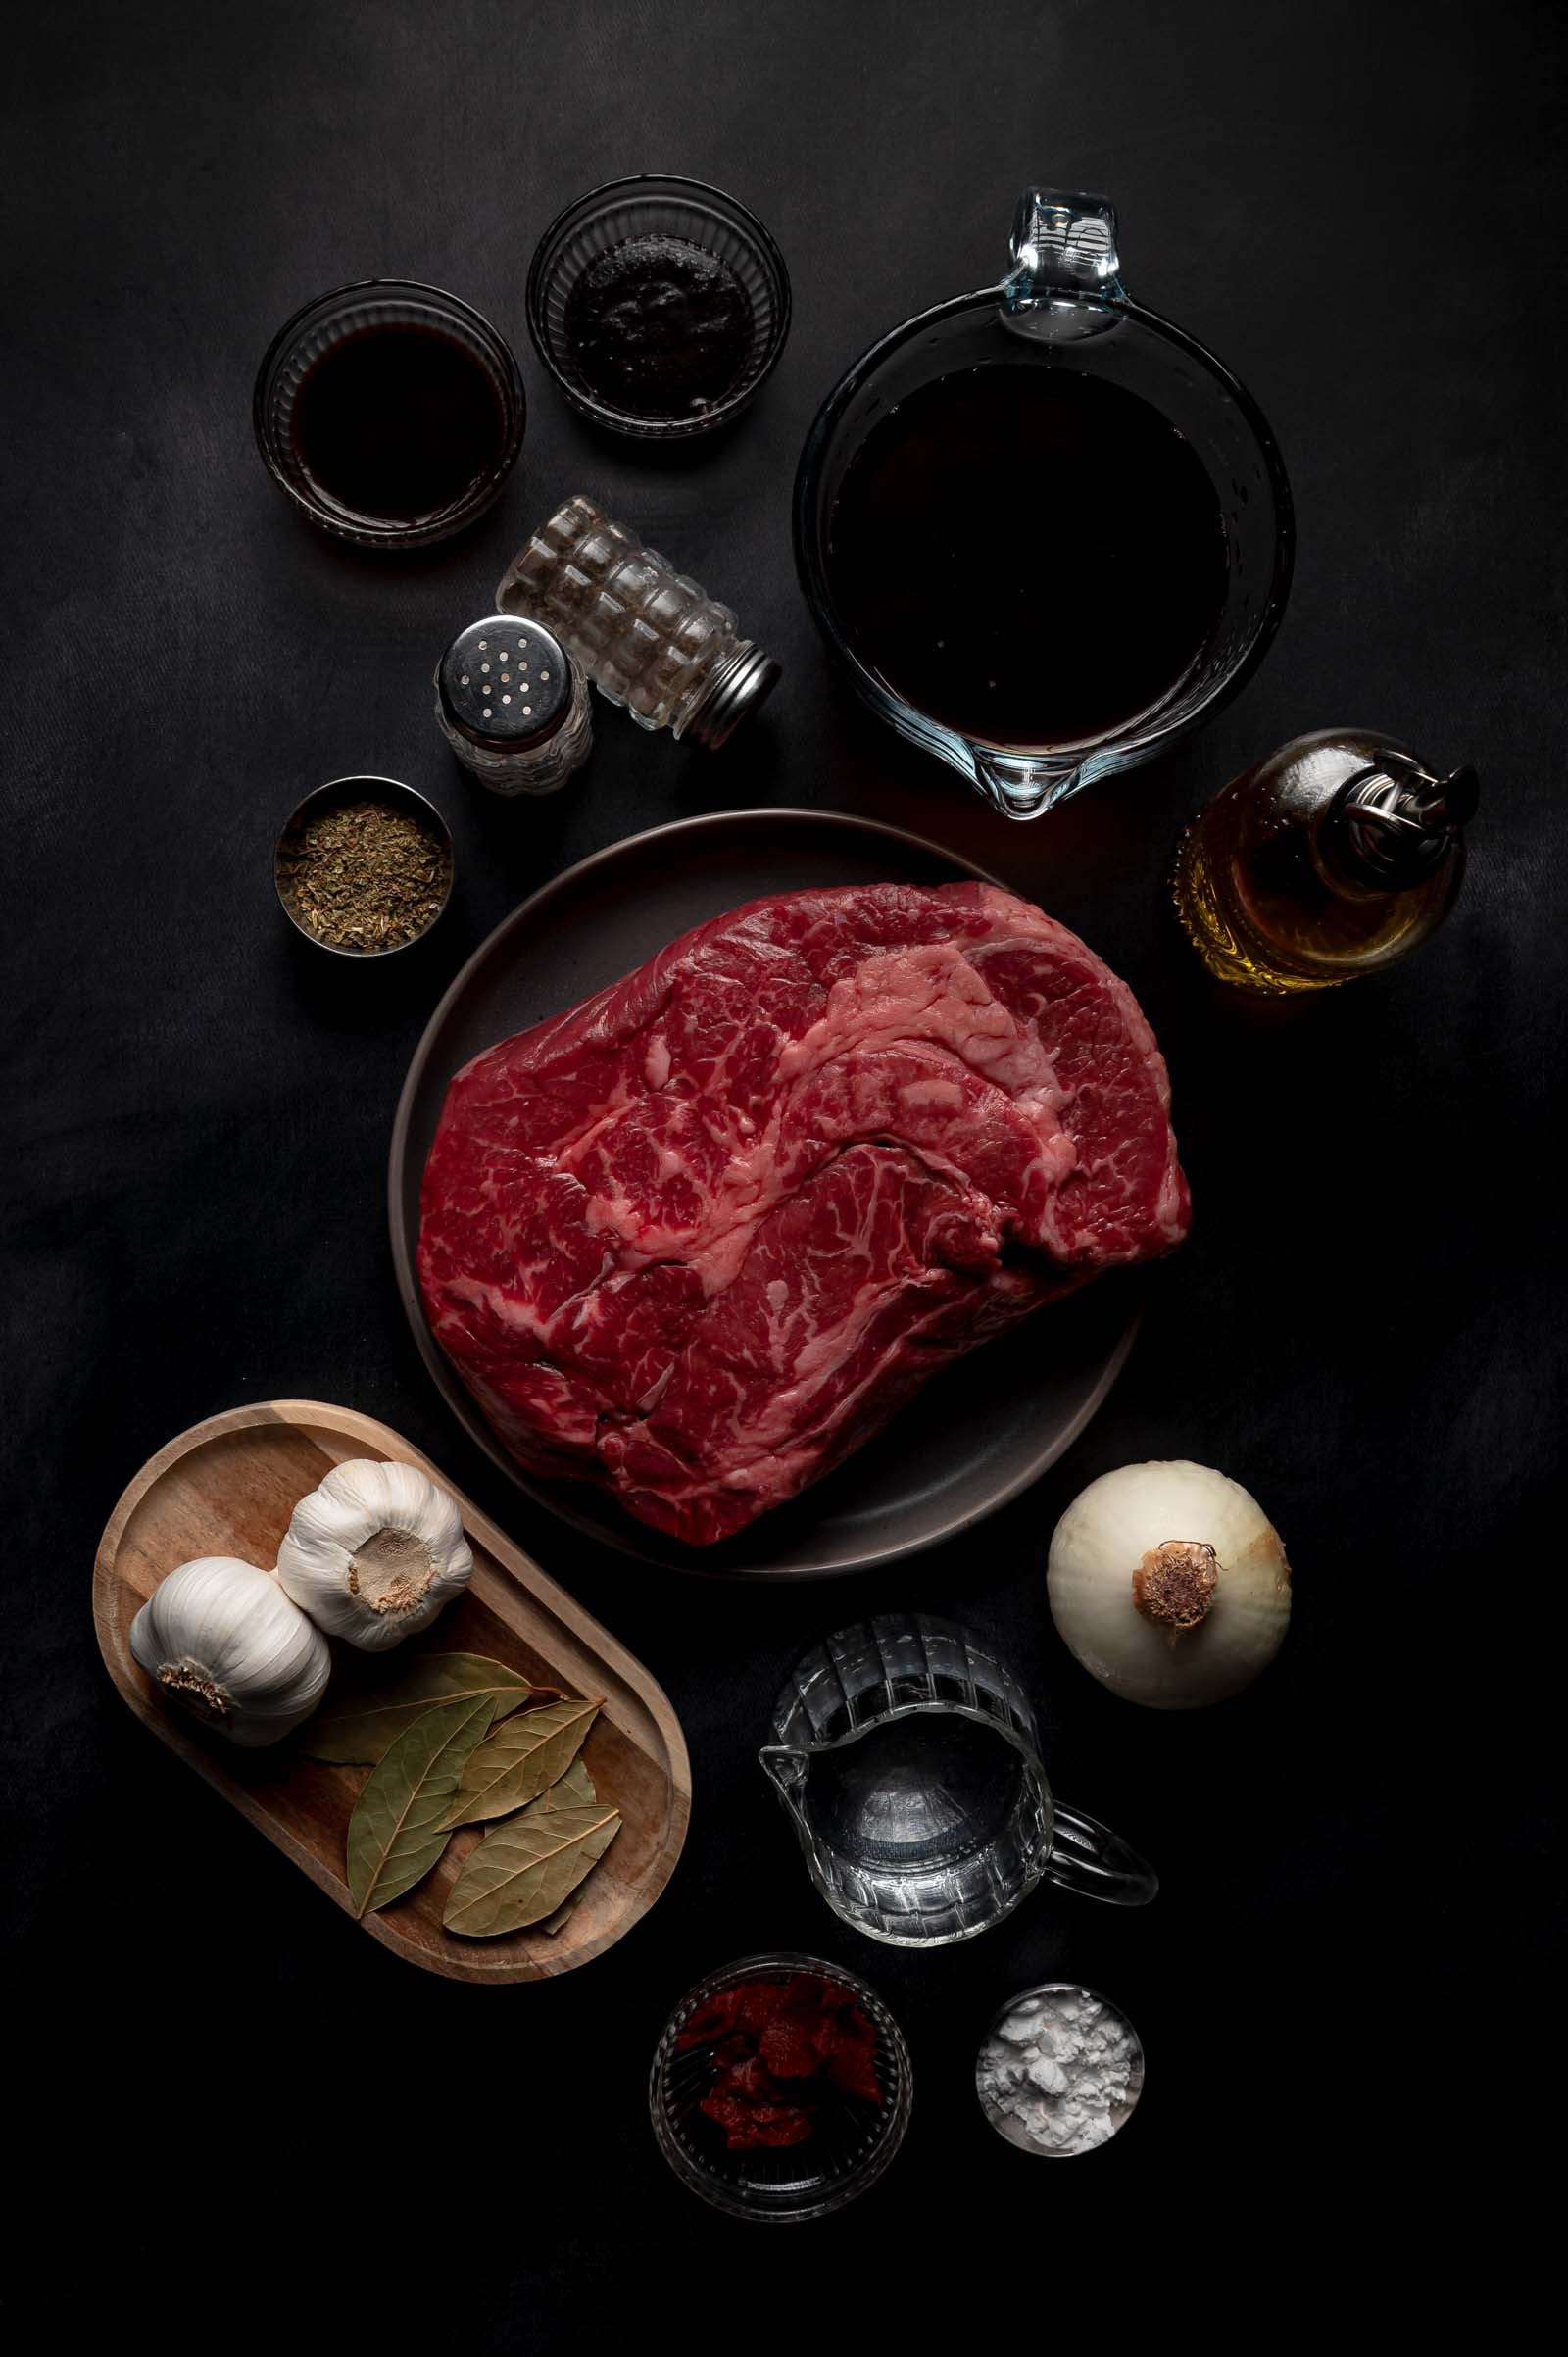
🔪 Ingredients for Braised Beef Tips in Gravy
6Portions
6 hrsFreeze Time
5-6 minReheat Time
3 moFreezer Life
- Boneless beef chuck roast, trimmed and cut into pieces. Chuck’s the right cut for this recipe, it’s got enough fat running through it to stay tender through a braise, a freeze, and a reheat. If you love cooking with this cut, our full lineup of beef recipes leans on it more than once.
- Kosher salt and black pepper
- Avocado oil, for searing. It handles a hard sear better than most other oils already in your pantry.
- Yellow onion
- Garlic
- Tomato paste
- Low sodium beef broth, plus Better Than Bouillon beef base for a rounder, more concentrated beef flavor than broth gives you on its own.
- Worcestershire sauce, Italian seasoning, and a bay leaf
- Tapioca starch and cold water
Equipment
- A Dutch oven for braising
- Six 1-cup silicone molds, for portioning the beef and gravy before it goes into the freezer.
- Freezer-safe bags or airtight containers, for storing the frozen portions once they’re out of the molds.
- A vacuum sealer and vacuum-sealing bags, optional, for the longest possible freezer life.
Full picks and links for every mold, sealer, and bag in this system: Freezer Meal Prep Equipment Guide.
📝 How to Make Braised Beef Tips in Gravy
- Trim and Season the Chuck. Pat the chuck roast dry, trim away the big slabs of hard exterior fat but leave the marbling running through the meat, then cut it into even 1½-inch pieces. Season with the salt and all the pepper. Uniform pieces are what keeps every cube cooking, and later reheating, at the same rate.
- Sear the Beef in Batches. Heat the avocado oil in a Dutch oven over medium-high and brown the beef in two or three batches, never crowding the pot. Give each batch 4 to 6 minutes, turning the pieces so several sides pick up color. The beef won’t be cooked through here, you’re building fond, not finishing the meat, so pull it to a plate once it’s deeply browned on a few sides.
- Build the Aromatic Base. Drop the heat to medium, add the onion, and cook 5 to 6 minutes, until it’s softened and turning translucent, scraping up the browned bits as you go. Stir in the garlic for 30 seconds, just until it’s fragrant, then the tomato paste for a full minute so it darkens slightly instead of tasting raw.
- Build the Braising Liquid. Pour in the beef broth gradually, stirring and scraping the bottom the whole time, then whisk in the Better Than Bouillon base until it disappears. Add the Worcestershire, Italian seasoning, bay leaf, and the rest of the salt, then return the beef and its juices to the pot. Bring it to a gentle simmer, just a lazy bubble, before it goes in the oven.
- Braise Low and Slow. Cover the pot and braise at 325°F for 2 hours. Check a piece, it should shred easily under light pressure from a fork. If it’s still fighting you, keep the lid on and give it another 10 to 15 minutes at a time until it stops fighting back.
- Skim the Fat. Pull the pot from the oven and fish out the bay leaf. Skim the rendered fat off the surface with a spoon or ladle, tilting it to catch only the clear fat, and pass a piece of oil-absorbing paper over the top if there’s more to collect. Skim first, thicken second, or you’ll trap grease in the gravy.
- Thicken the Gravy. Whisk the tapioca starch into the cold water until smooth, bring the braising liquid to a gentle simmer, then stir the slurry in while whisking constantly. Cook 1 to 2 minutes, stirring the whole time, until the gravy visibly coats the back of a spoon. Pull it off the heat as soon as it thickens, extended boiling after the tapioca goes in turns it stretchy instead of silky.
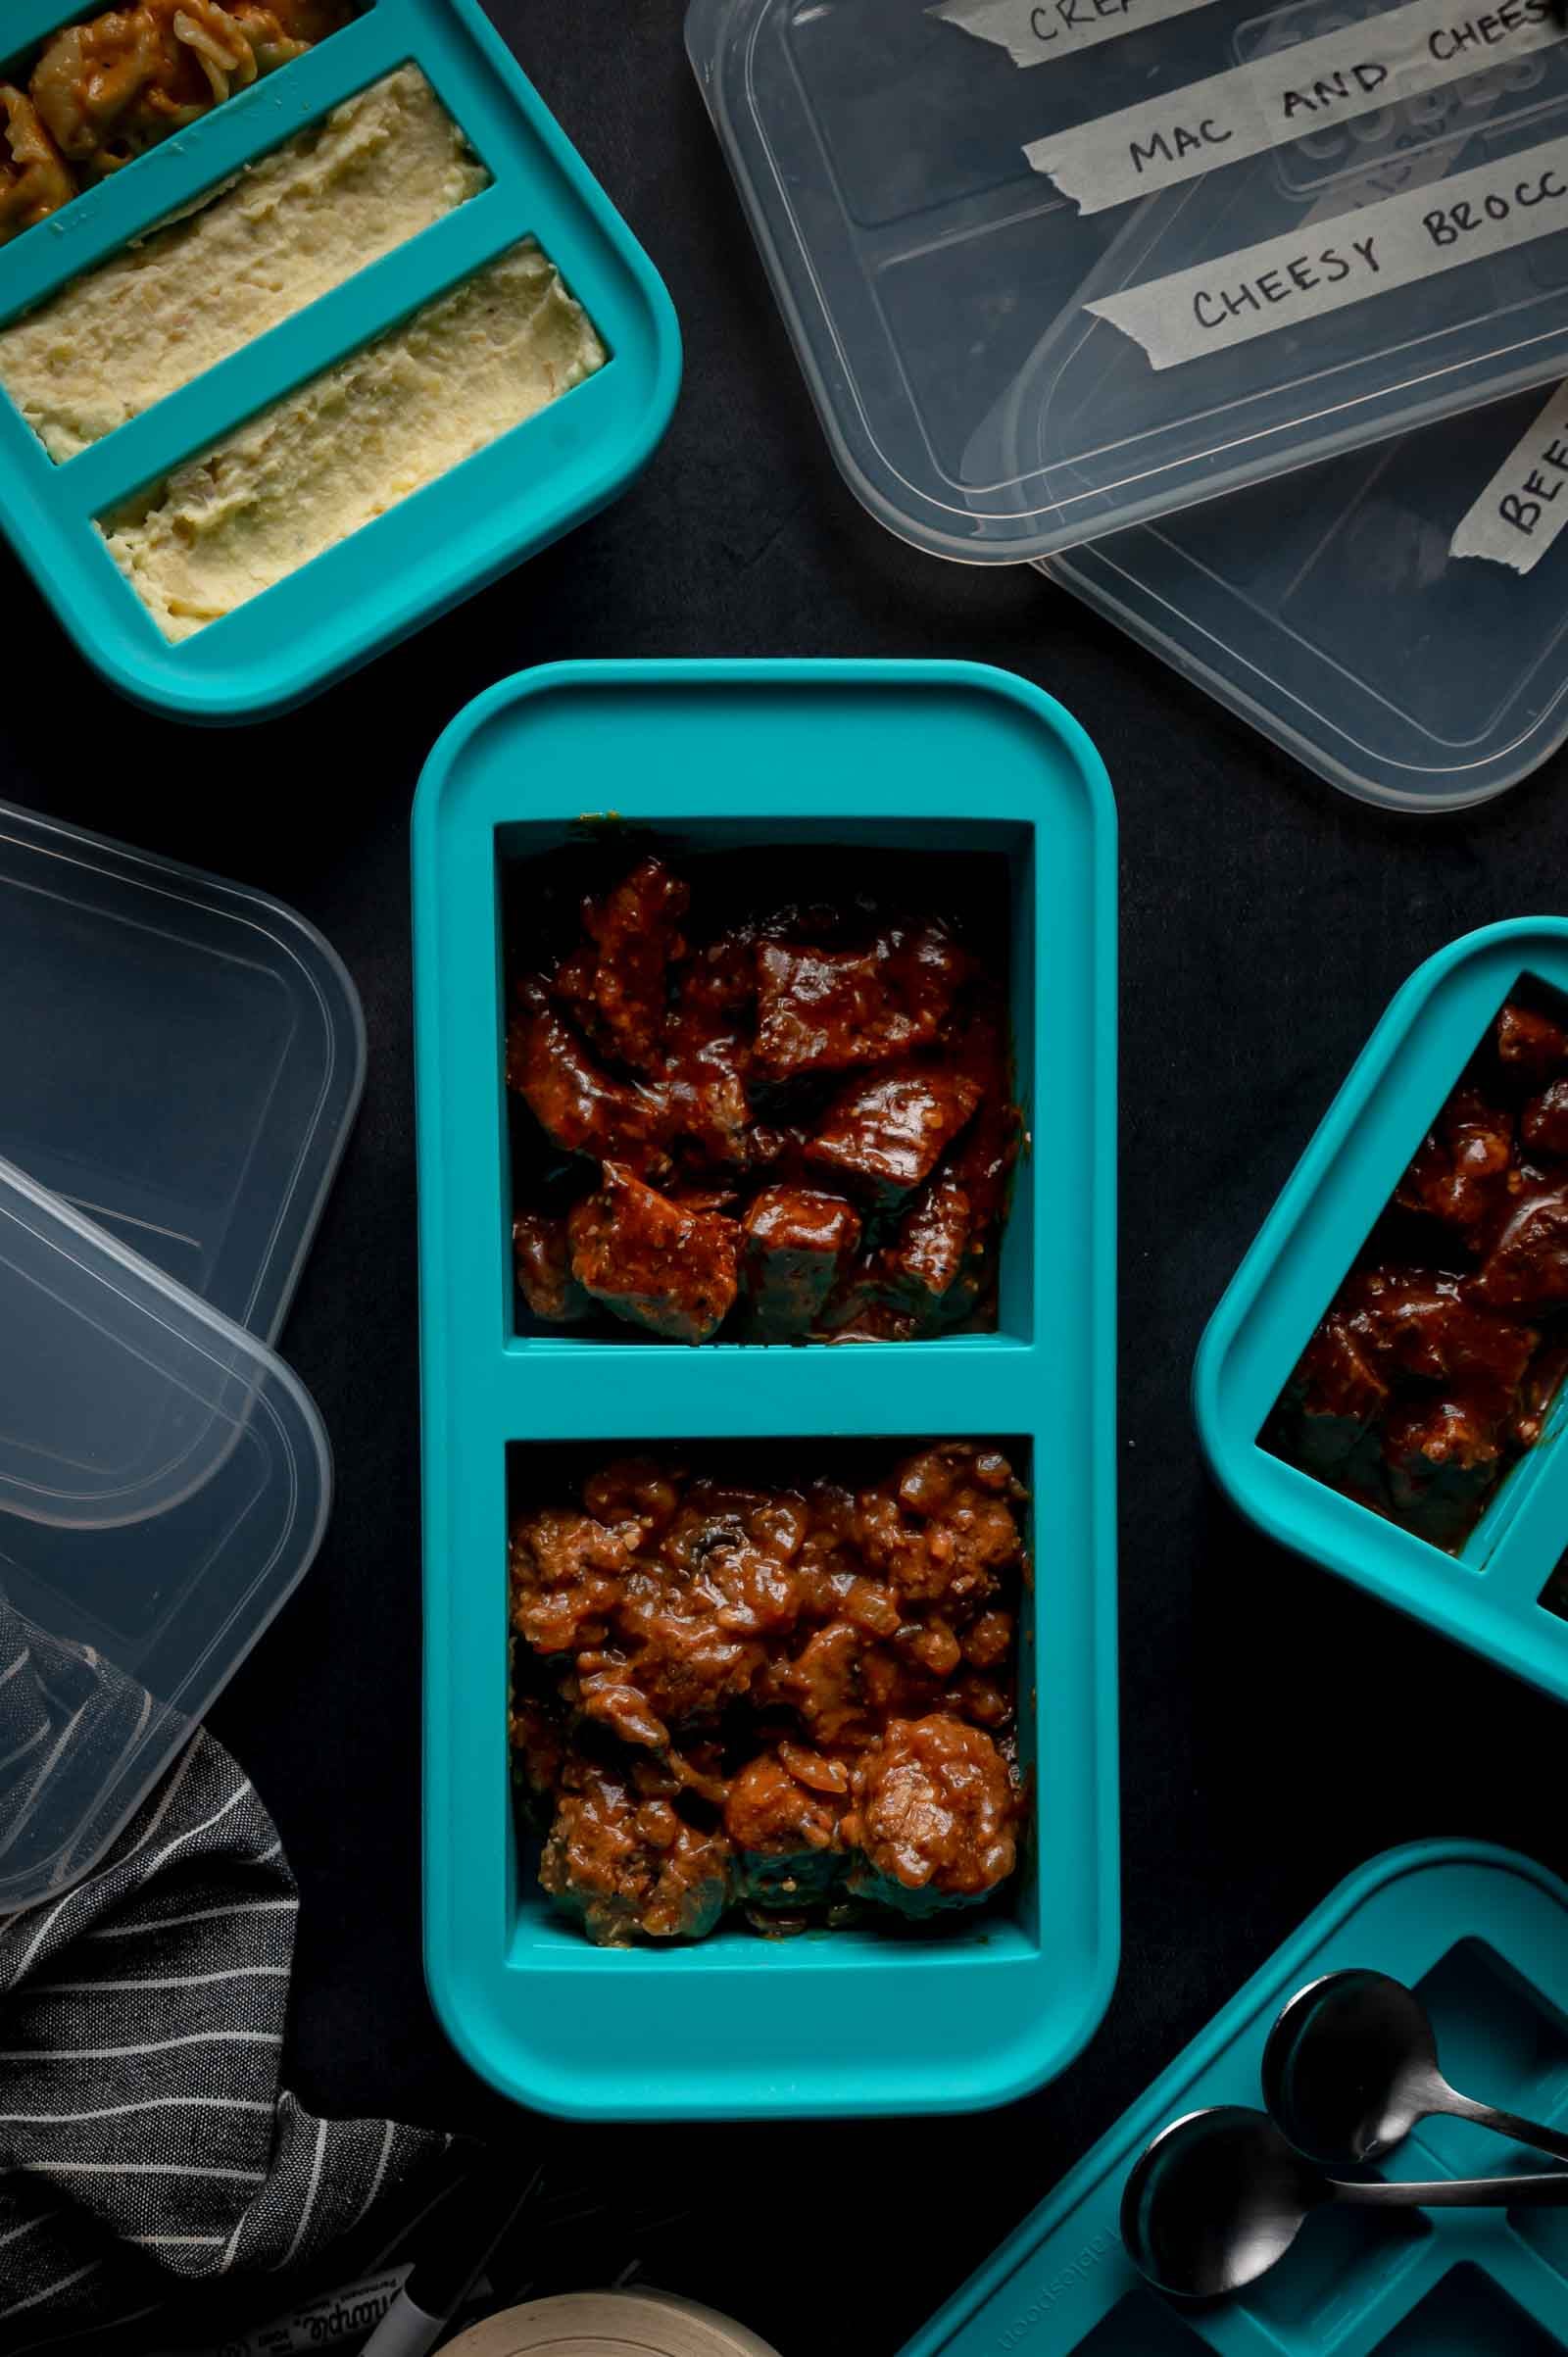
Portioning and Meal Prep Assembly
Transfer the beef and gravy to a shallow pan and let it cool at room temperature for 20 to 30 minutes. That rest isn’t optional; hot beef and gravy going straight into silicone molds means a longer freeze and more condensation once it’s covered.
- Set six 1-cup silicone molds on a rimmed sheet pan before you start filling them.
- Divide the beef evenly across the six molds.
- Spoon gravy over each portion until it reaches the 1-cup fill line, keeping the beef fully submerged so it doesn’t dry out in the freezer or during reheating.
- Want bigger portions instead? Use three 2-cup molds in place of the six 1-cup ones.
| Mold Size | Portions | Fill Level | Best For |
|---|---|---|---|
| 1-cupRecommended | 6 | To the 1-cup fill line, gravy over beef | Single serving, mix-and-match with a starch + veg |
| 2-cup | 3 | To the fill line (larger cavity) | Family-size portions |
Freezing Instructions
🍳
Cool20-30 min room temp→
🧊
ChillFridge uncovered 1 hr, then covered 1 hr→
🟥
Fill MoldsTo the 1-cup line→
🏷️
LabelDate + recipe name→
❄️
Freeze6 hours solid
- Chill uncovered. Refrigerate the filled molds uncovered for about 1 hour, until the portions aren’t warm anymore.
- Cover and chill again. Cover the molds and refrigerate for another hour. This two-stage chill cuts down on condensation and keeps big ice crystals from forming once the beef hits the freezer.
- Freeze solid. Move the covered molds to a level spot in the freezer and freeze for at least 6 hours, until the portions are completely solid all the way through.
- Pop and transfer. Pull the silicone away from the edges of each mold and press gently upward from the bottom to release the frozen cubes. Move them into a freezer-safe bag or airtight container, pressing out as much air as possible before sealing.
- Stack and label. If you’re using a rigid container, separate stacked portions with parchment. Label the bag or container with the recipe name, portion size, the freezing date, and how to reheat it. Freeze for up to 3 months.
- Expect a gelled look. Tapioca-thickened gravy firms up and can look gelled while frozen. That’s normal, it loosens right back into gravy as soon as it reheats.
- Vacuum sealing, if you’re using it. Freeze the portions completely solid first, then place one or two frozen cubes per bag and seal immediately. Don’t vacuum seal the gravy while it’s warm, soft, or only partially frozen.
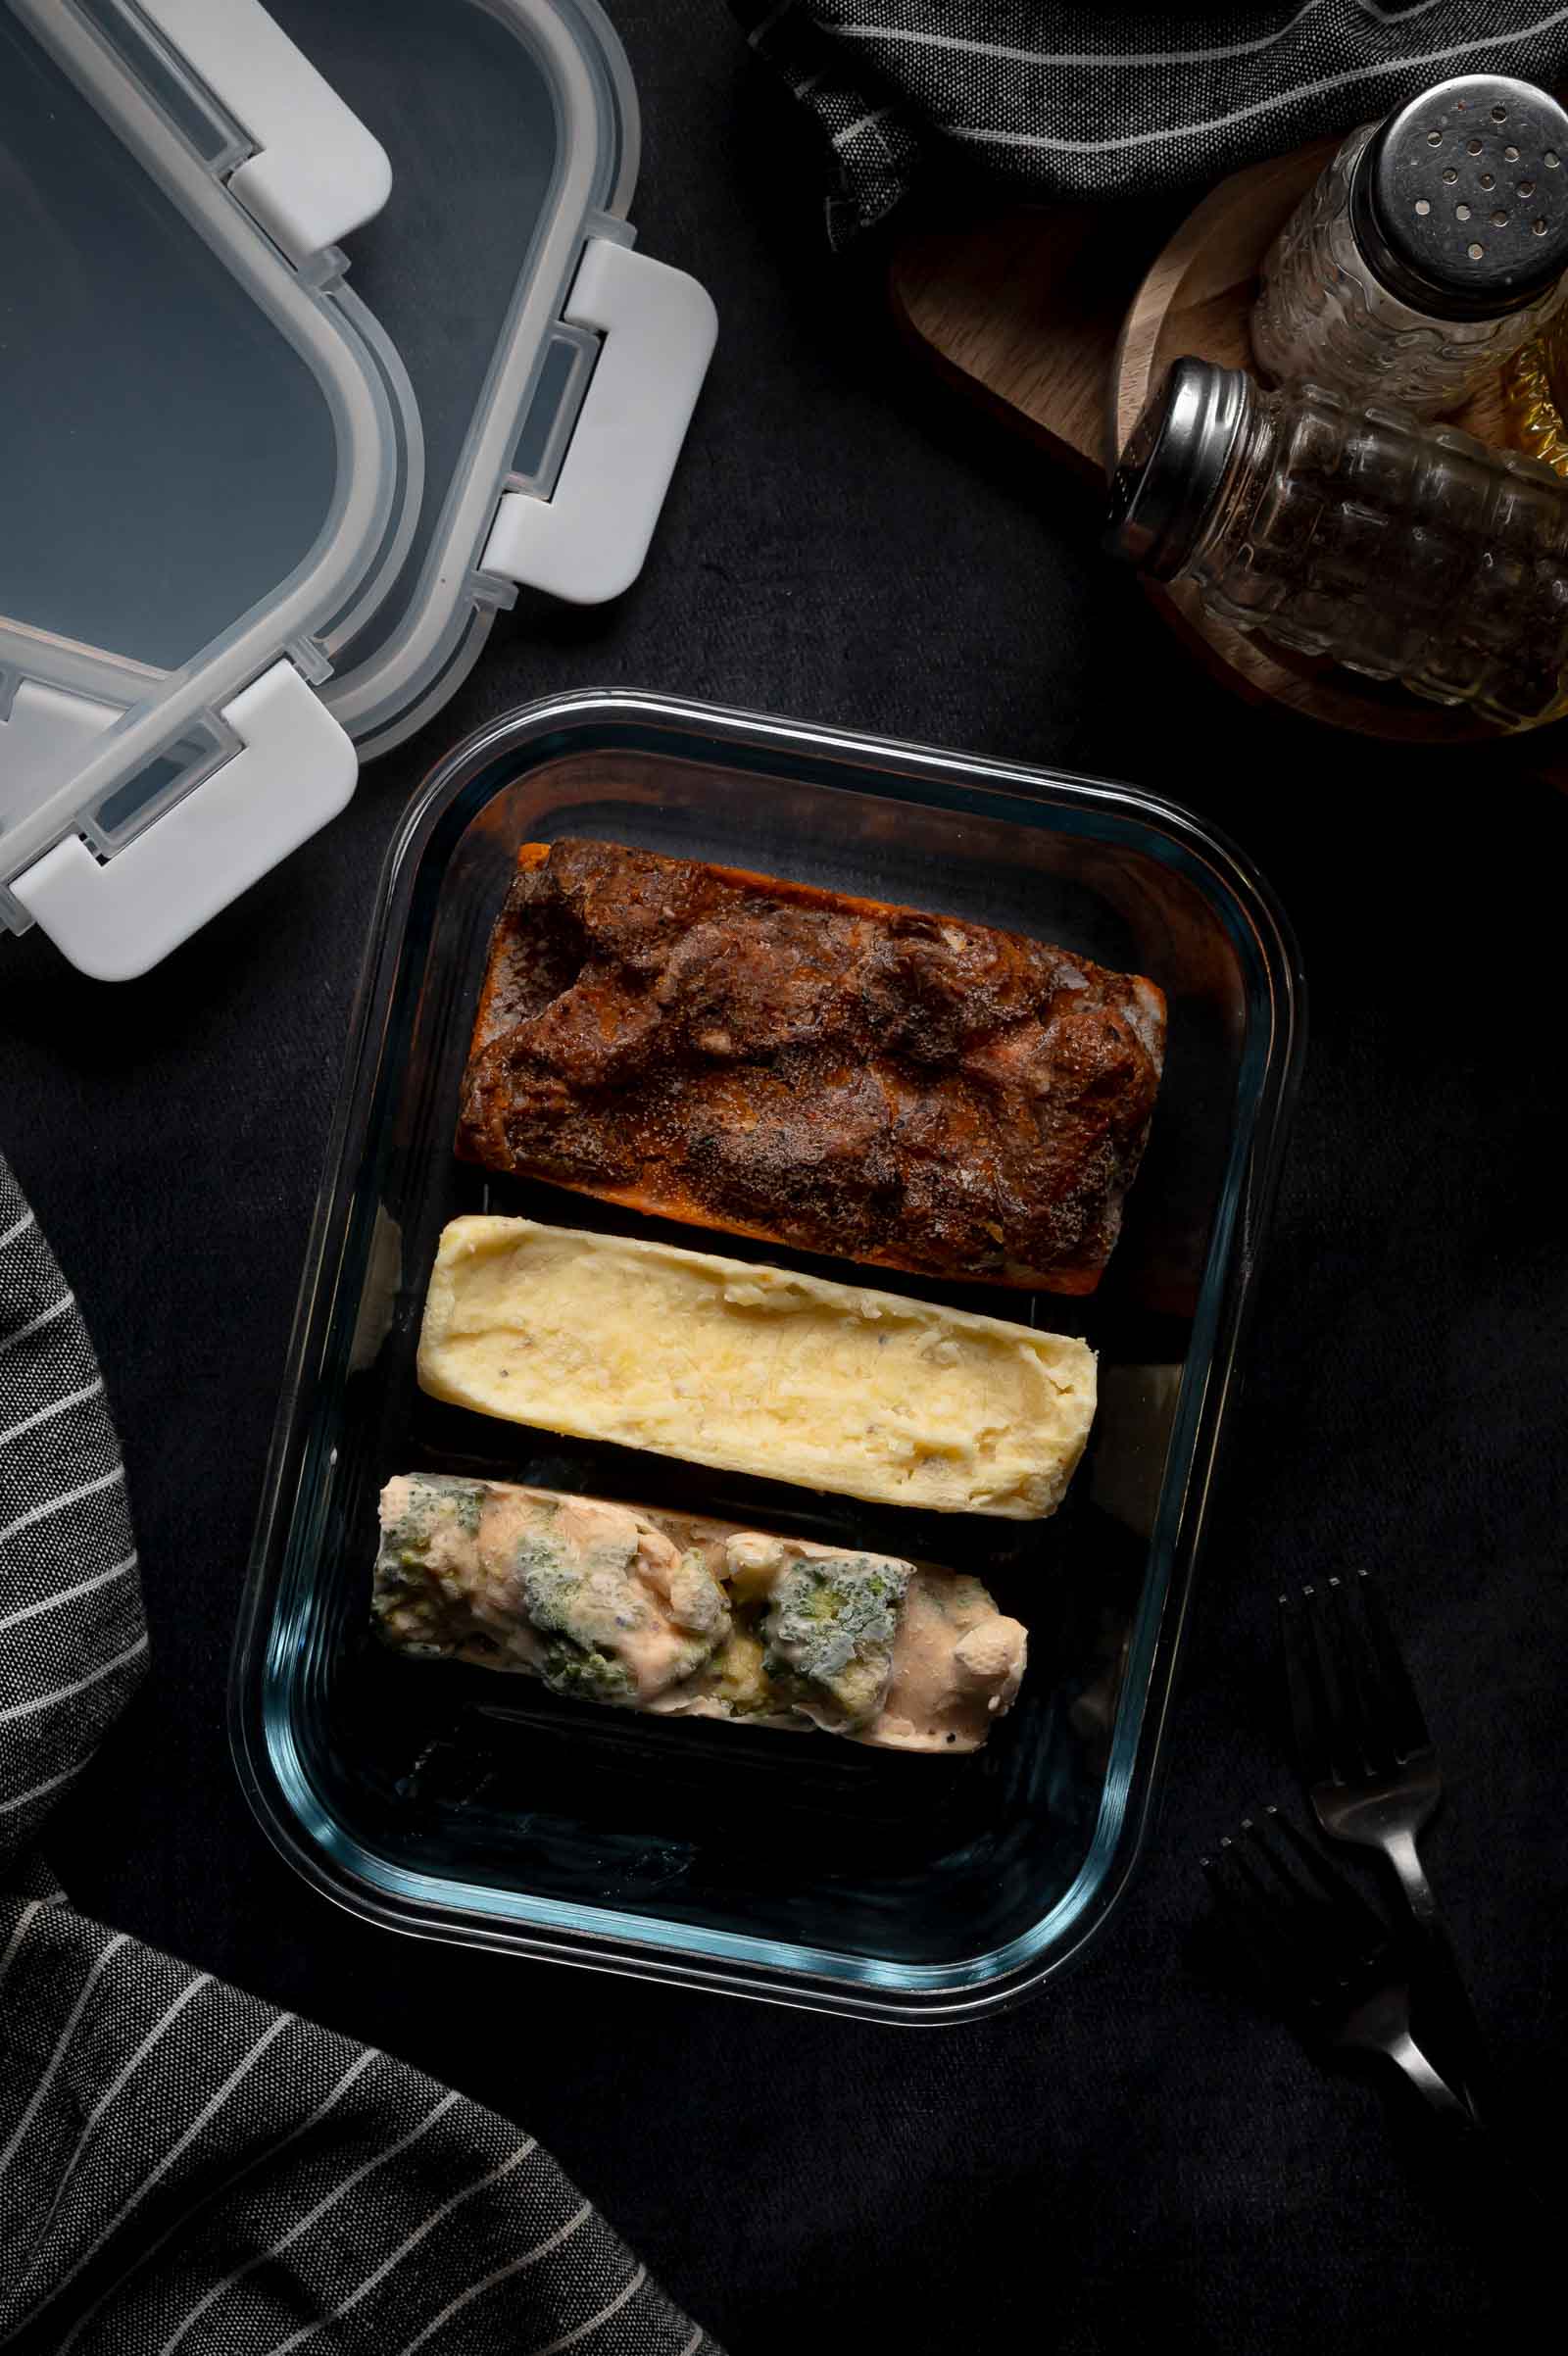
Reheating Instructions
- Add a splash of beef broth, cover loosely
- Microwave 3 minutes, break apart, stir the gravy
- 2-3 minutes more, stirring every minute
- Rest 1 minute before serving
- Cover loosely
- Microwave 2-3 minutes, stirring halfway
- Add a splash of broth if needed
- Rest 1 minute before serving
- Add a splash of broth, cover
- Low heat 8-12 minutes, turning occasionally
- Break apart, 3-5 minutes more until smooth
- Add a splash of broth if thick, cover
- Medium-low heat 5-7 minutes, stirring occasionally
Troubleshooting
| Problem | Fix |
|---|---|
| Beef is still tough after 2 hours | Keep braising covered in 10 to 15-minute increments until it shreds easily. Chuck needs the extra time more than it needs more liquid. |
| Gravy tastes greasy | Skim the fat before adding the tapioca slurry, not after. Thickening traps whatever fat is still floating. |
| Gravy turns stretchy or overly thick | Don’t hold it at a boil once the tapioca goes in. Pull it as soon as it coats a spoon. |
| Portions freeze to the mold lid | Stop at the 1-cup fill line. Overfilled molds expand past the rim and lock on. |
🔄 Substitutions
- Swap in packaged beef stew meat when you’re short on time. Sort through the package and cut any oversized pieces down to match the rest. Stew meat is often a mix of cuts that tenderize at different rates, so uneven pieces mean uneven doneness.
- Beef stock works in place of the broth. Stick to a low-sodium version either way; the Better Than Bouillon base and the Worcestershire are both already salting the pot.
- What doesn’t work: swapping the tapioca starch for flour or cornstarch. Both break down and go grainy or watery after a freeze-thaw cycle. Tapioca holds its structure in the freezer and comes back smooth, which is the whole reason it’s in this recipe instead of a classic roux.
💡 Meat Nerd Tips
- Cut the chuck into pieces that are the same size. Uneven pieces cook at different rates, so some cubes end up tender while others are still tough or already falling apart.
- Leave the marbling alone when you trim. Pull off the big slabs of hard exterior fat, but the thin fat running through the meat is what keeps these cubes from drying out through a freeze and a reheat.
- Skim before you thicken, always. Tapioca slurry traps any fat still floating on the surface, so a clean skim is what stands between silky gravy and a greasy one.
- Don’t let the gravy boil long after the tapioca slurry goes in. A minute or two is plenty, push past that and it turns stretchy instead of smooth.
- The two-stage chill before freezing, uncovered then covered, isn’t busywork. It’s what keeps condensation and big ice crystals from forming, which is half of what makes reheated gravy taste watery instead of freshly made.
The GC Freezer Meal Formula: Build Your Plate
Freezer meals don’t have to mean eating the same casserole four nights in a row.
The GC Freezer Meal System works differently. Each recipe is built as a component that freezes, reheats, and pairs well with the others.
Think of it like building a plate: Protein cube + starch cube + vegetable cube = dinner
Each build is designed around matching portions and mold sizes, so you can mix and match straight from the freezer. Make a few components on prep day, then build different dinners throughout the week without starting from scratch every night.
This build combines 5 freezer components designed to work together. Make the full build during one prep session, or choose only the pieces that fit your freezer.
Protein
Braised Beef Tips in Gravy
Starch
Cream Cheese Mashed Potatoes
Vegetable
Cheesy Broccoli
Braised Beef Tips cube + Cream Cheese Mashed Potatoes cube + Cheesy Broccoli cube = dinner from frozen in under 5 minutes. Or swap in the Salisbury Steak Meatballs or Stovetop Mac and Cheese for a different combo. Each recipe is designed to mix and match across the system.
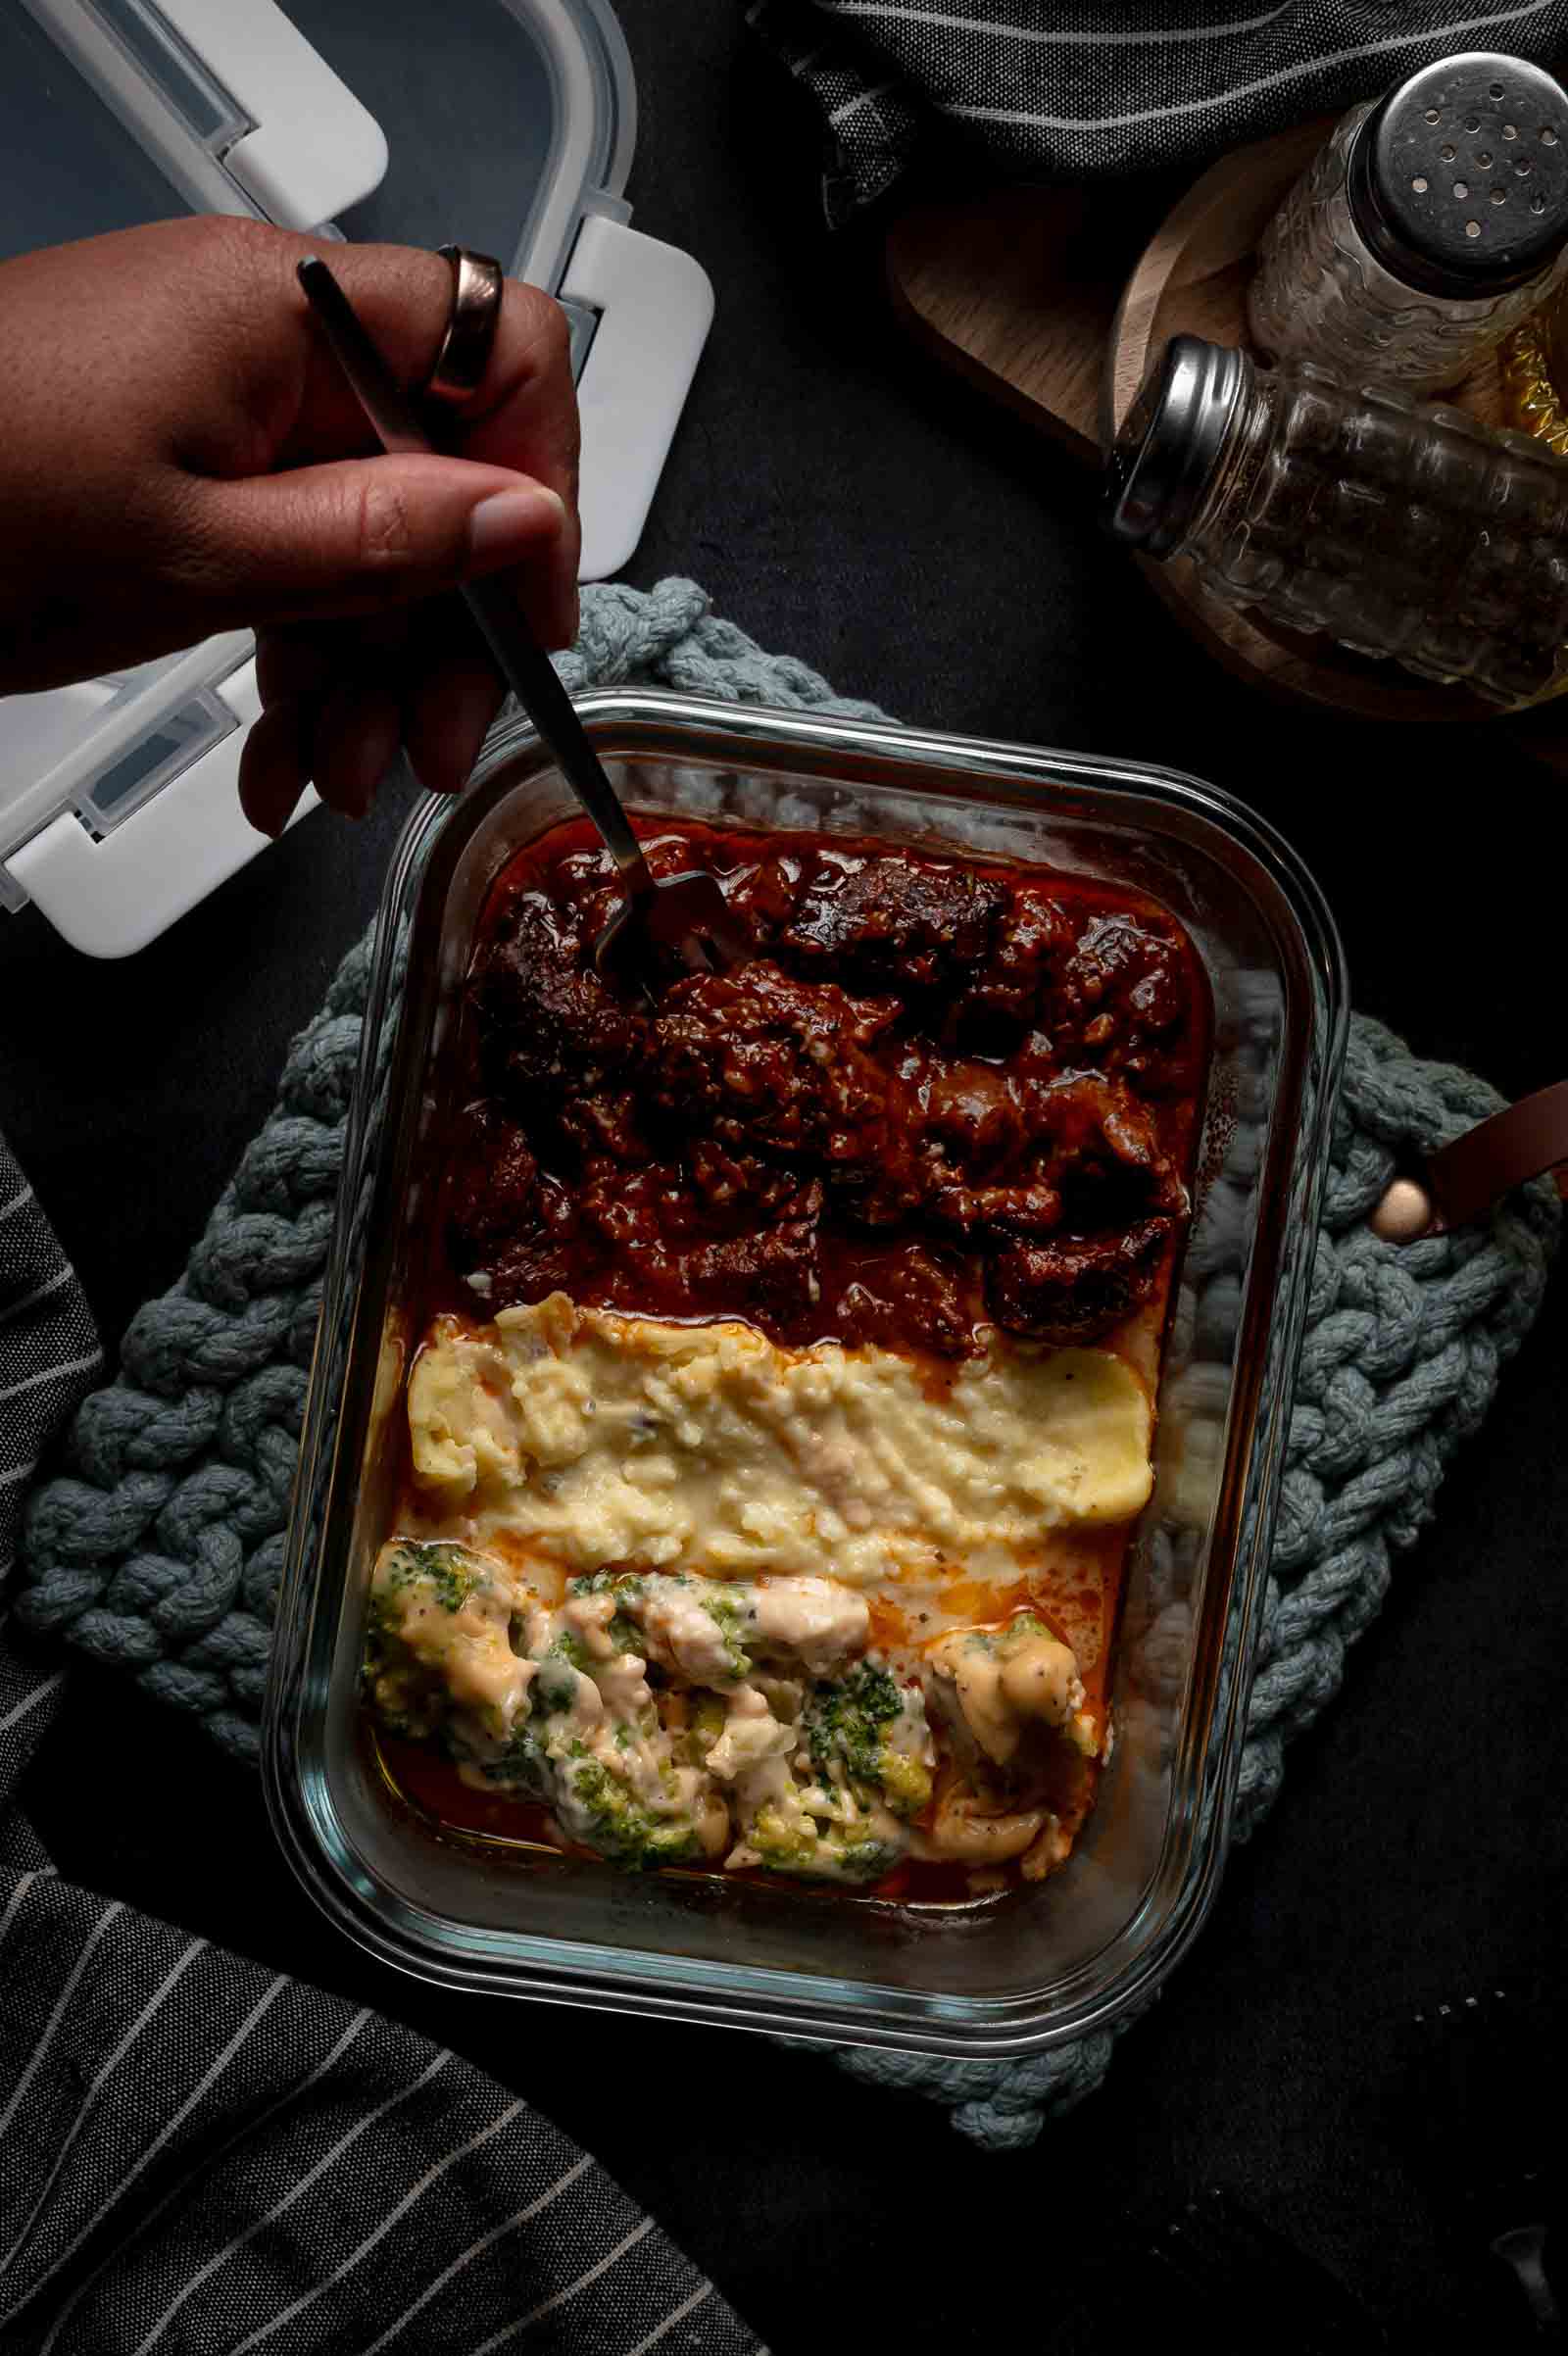
🍽️ What to Serve with Braised Beef Tips in Gravy
- Cream Cheese Mashed Potatoes, the gravy needs something to soak into, and this is the batch’s built-in answer.
- Cheesy Broccoli, pull one cube of each and dinner is a full plate in under 5 minutes.
- Stovetop Mac and Cheese, swap this in for the potatoes on nights the kids are picking dinner.
- Salisbury Steak Meatballs, keep this one in the freezer rotation too so you’re not eating beef tips four nights in a row.
- Easy Beef on Weck, for the night you’d rather skip the mold system and pile this same style of beef and gravy onto a toasted roll.
🧊 Leftovers and Storage
4 daysRefrigeratorAirtight container. Reheat before eating.
3 monthsIn the FreezerLabel with date and recipe name.
3 monthsVacuum SealedFreeze solid first, then seal one or two cubes per bag.
- Reheat: microwave or stovetop, from frozen or thawed, with a small splash of broth or water to loosen the gravy back up.
- Don’t refreeze: once a portion has been fully thawed and reheated, don’t refreeze what’s left.
Quick Summary
Braised beef tips in gravy is a chuck roast braise built to survive the freezer, portioned into six 1-cup molds and thickened with tapioca starch instead of flour so the gravy comes back smooth instead of grainy. Skim the fat before you thicken, chill in two stages before freezing, and don’t fill past the mold’s fill line. Do that and you’ve got a five-minute dinner sitting in your freezer for the next three months.
Chuck roast braised low and slow in a rich beef gravy, thickened with tapioca starch so it freezes and reheats smooth instead of grainy.
Prevent your screen from going to sleep
Trim and Season the Chuck
-
Heat the oven to 325°F. Pat the chuck roast dry with paper towels, trim away large pieces of hard exterior fat, and cut it into uniform 1½-inch pieces. Season with 1 teaspoon of the salt and all the black pepper.
Sear the Beef in Batches
-
Heat the avocado oil in a large Dutch oven over medium-high heat. Brown the beef in two or three batches without crowding the pot, 4 to 6 minutes per batch, turning so several sides develop color. Transfer to a plate. The beef won’t be cooked through yet.
Build the Aromatic Base
-
Reduce heat to medium. Cook the onion 5 to 6 minutes, stirring and scraping the browned bits, until softened. Add the garlic and cook 30 seconds. Stir in the tomato paste and cook 1 minute.
Build the Braising Liquid
-
Pour in the beef broth gradually while stirring and scraping the bottom of the pot. Stir in the Better Than Bouillon base until dissolved. Add the Worcestershire sauce, Italian seasoning, bay leaf, and remaining salt. Return the beef and its juices to the pot and bring to a gentle simmer.
Skim the Fat
-
Remove the pot from the oven and discard the bay leaf. Skim rendered fat from the surface with a spoon or ladle, using oil-absorbing paper for smaller pools if needed, without removing much braising liquid.
Thicken the Gravy
-
Whisk the tapioca starch and cold water into a smooth slurry. Bring the uncovered braising liquid to a gentle simmer over medium heat, then slowly stir in the slurry. Cook 1 to 2 minutes, stirring constantly, until thickened. Don’t boil for an extended time after adding the slurry, it can turn overly thick or stretchy. Taste and adjust seasoning.
Serve Fresh or Freeze
-
If you’re eating tonight, stop here. Serve the beef tips and gravy hot, spooned over your favorite base. Everything from this point on is for the freezer.
Cool, Chill, and Portion
-
Transfer the beef tips and gravy to a shallow cooling pan and let cool at room temperature 20 to 30 minutes. Set six 1-cup silicone molds on a rimmed sheet pan. Divide the beef evenly among the molds and spoon gravy over each until it reaches the 1-cup fill line, keeping the beef covered with gravy. (Use three 2-cup molds for larger portions.)
Freeze
-
Refrigerate the filled molds uncovered for about 1 hour, until no longer warm. Cover and chill for another hour. Transfer the covered molds to a level spot in the freezer and freeze at least 6 hours, until completely solid.
Bag and Label
-
Pull the silicone away from the edges and press gently upward from the bottom to release each frozen portion. Transfer to a freezer-safe bag or airtight container, pressing out as much air as possible. Place parchment between portions if stacking in a rigid container. Label with recipe name, portion size, freezing date, and reheating directions. Freeze up to 3 months. For vacuum sealing, freeze portions completely solid first, then seal one or two cubes per bag immediately; don’t vacuum seal warm, soft, or partially frozen gravy.
Reheat From Frozen
-
Microwave: Place one frozen portion in a microwave-safe bowl with a small splash of beef broth or water, cover loosely, and microwave 3 minutes. Break apart softened edges and stir. Continue microwaving 2 to 3 minutes, stirring every minute, until hot throughout. Add more broth if too thick. Rest, covered, 1 minute before serving.
-
Stovetop: Place one frozen portion in a small saucepan with a small splash of broth. Cover and heat over low 8 to 12 minutes, turning occasionally as edges soften. Break apart and continue heating 3 to 5 minutes, stirring frequently, until hot and smooth.
Reheat From Thawed
-
Microwave (best texture): Place one thawed portion in a microwave-safe bowl, cover loosely, and microwave 2 to 3 minutes, stirring halfway through. Add a splash of broth if needed. Rest 1 minute before serving.
-
Stovetop: Place the thawed portion in a small saucepan, add a splash of broth if thick, cover, and heat over medium-low 5 to 7 minutes, stirring occasionally, until hot throughout.
This recipe is part of the GC Freezer Meals system. Pair it with creamy mashed potatoes and cheesy broccoli for a complete dinner from frozen in under 5 minutes. See the full Batch guide →
- Refrigerate cooled beef tips in an airtight container up to 4 days.
- Use beef stock in place of broth (low sodium) or packaged stew meat in place of chuck roast, cutting oversized pieces to match.
- Don’t refreeze beef tips that have been fully thawed and reheated.
Serving: 1serving | Calories: 348kcal | Carbohydrates: 7g | Protein: 31g | Fat: 22g | Saturated Fat: 8g | Polyunsaturated Fat: 2g | Monounsaturated Fat: 12g | Trans Fat: 1g | Cholesterol: 104mg | Sodium: 1241mg | Potassium: 826mg | Fiber: 1g | Sugar: 2g | Vitamin A: 118IU | Vitamin C: 3mg | Calcium: 51mg | Iron: 4mg
Guides Worth Bookmarking
The Gear Behind our Lego Lunch Recipes
Every step above assumes you have got the right sealer and the right molds. See the exact FoodSaver sealer and Souper Cubes mold set GC runs this whole system on, plus the budget-friendly swap, in one place.
See the Full Equipment Guide →
❓ FAQs
It’s a sheet designed to lift floating grease off the surface of soups, sauces, and braising liquid without disturbing what’s underneath. Lay it lightly on top, then pull it off before it starts soaking into the gravy itself. It’s a nice-to-have, not a requirement, a spoon or ladle tilted at an angle does the same job with a little more patience.
Yes, packaged stew meat works here. Sort through the package first and trim any oversized pieces down to match the rest, since stew meat is often a mix of cuts that tenderize at different rates.
Up to 3 months in the freezer, whether they’re in a silicone-mold portion transferred to a freezer bag, a rigid airtight container, or vacuum-sealed.
Yes, but freeze the portions completely solid first. Vacuum sealing gravy while it’s still warm, soft, or partially frozen pulls moisture into the seal and can ruin it.
No, both the microwave and stovetop methods work straight from frozen. If you’d rather thaw first, move a portion to the refrigerator overnight rather than thawing it in the mold.