

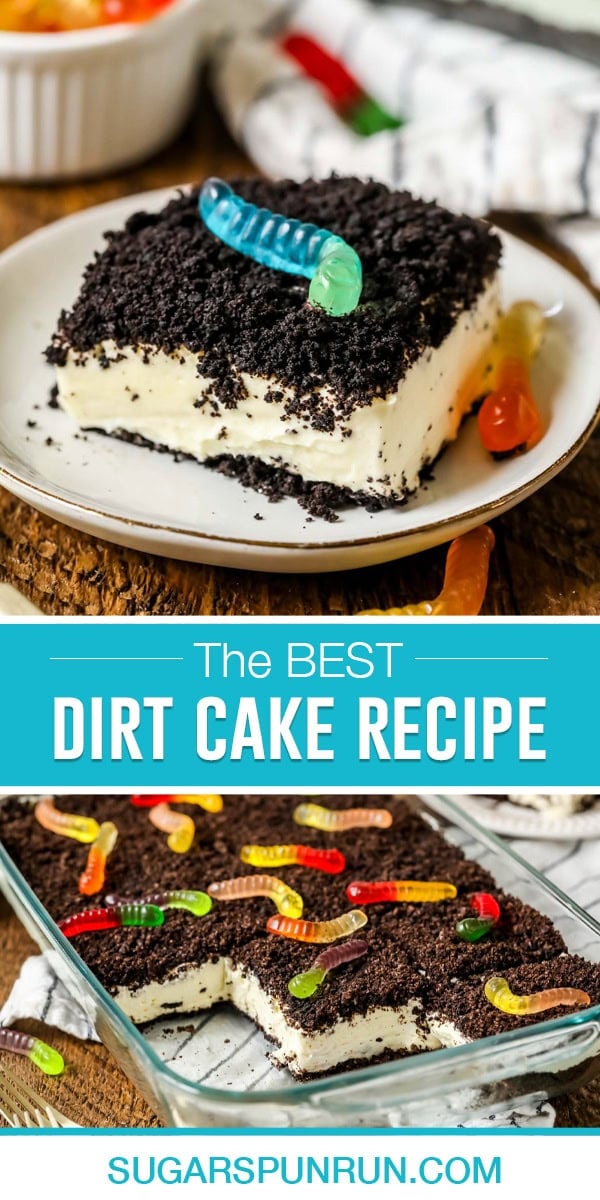
My homemade dirt cake recipe skips the pudding mix and storebought whipped topping for a richer, creamier, more flavorful version of the classic. Made with real vanilla pudding, a cream cheese-based filling and chocolate cookies. Top with gummy worms or skip them for a totally homemade treat.
Dirt Cake — But Make it From Scratch
Admittedly, a homemade dirt cake recipe involves a bit more time, effort and dishes than boxed pudding versions, but just wait til you taste it. It’s a creamy, crunchy, vanilla/chocolate dessert that’s fun (to make and eat!) for kids and adults, and you can feel at least a tiny bit better about the ingredients.
Why You’ll Love This Recipe
- Less processed. We’ll skip the Cool Whip and opt for homemade whipped cream, and swap the boxed pudding for a homemade vanilla pudding that’s thickened with egg yolks and cornstarch. You can go the extra mile and make your own homemade Oreos too, if you’re feeling especially ambitious.
- Creamy, dreamy filling. The homemade whipped cream folded into the pudding and cream cheese gives us a light, mousse-like texture that’s rich without being too sweet or too heavy.
- Perfect for parties! This recipe feeds a crowd and is great for making ahead. I especially love making this for summer picnics and potlucks, since you can make it in advance and let it set up in the fridge while you prep other things (mine chilled all day today while I prepped my pasta salad and burger buns for this weekend’s cookout).
- Can easily be made gluten-free with gluten-free Oreos! I’ve used them to make my Oreo crust, and they work great!
Jump to:
What You Need
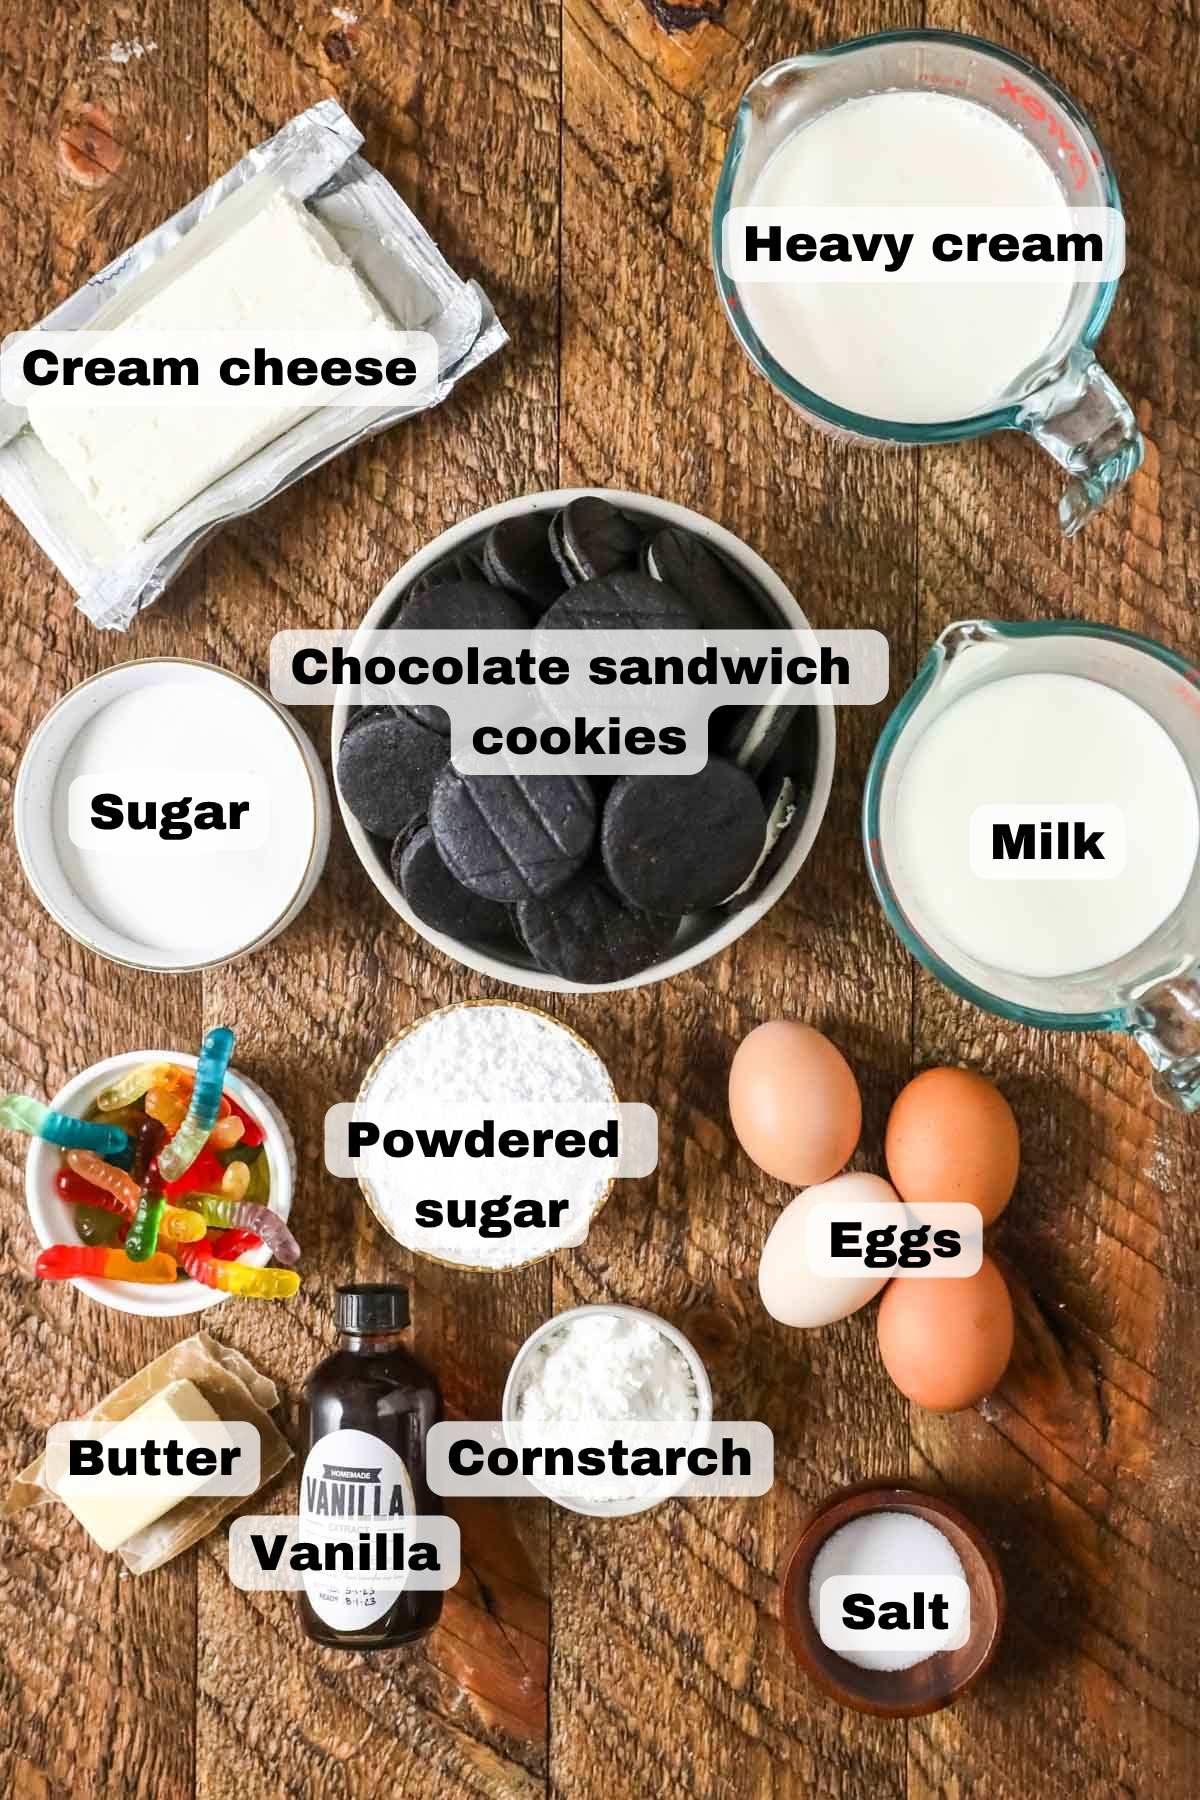
- Oreo cookies. You can certainly make them if you want to go the fully from-scratch route, but store-bought will also work totally fine for this dirt cake recipe.
- Egg yolks. You’ll need just the yolks for the pudding. Save the whites for meringue cookies (you could even pipe these into mushrooms for topping your cake!), chocolate meringues, or a double batch of my coconut macaroons.
- Heavy cream. Whipping cream or double cream will also work. We will use this in both the pudding and homemade whipped cream. For the whipped cream, make sure you keep the cream nice and cold so you can easily whip it to stiff peaks!
- Cream cheese. Just like when making an Oreo cheesecake or cream cheese frosting, use full-fat, brick-style cream cheese for this homemade dirt cake. Low fat or spreadable cream cheese will be too soft and runny, and your cake won’t set up properly.
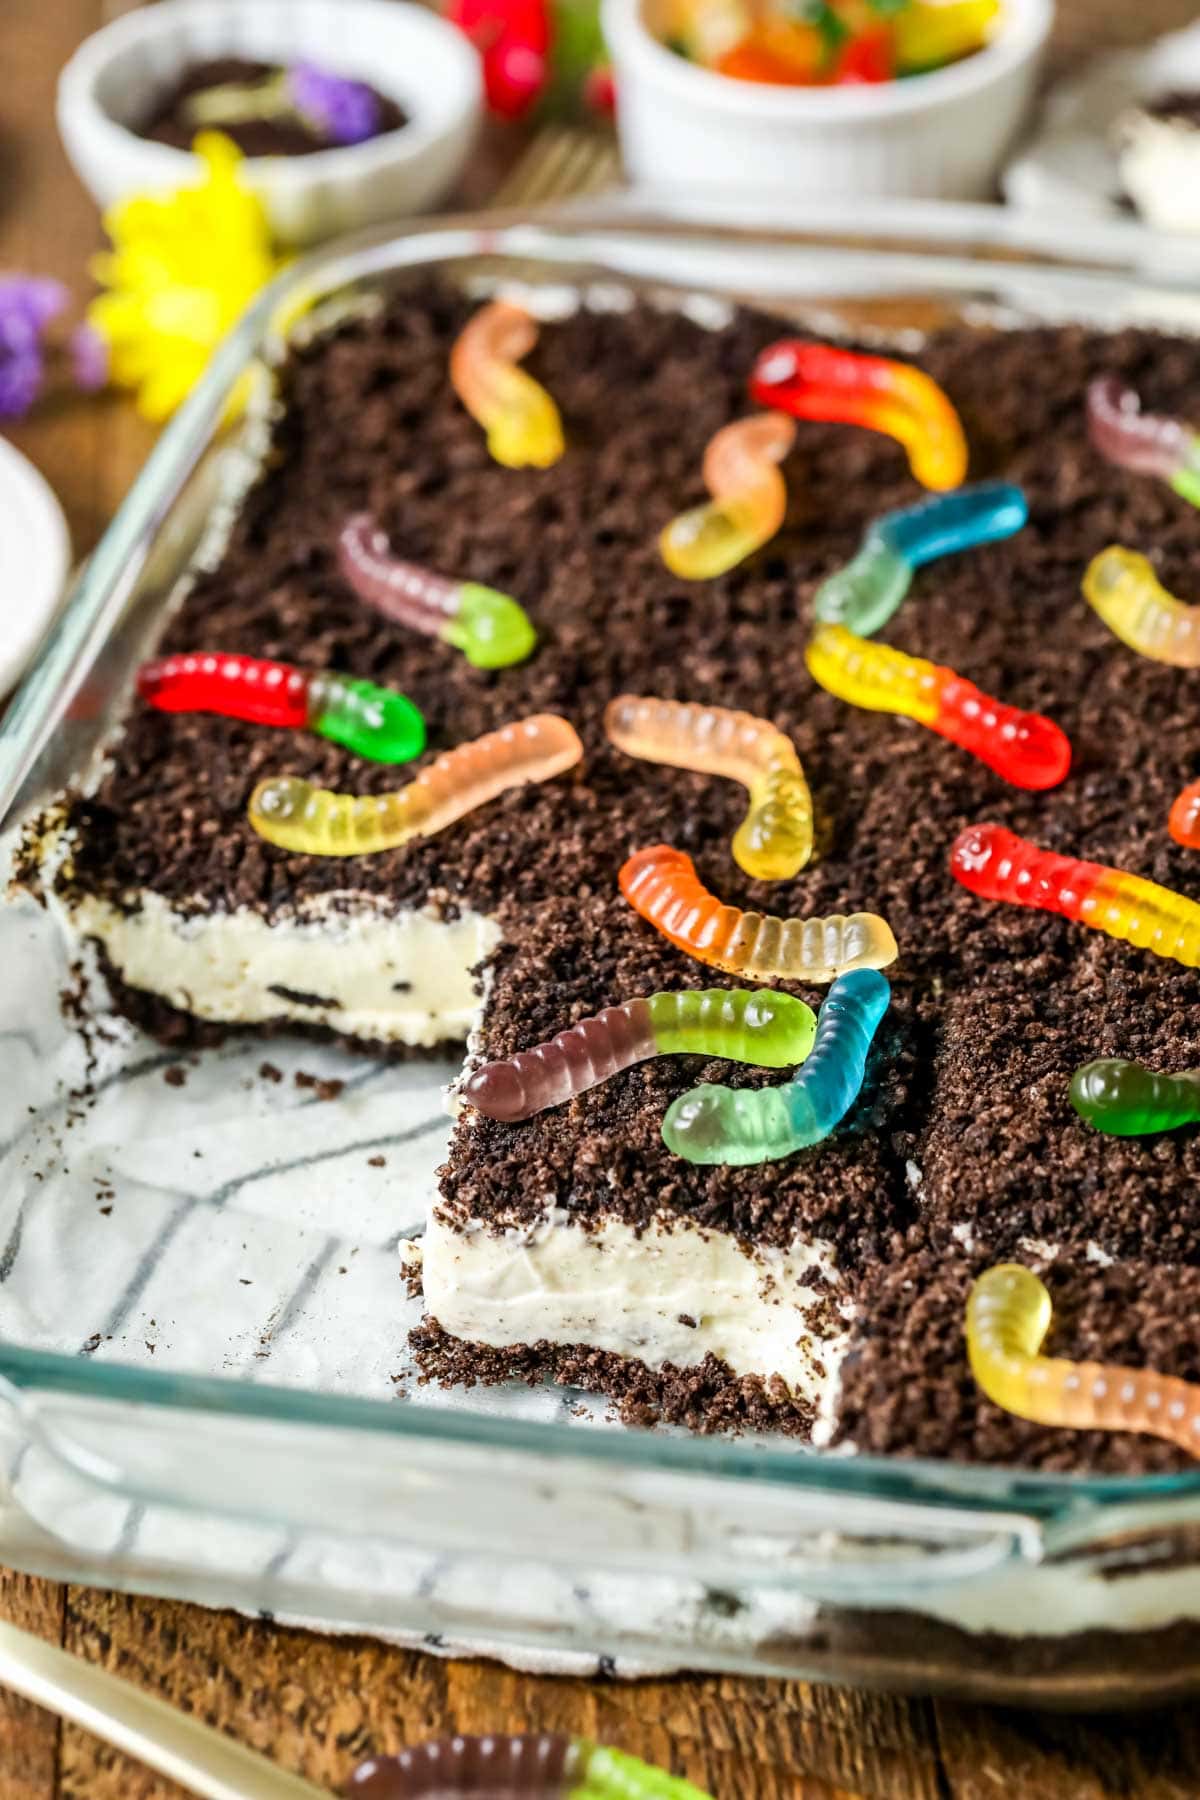
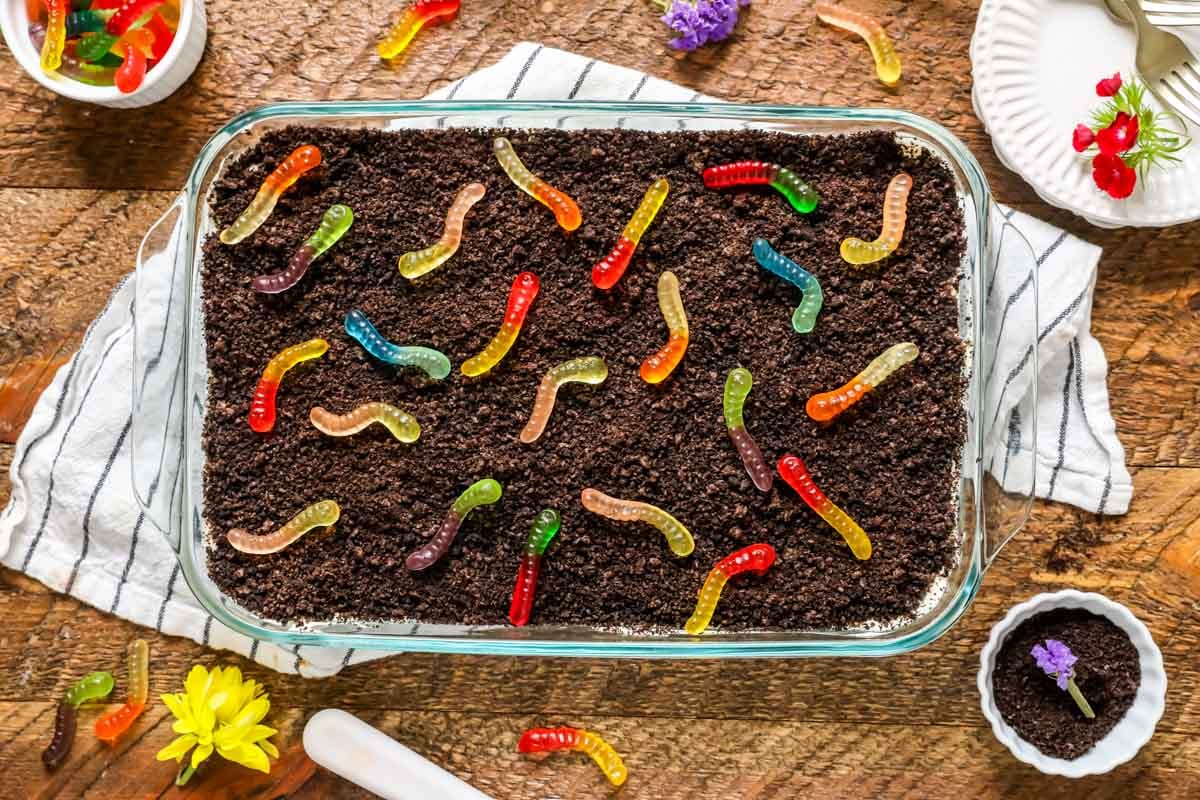
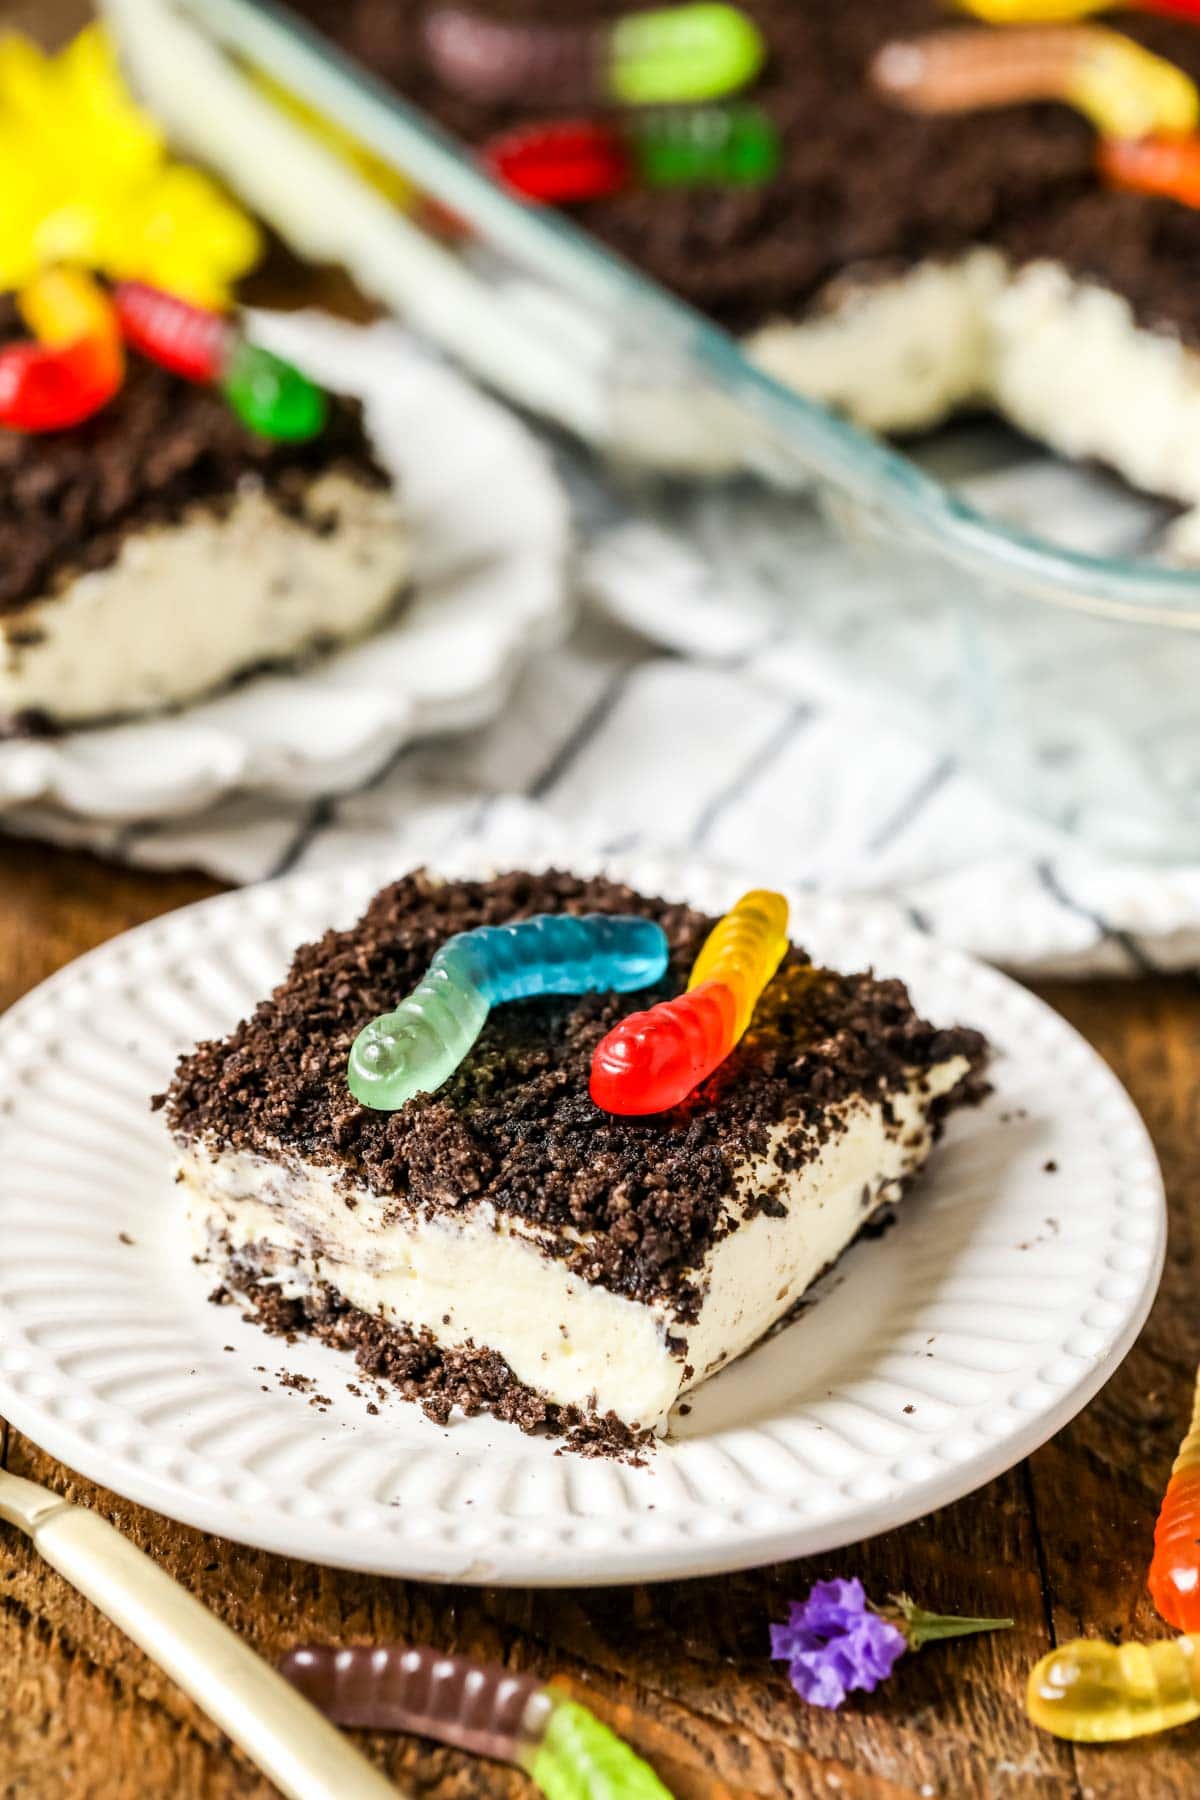
- Gummy worms. You can skip the gummy worms entirely if you want a completely from-scratch dish. They really help sell the dirt cake look though (and kids love them)!
This is just an overview of the ingredients I used and why. For the full recipe please scroll down to the bottom of the post!
SAM’S TIP: If you don’t want to use a 9×13 pan, you can serve this dirt cake recipe in a trifle dish! It looks very pretty served that way, and you don’t have to worry about cutting slices.
How to Make Dirt Cake
Step 1: Make the pudding
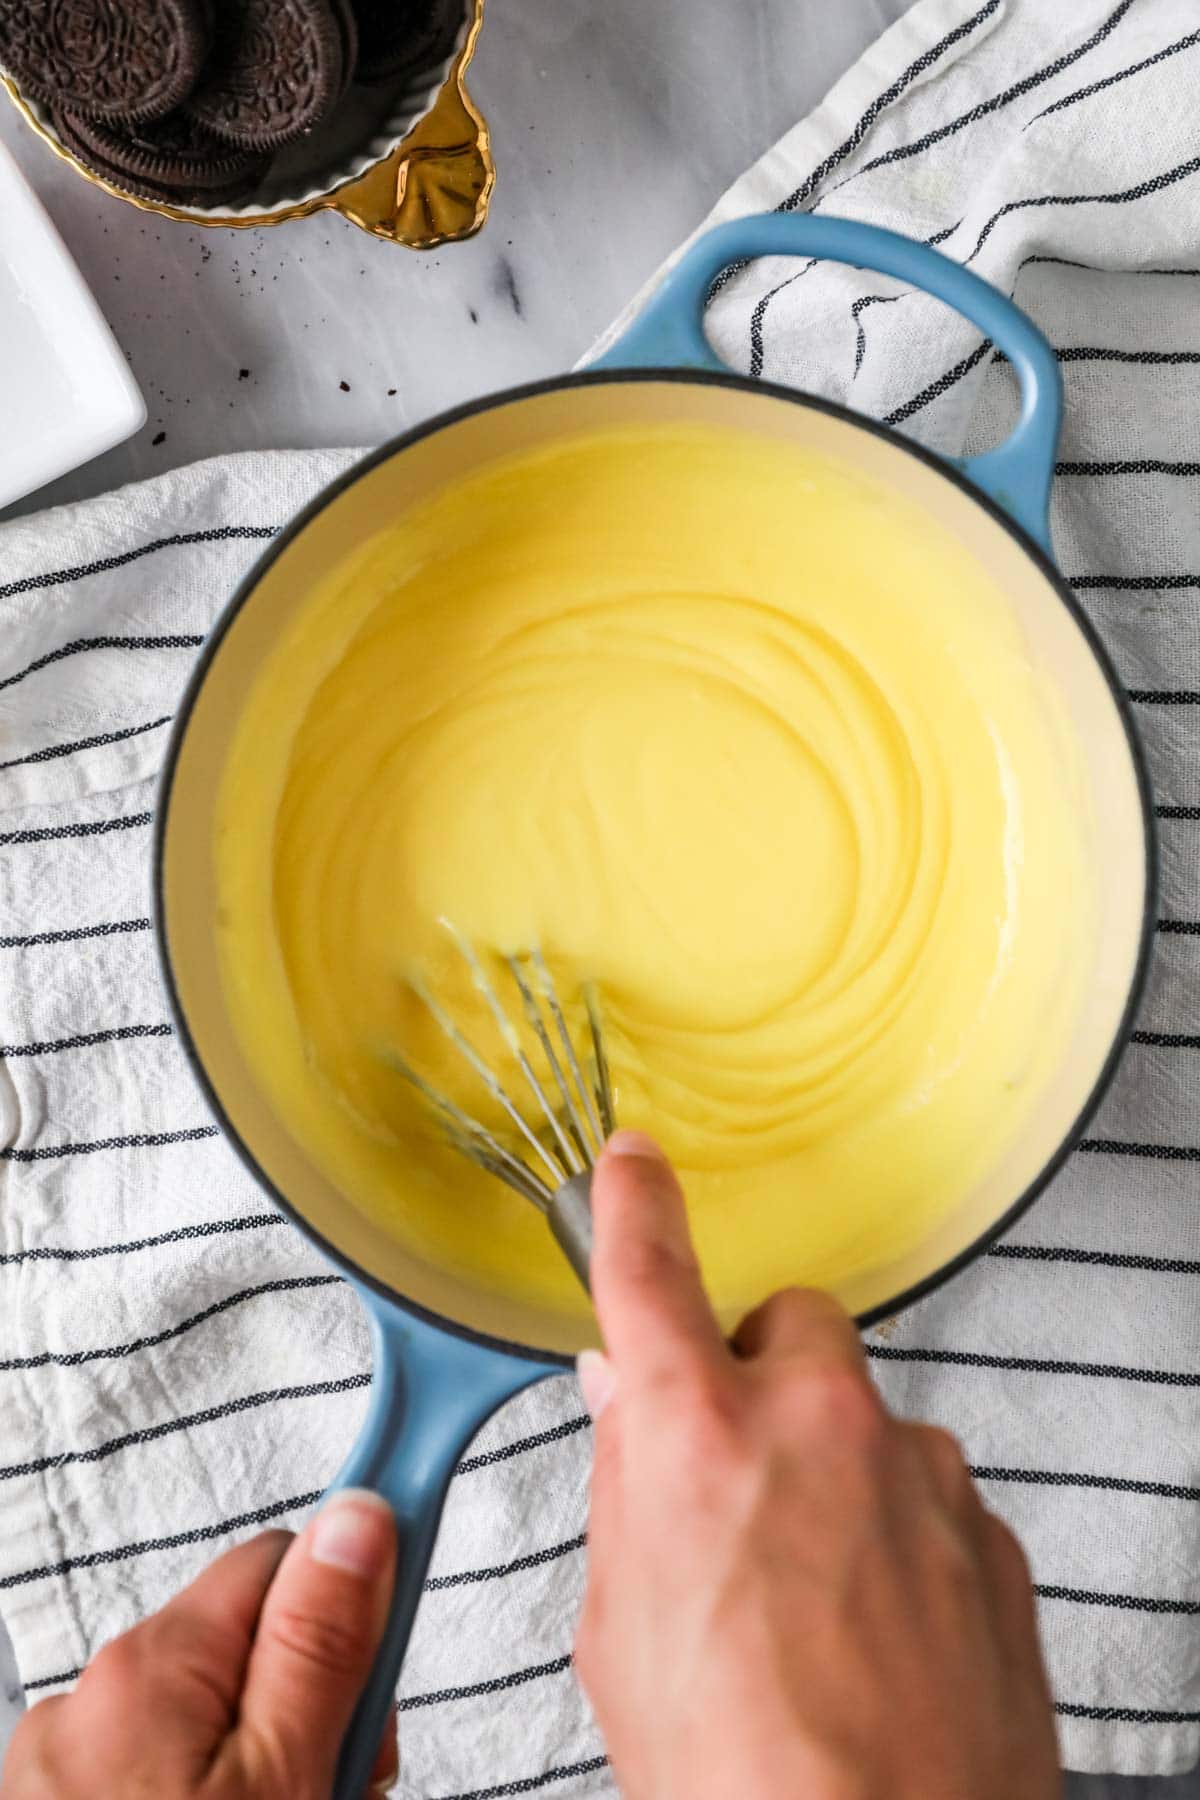
Whisk together your sugar, cornstarch, and salt in a saucepan, then add milk, cream, and egg yolks. Whisk constantly over medium/low heat until the mixture’s thickened to a pudding consistency (or just a tad looser, as it’ll thicken a bit as it cools). The whisk should leave trails in the mixture and it should coat the back of a spoon
Always pour the pudding through a fine mesh strainer into a new bowl immediately after cooking. This will stop the cooking process, so the pudding doesn’t overcook or burn, and will catch any lumps so the pudding is completely smooth. Next stir in some vanilla and butter, and let the mixture cool (stir it occasionally to prevent a skin from forming) before proceeding.
Step 2: Make the Filling
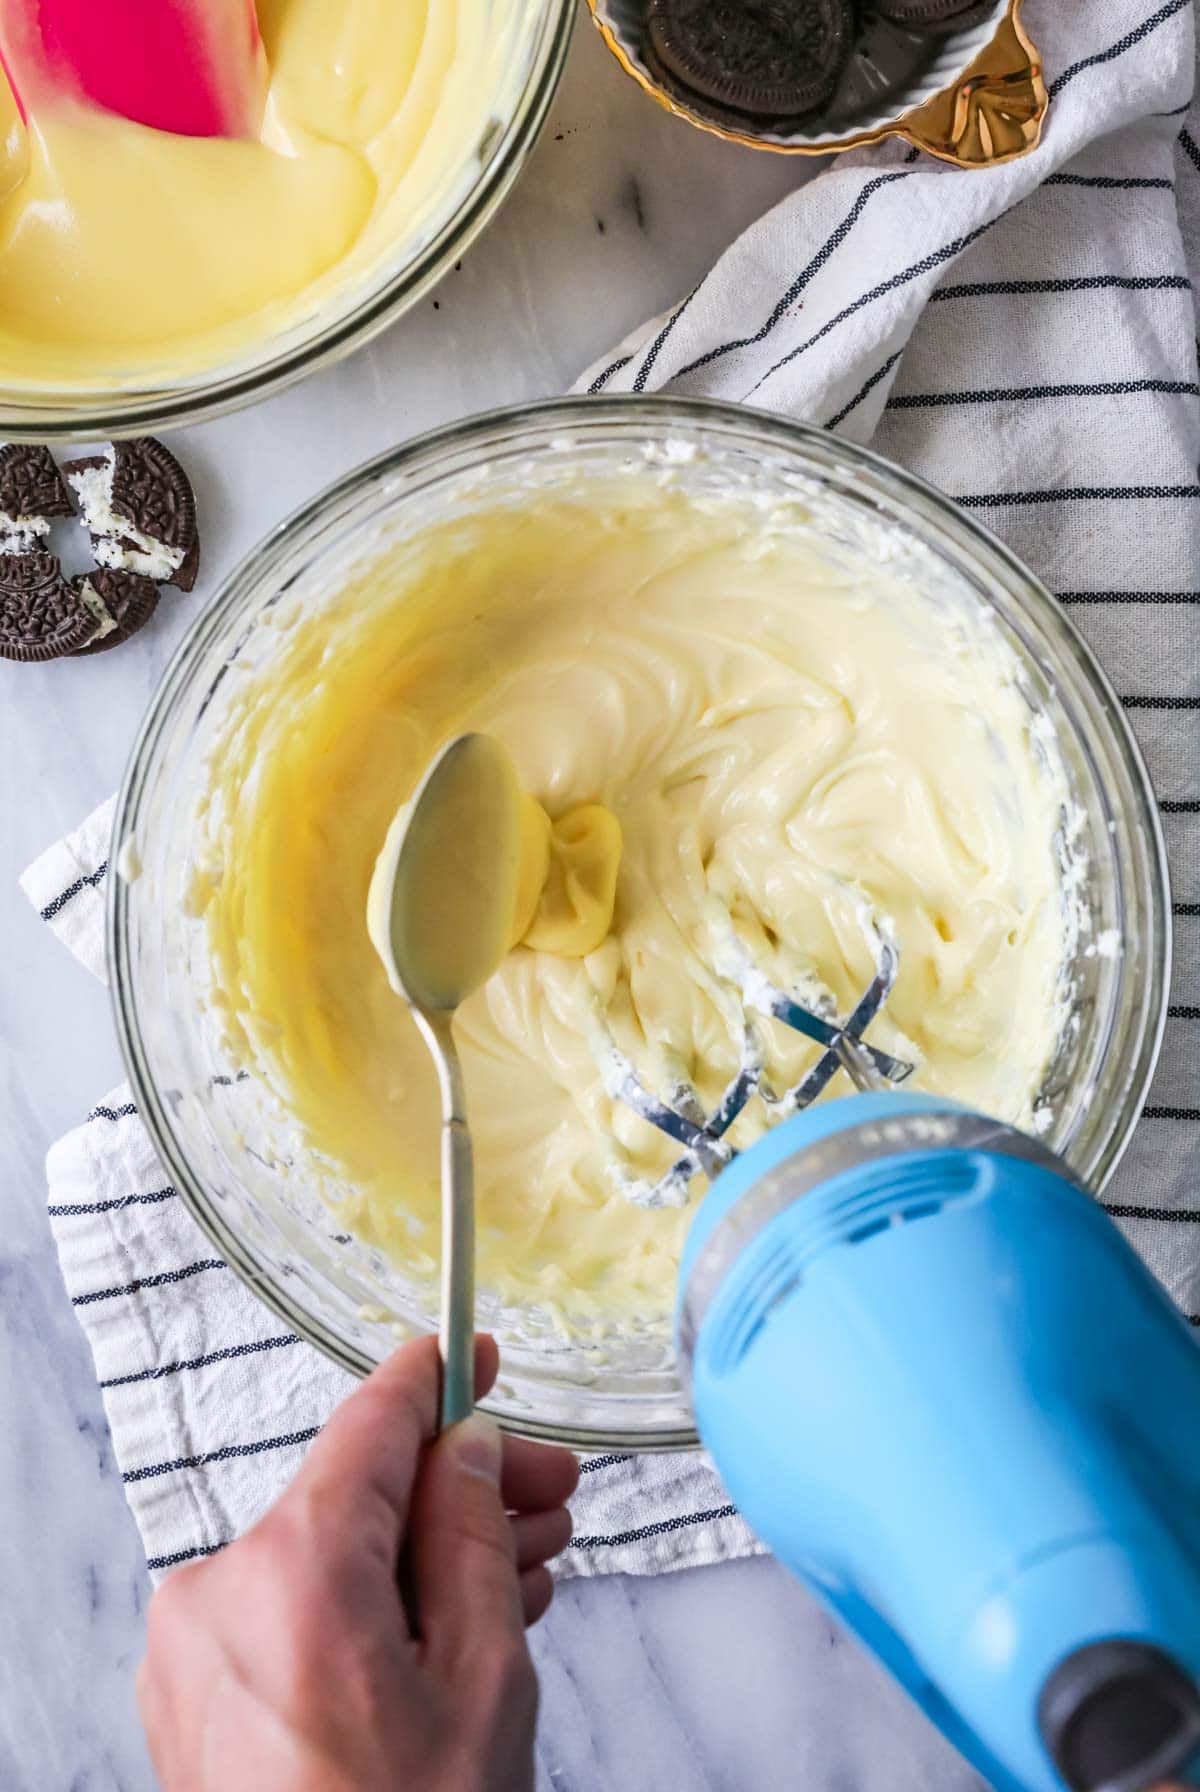
Beat the cream cheese in a large bowl until it’s smooth, creamy, and lump free.
Now, once the pudding is cooled you’ll slowly add the pudding to the cream cheese mixture, a spoonful at a time. Don’t add it all at once, or the mixture could split. Set this aside and make the whipped cream.
Step 3: Stir in the whipped cream
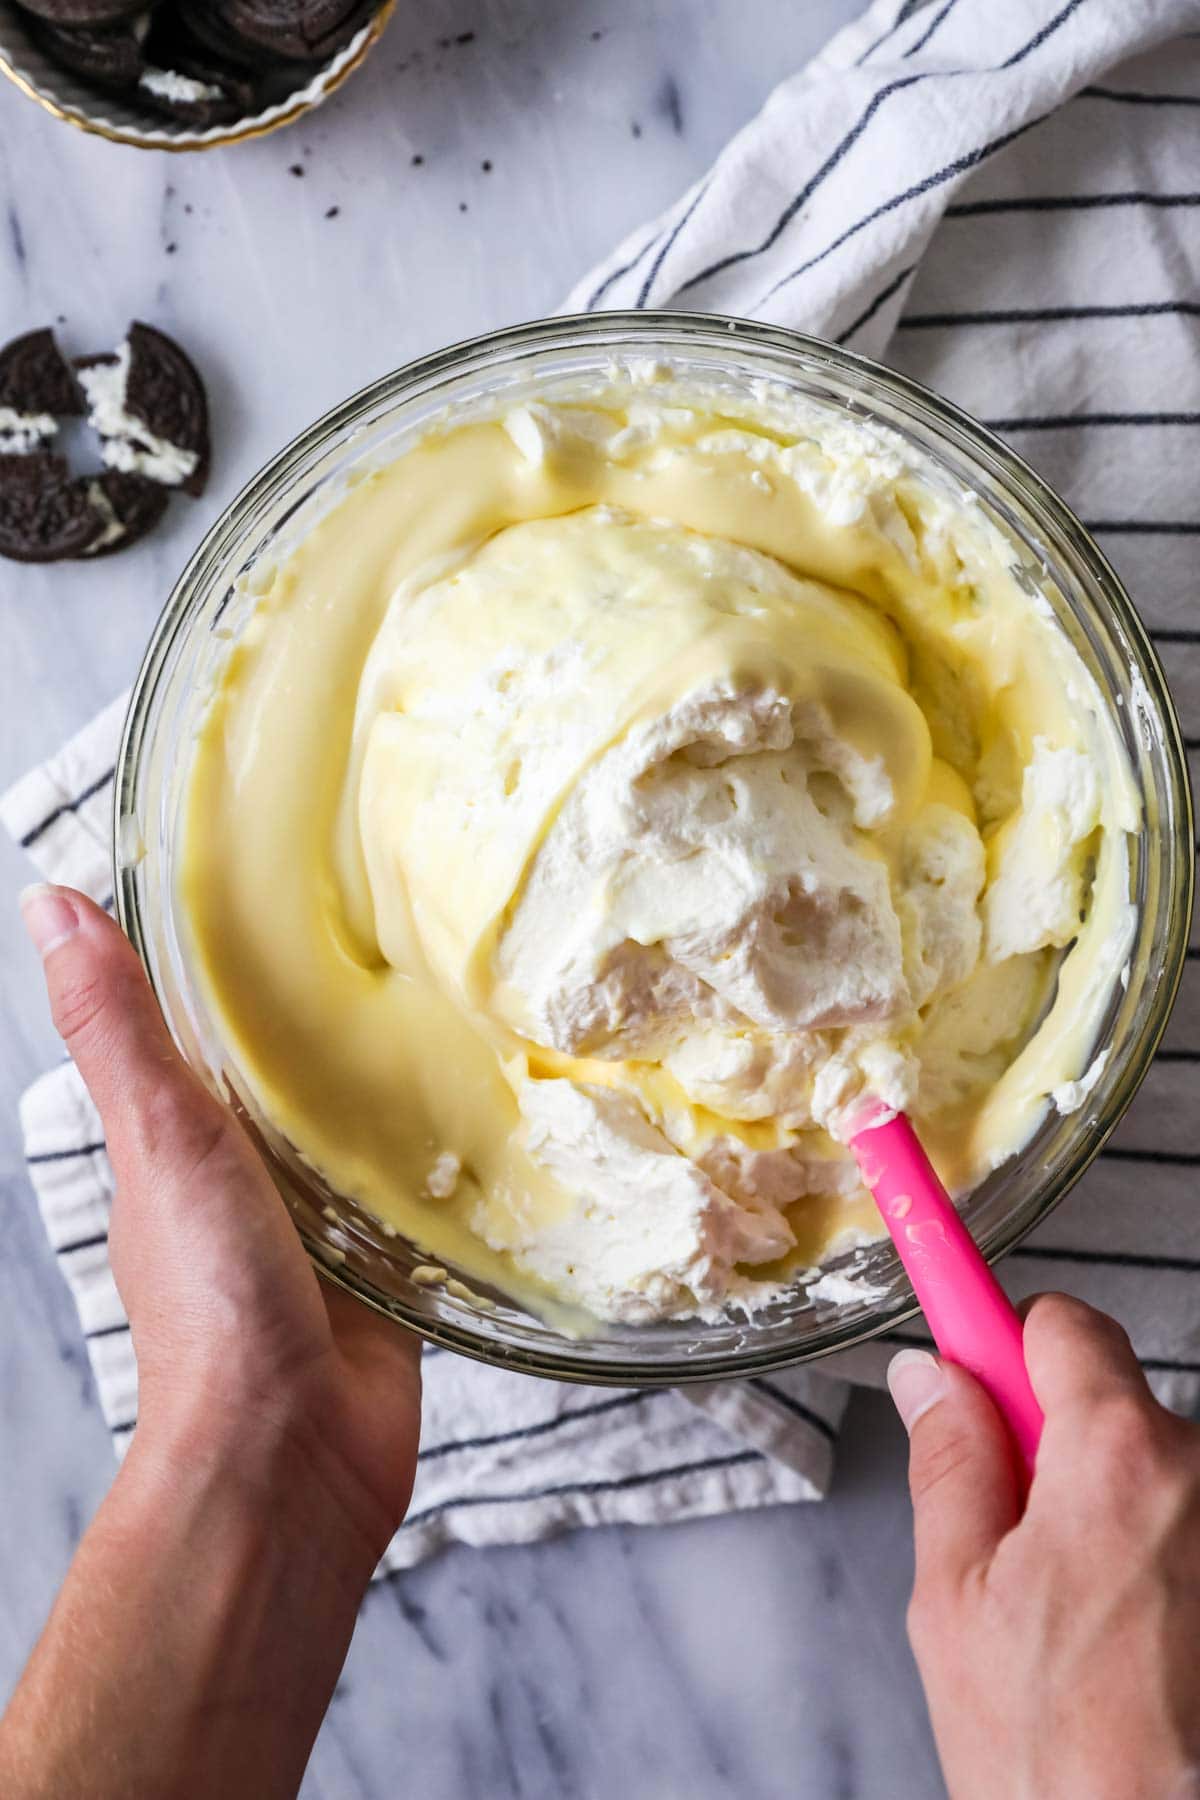
Whip the cream to stiff peaks, then use a spatula to gently fold it into the pudding mixture until the ingredients are uniform and well combined.
Step 4: Assemble
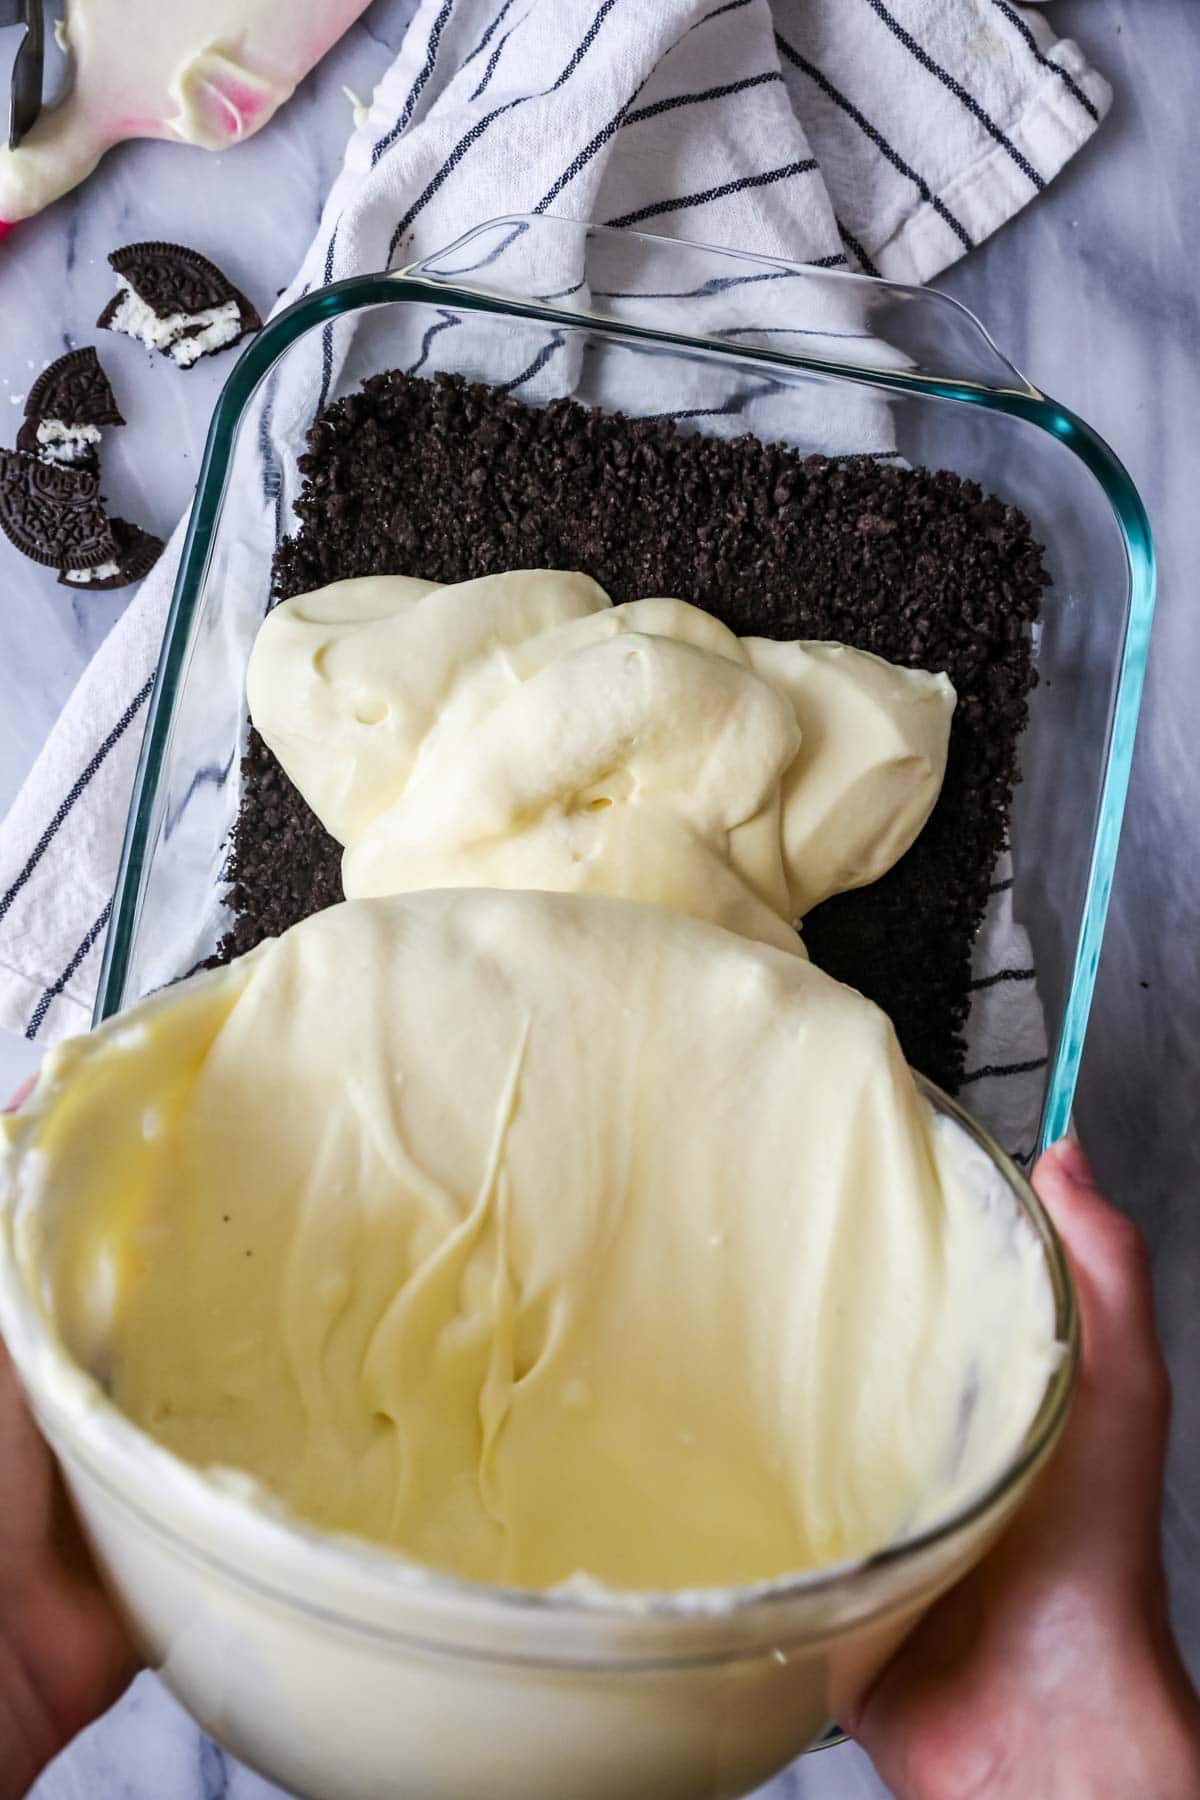
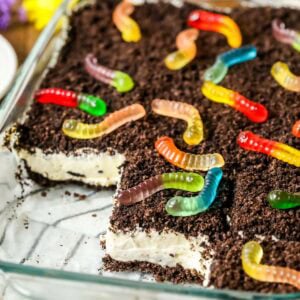
Press half of your crushed cookies into the bottom of the pan, then spoon or dollop the mixture evenly overtop, then add the rest of your crumbs. The dirt cake should chill in the fridge for at least a few hours before serving (cover it tightly first!).
If you’re adding gummy worms, do this just before serving as they can get pretty hard sitting in the fridge.
SAM’S TIP: Regardless of whether you’re using homemade or storebought cookies, you do not need to remove the cream from the Oreos before pulverizing/crushing them. I just toss the cookies (cream and all!) into my food processor and pulse until they are fine crumbs. A rolling pin and ziplock bag would also work for this!
Frequently Asked Questions
If you dip a spoon into the mixture, it should coat the back without dripping off–think pudding-like consistency (like the pudding packs you’d eat as a kid!). The pudding will be a bit looser while it’s warm and will thicken slightly more as it cools.
This usually takes about 10 minutes for me, but it may take more or less time depending on your stove.
Dirt cake can be tricky to slice, as it doesn’t cut super neatly. Usually we just spoon or scoop it into bowls; it was some effort to cut it as neatly as I could for the photos today! If clean slices are super important to you, though, just freeze the dirt cake for half an hour or up to several hours before slicing.
Honestly the messy look is part of its charm–it’s dirt cake, after all, and it’s a lot of fun for kids!
SAM’S TIP! This homemade dirt cake recipe is totally customizable for whatever the occasion. It’s great for kid birthday parties, turn it into a spring or Easter treat by topping with carrot gummies, or even as a halloween dessert with candy pumpkins and white chocolate skeletons.
Similar to my homemade strawberry pretzel salad, this recipe isn’t quite what the name implies. It’s less like a cake and more like an Oreo pie or fluffy layered pudding. Despite the misnomer, it’s one of my favorite fun treats of summer, and I hope you love it just as much!
Enjoy!
Let’s bake together! Subscribe to my newsletter to be notified of all the newest recipes, and find my free recipe tutorials on YouTube 💜
Homemade Dirt Cake Recipe
This 100% homemade dirt cake recipe tastes SO much better than versions made with Cool Whip and boxed pudding! It’s still very easy to make despite the from-scratch swaps.
Print
Pin
Rate
Prevent your screen from going dark
Servings: 15 servings
Calories: 440kcal
Instructions
-
In a medium-sized saucepan, whisk together sugar, cornstarch, and salt.
¾ cup (150 g) granulated sugar, ¼ cup (32 g) cornstarch, ½ teaspoon table salt
-
In a separate mixing bowl (I use a large measuring cup), whisk together milk, cream, and egg yolks until yolks are broken up and ingredients are well combined.
1 ½ cups (354 ml) whole milk, 1 ½ cups (354 ml) heavy cream, 4 large egg yolks
-
While whisking the dry ingredients, slowly drizzle in the milk mixture and whisk until combined.
-
Cook over medium/medium-low heat, whisking constantly, until mixture has thickened to a pudding-like consistency and coats the back of a spoon (this will likely take around 10 minutes but could take more or less time depending on your stovetop).
-
Once mixture has thickened, immediately remove from heat and pour through a fine mesh strainer into a heatproof bowl. Add vanilla extract and butter and stir until butter is melted and completely incorporated.
2 teaspoons vanilla extract, 3 Tablespoons (42 g) unsalted butter
-
Allow mixture to cool for 15-20 minutes, stirring occasionally, then press a piece of plastic wrap or parchment paper against the surface of the pudding and place in the refrigerator to cool completely, typically 1-2 hours, before moving on to the next step.
Finish the filling & assemble
-
Once the pudding mixture has cooled, remove it from the fridge and set aside.
-
Place cream cheese in a separate, large bowl and use an electric mixer to beat cream cheese until completely smooth and creamy.
8 oz (226 g) cream cheese
-
Gradually (a heaping spoonful at a time) add pudding to the cream cheese (I do this in 4-5 parts), mixing on low-speed after each addition until completely combined. Set aside.
-
Make the whipped cream: In a large, clean mixing bowl, use an electric mixer to beat cream and sugar until stiff peaks form.
1 ½ cups (354 ml) heavy cream, ½ cup (65 g) powdered sugar
-
Add the whipped cream into the pudding/cream cheese mixture, using a spatula to gently fold together until combined.
-
Evenly layer about half of the crushed cookies into the bottom of a 13×9” (33x23cm) pan and use the bottom of a glass or measuring cup to tamp down into an even layer.
30 Oreo cookies
-
Gently pour or dollop the pudding mixture evenly over cookie crumbs, then use the back of a spoon or an offset spatula to smooth into an even layer. Sprinkle the remaining crushed cookies evenly over the surface of the pudding. Cover tightly with plastic wrap and refrigerate for at least 2 hours before topping with gummy worms and serving.
Gummy worms
Notes
Oreo cookies
Finely crush Oreo cookies in a food processor or with a rolling pin. If you want to avoid using store-bought Oreo cookies, you can make my homemade Oreo cookies instead. You will need only ½ batch (I do fill the cookies with the homemade cream before crushing them).
Storing
Cover tightly and store in the refrigerator for up to 5 days. This dish may also be tightly wrapped and frozen for up to 3 months. Serve from frozen or thaw overnight in the refrigerator before serving.
Nutrition
Serving: 1serving | Calories: 440kcal | Carbohydrates: 37g | Protein: 5g | Fat: 31g | Saturated Fat: 18g | Polyunsaturated Fat: 2g | Monounsaturated Fat: 9g | Trans Fat: 0.1g | Cholesterol: 130mg | Sodium: 243mg | Potassium: 165mg | Fiber: 1g | Sugar: 27g | Vitamin A: 1082IU | Vitamin C: 0.3mg | Calcium: 88mg | Iron: 3mg
Nutritional information is based on third-party calculations and should be considered an estimate only. Actual nutritional content will vary based upon brands used, measuring methods, cooking method, portion sizes, and more.