
Roasting garlic brings out the natural sweetness and adds depth of flavor. There are no special tricks to learning how to roast garlic, and having it on hand takes your cooking skills to the next level. Plus, it stores well.
I have a serious love affair with garlic (please don’t tell hubby). The irresistible aroma coming from the oven whets my appetite. And since we’re roasting the whole head of garlic, it’s super easy. Drizzle it with olive oil, cover it with foil, and roast to buttery-soft perfection. Of course, I can’t resist adding thyme.
When perfecting my garlic butter recipe, I had to try it with roasted instead of raw garlic. Wow! It was even better than plain garlic butter. I slathered my freshly toasted baguette and went straight to heaven.
Why DIY Is the Wave of the Future
With rising prices and lowering food quality, it’s time we take control of what goes into our mouths. Yes, some companies make good stuff, but they also have to pay employees. And so the higher prices.
Therefore, I’ve decided to share simple but money-saving hacks and how-tos. Not only that, but you can also control the quality. But how long do you roast garlic? The oven does all the work in 35-40 minutes.
How to Roast Garlic

- Peel some of the papery outer layers, but leave the head whole.
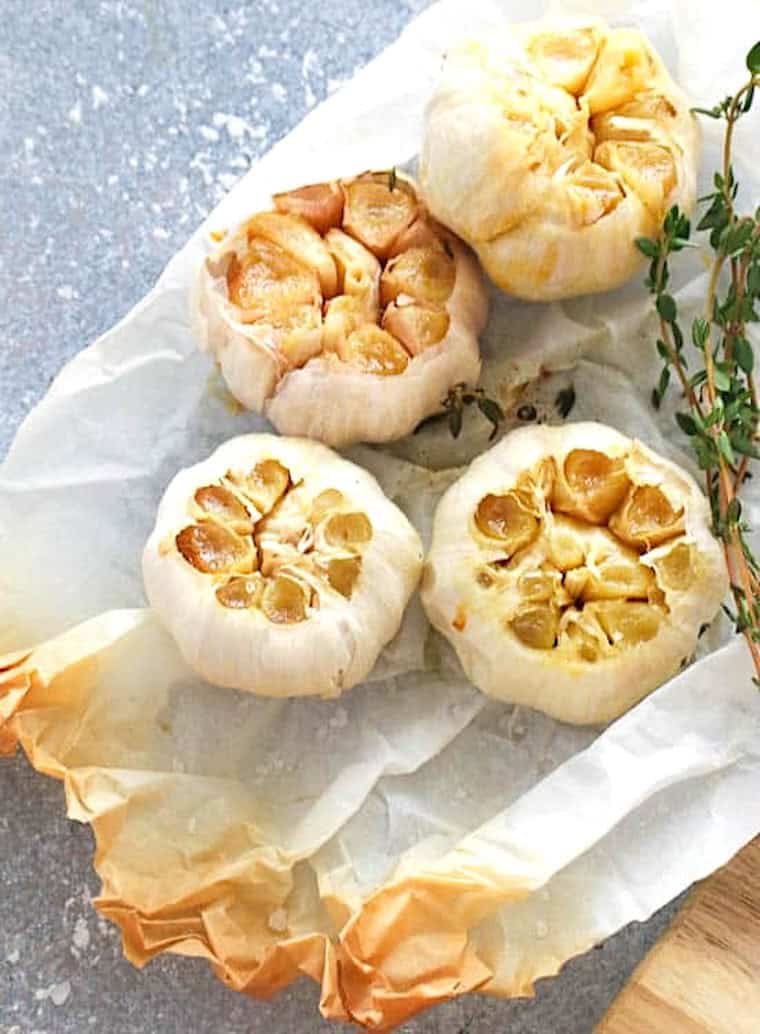
- Cut the top ¼-½” off a whole head so the tips of the individual cloves are visible. Make sure every garlic clove is exposed. (Photo 1)
- Assemble – Place the head of garlic (cut-side up) on a large piece of foil and sprinkle with the thyme. Drizzle the top with a teaspoon or two of olive oil. (Photo 2)
- Wrap it with parchment paper or aluminum foil, tie it with kitchen twine, and place it in the oven. (Photo 3)
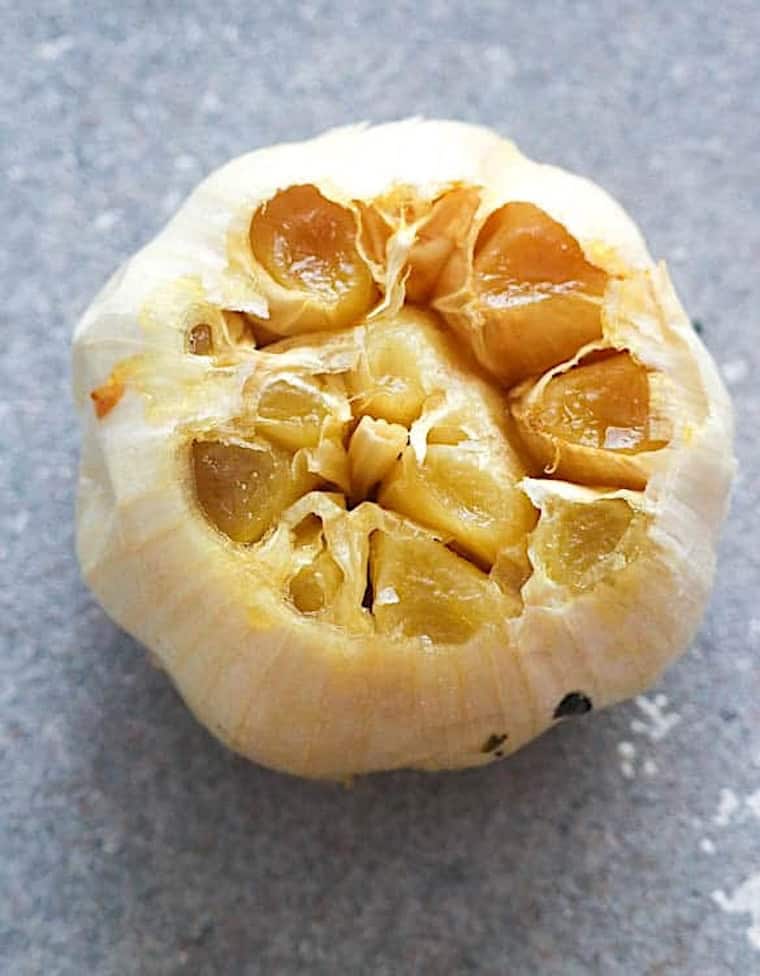
- Roast garlic in the oven for 35-40 minutes. Cooking time depends on the size of the garlic head, its age, and oven temperature. The garlic is ready when it’s completely soft, fragrant, and easily pierced with a fork or knife. (Photo 4)
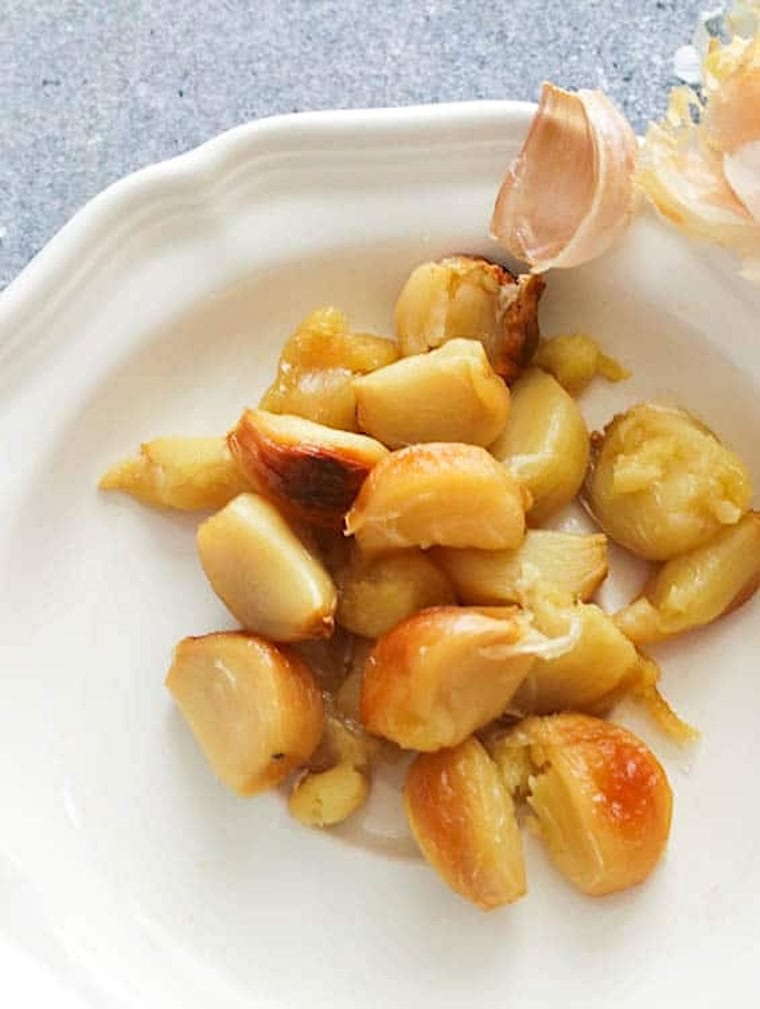
- Ready – Let the garlic cool, then squeeze individual cloves out of the skin. You’re ready to enjoy it in your favorite recipe.
How to Roast Garlic in an Air Fryer
Take advantage of your valuable air fryer and avoid heating up the house with the oven. Follow the recipe the same way: preheat your air fryer to 380°F (195°C), and air fry your garlic for 20-25 minutes. Be careful when opening the foil package to avoid burning yourself with the steam.
How to Store Roasted Garlic
Cool the roasted garlic head, then squeeze the individual cloves out of the skin. You can use it immediately, but it lasts up to 2 weeks in the fridge. I love doing 2-3 heads at once and freezing them for up to 6 months. Don’t forget to label your containers with the date.
NOTE: Please never store roasted garlic at room temperature while deprived of oxygen (in olive oil) to avoid botulism (Clostridium botulinum).
Wonderful Ways to Use Roasted Garlic
- Spread it on crackers, toast, and fresh bread
- Mash it into salad dressing and mashed potatoes
- Add to soups, stews, casseroles, or sauces instead of raw fresh garlic
- Mix it with mayonnaise, mustard, and butter for a delicious garlic butter
- Mix roasted garlic, caramelized, and roasted red bell peppers into hummus for a flavor explosion
- Roasted garlic, jalapenos, onions, and tomatillos pureed in the blender with a pinch of cilantro and salt make a fantastic salsa verde
Did you make roasted garlic? I would love to hear how you used it. Feel free to leave your thoughts down below.
More Delicious Garlic Recipes
This blog post was originally published in February 2020 and has been updated with additional tips and gorgeous photos