



These cemita buns are the Mexican sesame bread I got a little obsessed with the minute I learned about them. They’re soft and fluffy inside, golden on top, and sturdy enough to hold a stacked cemita poblana sandwich. They’re made with bread flour, butter, and egg, and most of the time is hands-off rise time.
A Note from Isabel

Cemita bread is one of those things I didn’t grow up eating. I actually found out about it as an adult, and since I already love baking Mexican breads like bolillos and teleras, I knew right away I had to figure out how to make it at home.
Cemitas are big, round buns with a twisted top, a golden crust, and a whole lot of sesame seeds. In Puebla, they’re the bread behind cemitas poblanas, a sandwich piled with milanesa, avocado, chipotles, quesillo, and pápalo. My version uses butter and egg for a softer crumb, but it’s still sturdy enough that the sandwich doesn’t fall apart halfway through.
Store-bought cemitas are hard to find, even at a lot of Mexican bakeries, so homemade is the way to go. And once you have a batch, they’re just as good for tortas or even burgers. Fair warning: your kitchen is going to smell like a panadería.
What Are Cemita Buns?
Cemita rolls are big, round sesame seed buns from Puebla, Mexico, and they’re the bread used for cemitas poblanas. The name comes from acemite, an old Spanish word for bran. You’ll know one by its shape: the top is twisted and folded over itself before baking, which gives it that little swirl.
In Puebla you’ll often find them made with a lean dough of just flour, water, yeast, and salt, brushed with a sweet cornstarch glaze. Mine is richer, with butter and egg, so it lands somewhere between a hamburger bun and brioche. Just don’t mix them up with semitas, a sweet bread from northern Mexico and Texas.
Ingredients You’ll Need
You only need a handful of pantry basics for these. You’ll find the full amounts in the recipe card below.
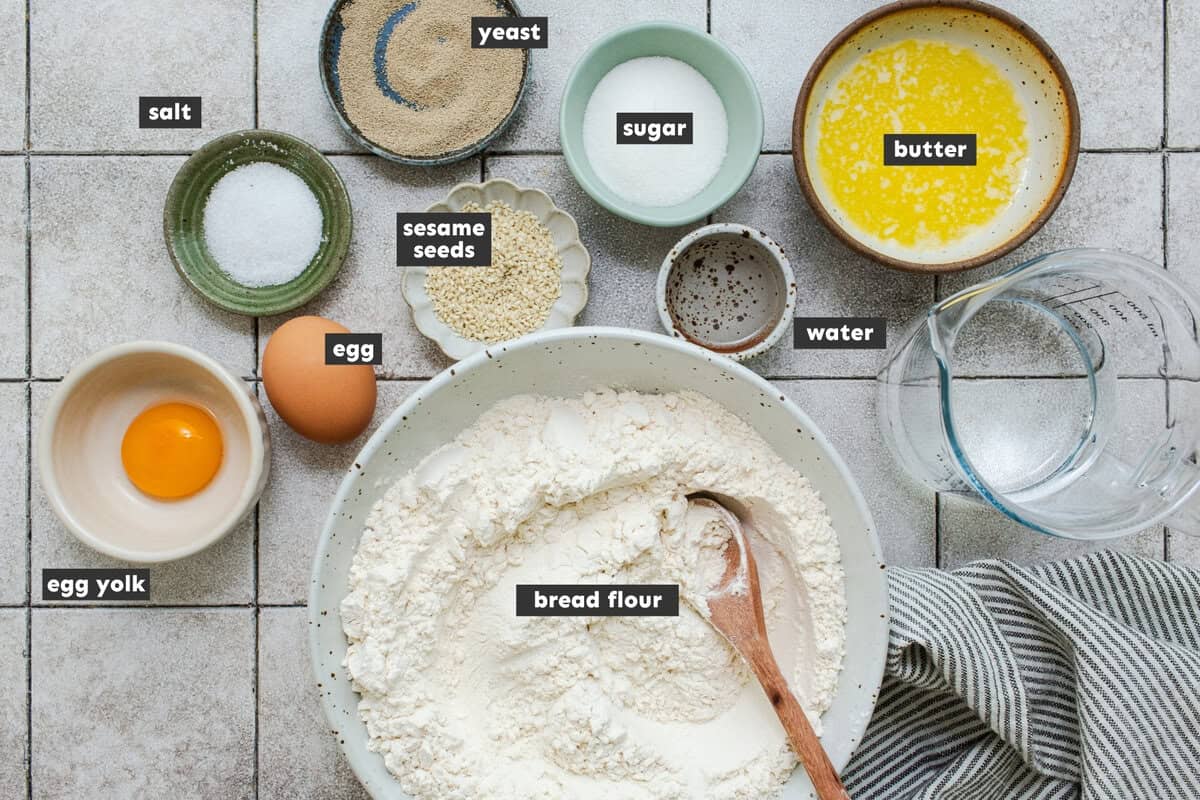
- Bread flour: It has more protein than all-purpose, so the buns come out soft but sturdy enough to hold a loaded sandwich. All-purpose works too, you’ll just get a softer, more tender roll.
- Instant yeast: It rises faster, which keeps the wait shorter. Active dry yeast works just as well, just plan on longer rise times.
- Warm water: Keep it between 110°F and 115°F so it wakes up the yeast without killing it. You can swap in warm milk for a richer, creamier bun.
- Butter: This adds richness and is part of what makes my version softer than a lean cemita. Softened lard or oil work too.
- Egg: One whole egg goes in the dough for moisture, and one yolk goes in the egg wash for that deep golden top.
- Sesame seeds: Don’t be shy with them. They’re the first thing you notice on a cemita. Toasted or untoasted both work.
How To Make Cemita Buns
Most of the time here is hands-off while the dough rises, and the shaping is easier than it looks.
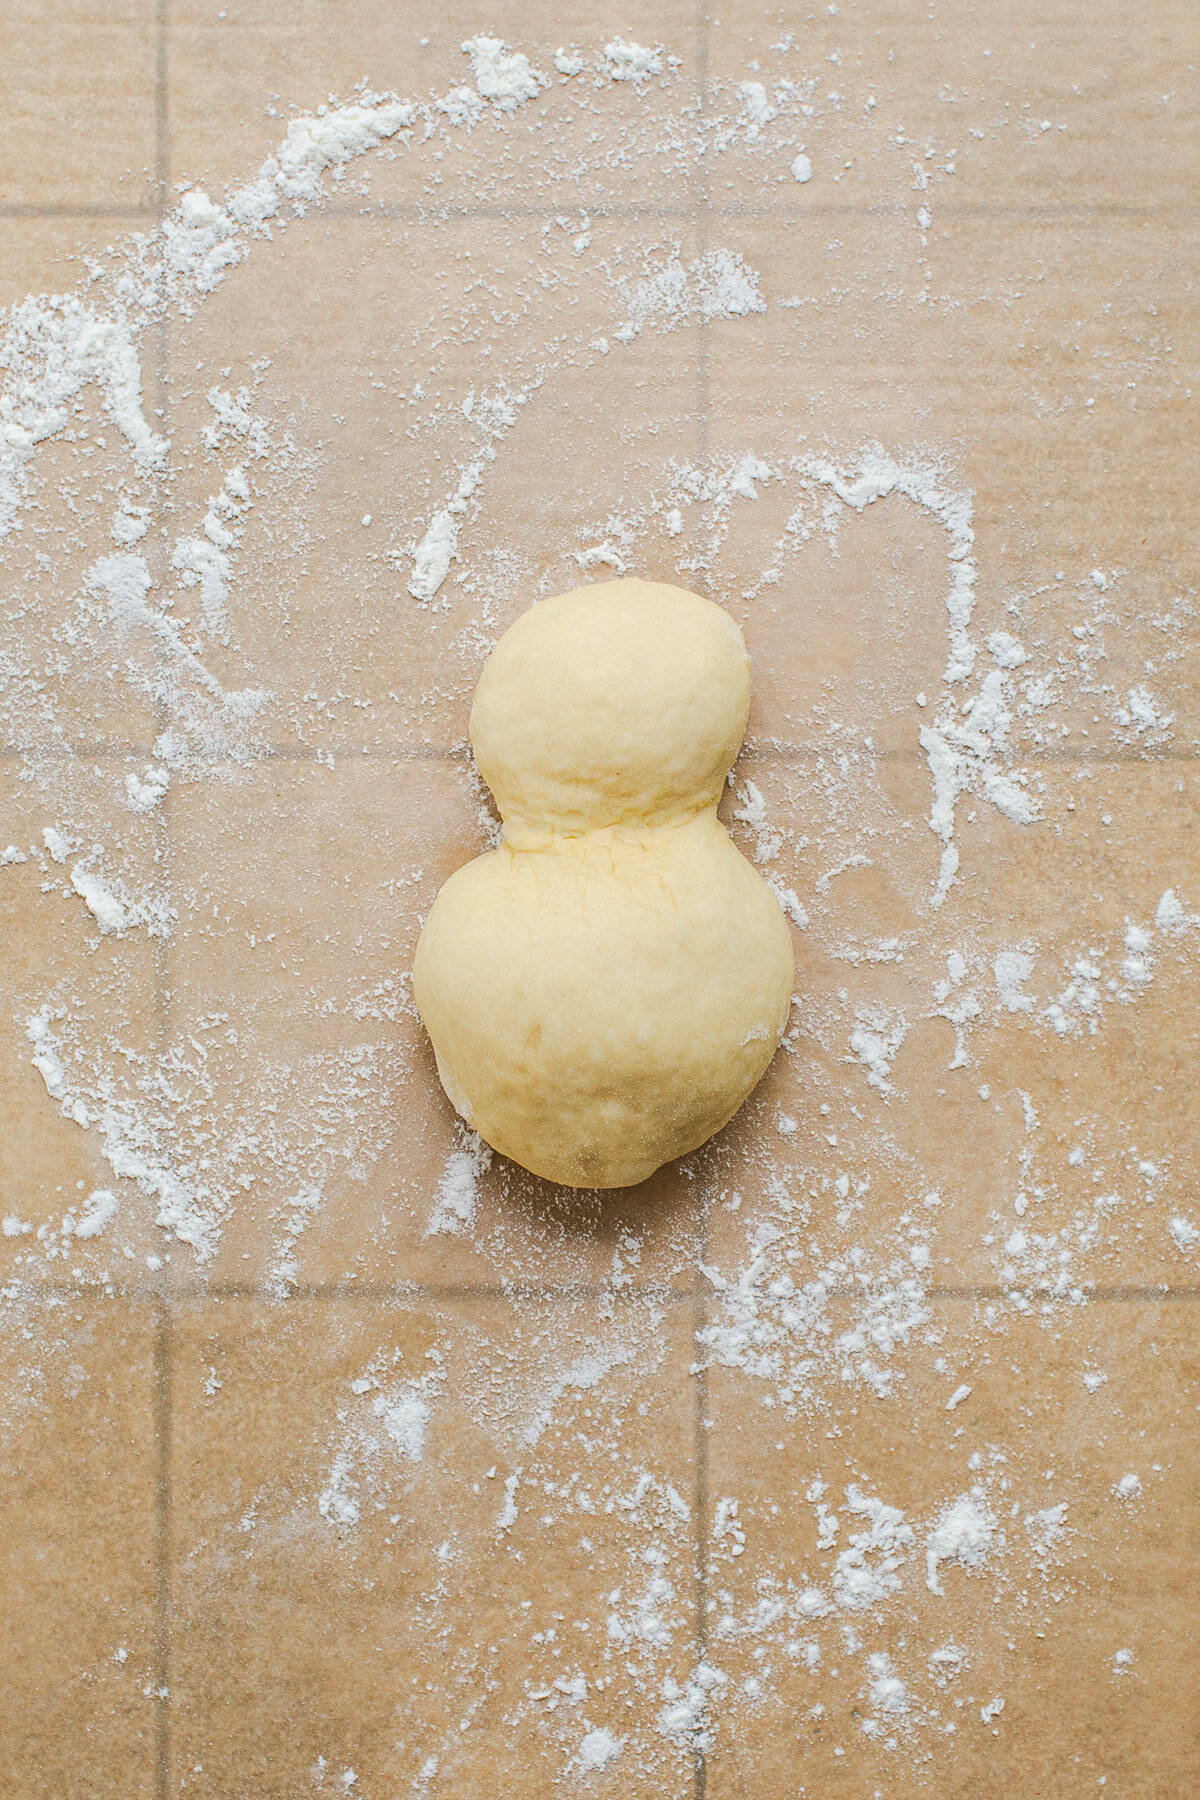
Divide the risen dough into 6 balls. Roll the pinky side of your hand across each one, about a third of the way in, until you have a small ball joined to a bigger one.
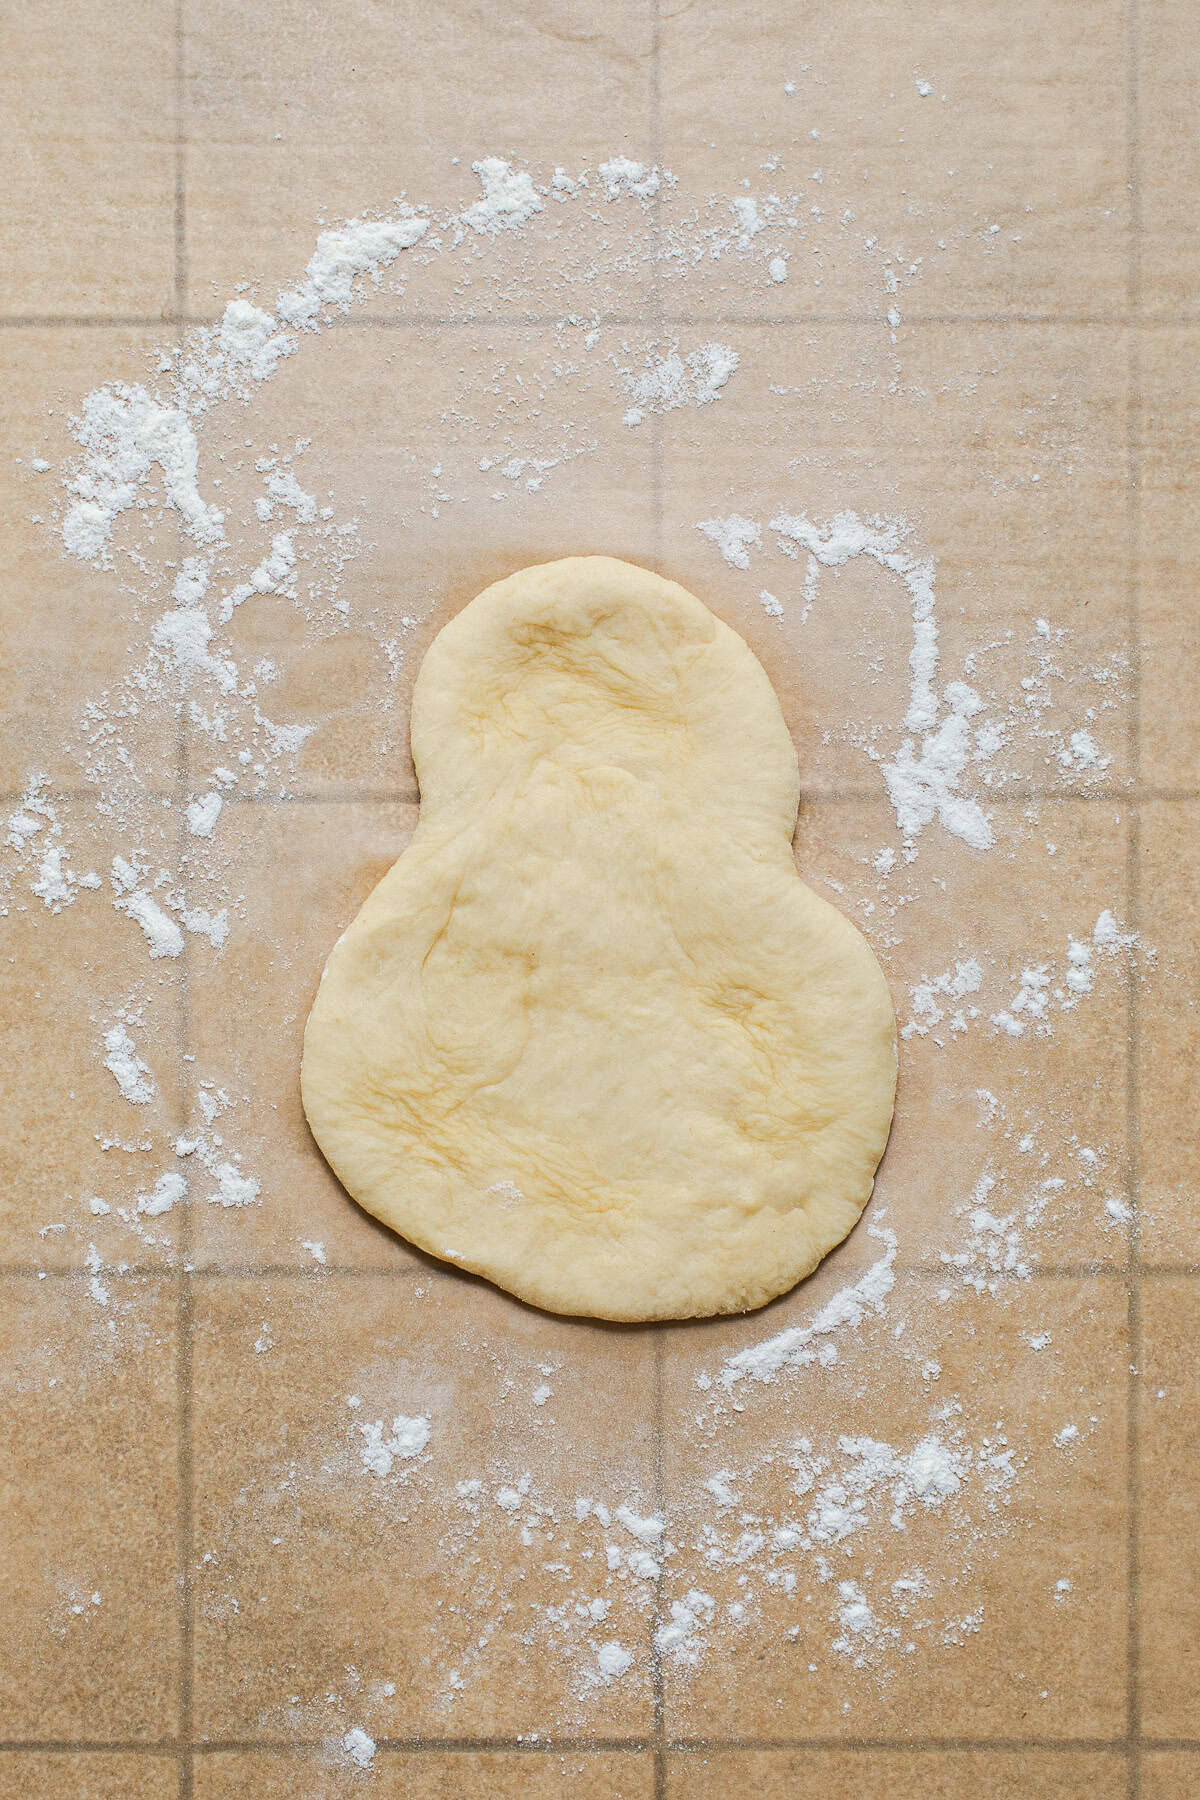
Press the whole thing flat with your palm, keeping that snowman shape. The bottom should be about 5 inches across.
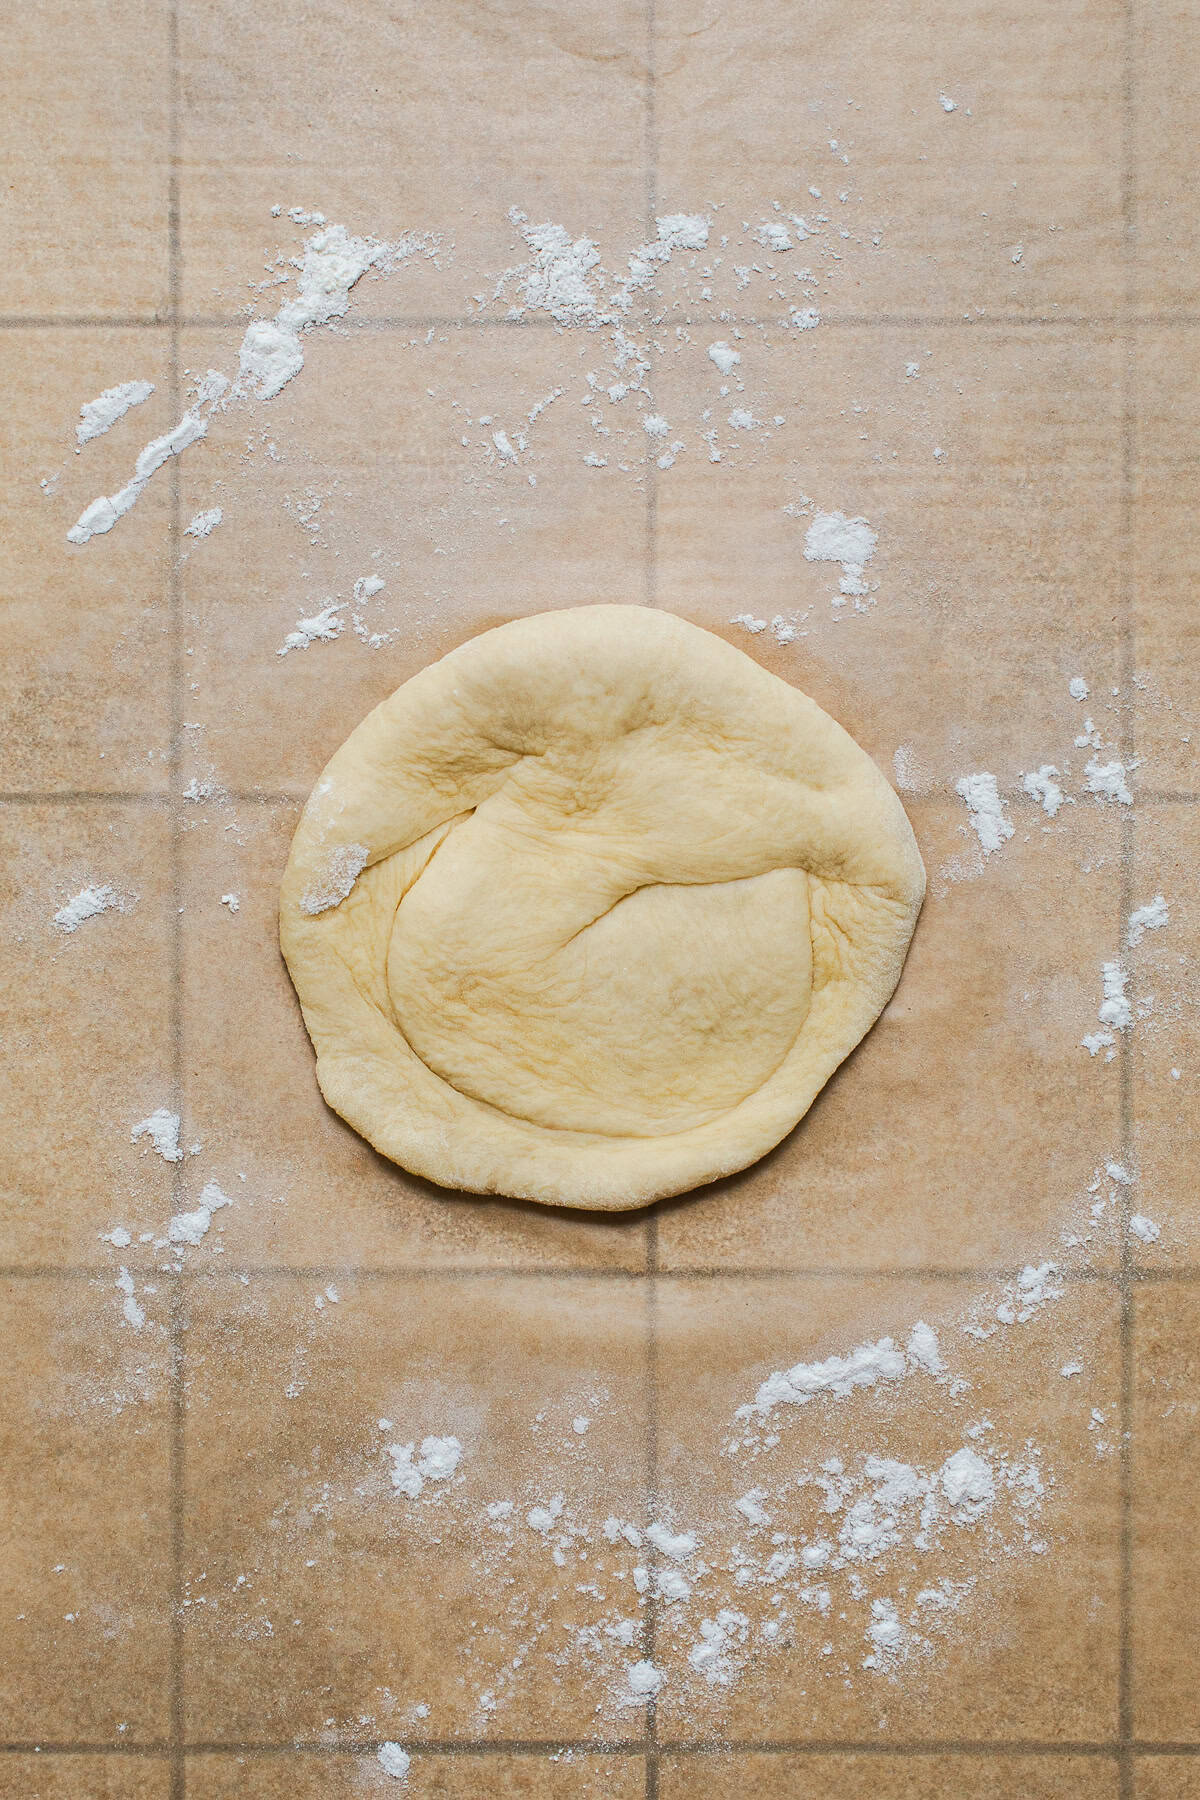
Pick up the small end, twist it a half turn, and lay it down on top of the big end. Press the bun flat again to about 5½ to 6 inches, pinching the edges to seal. You’ll see a curved ridge across the top.
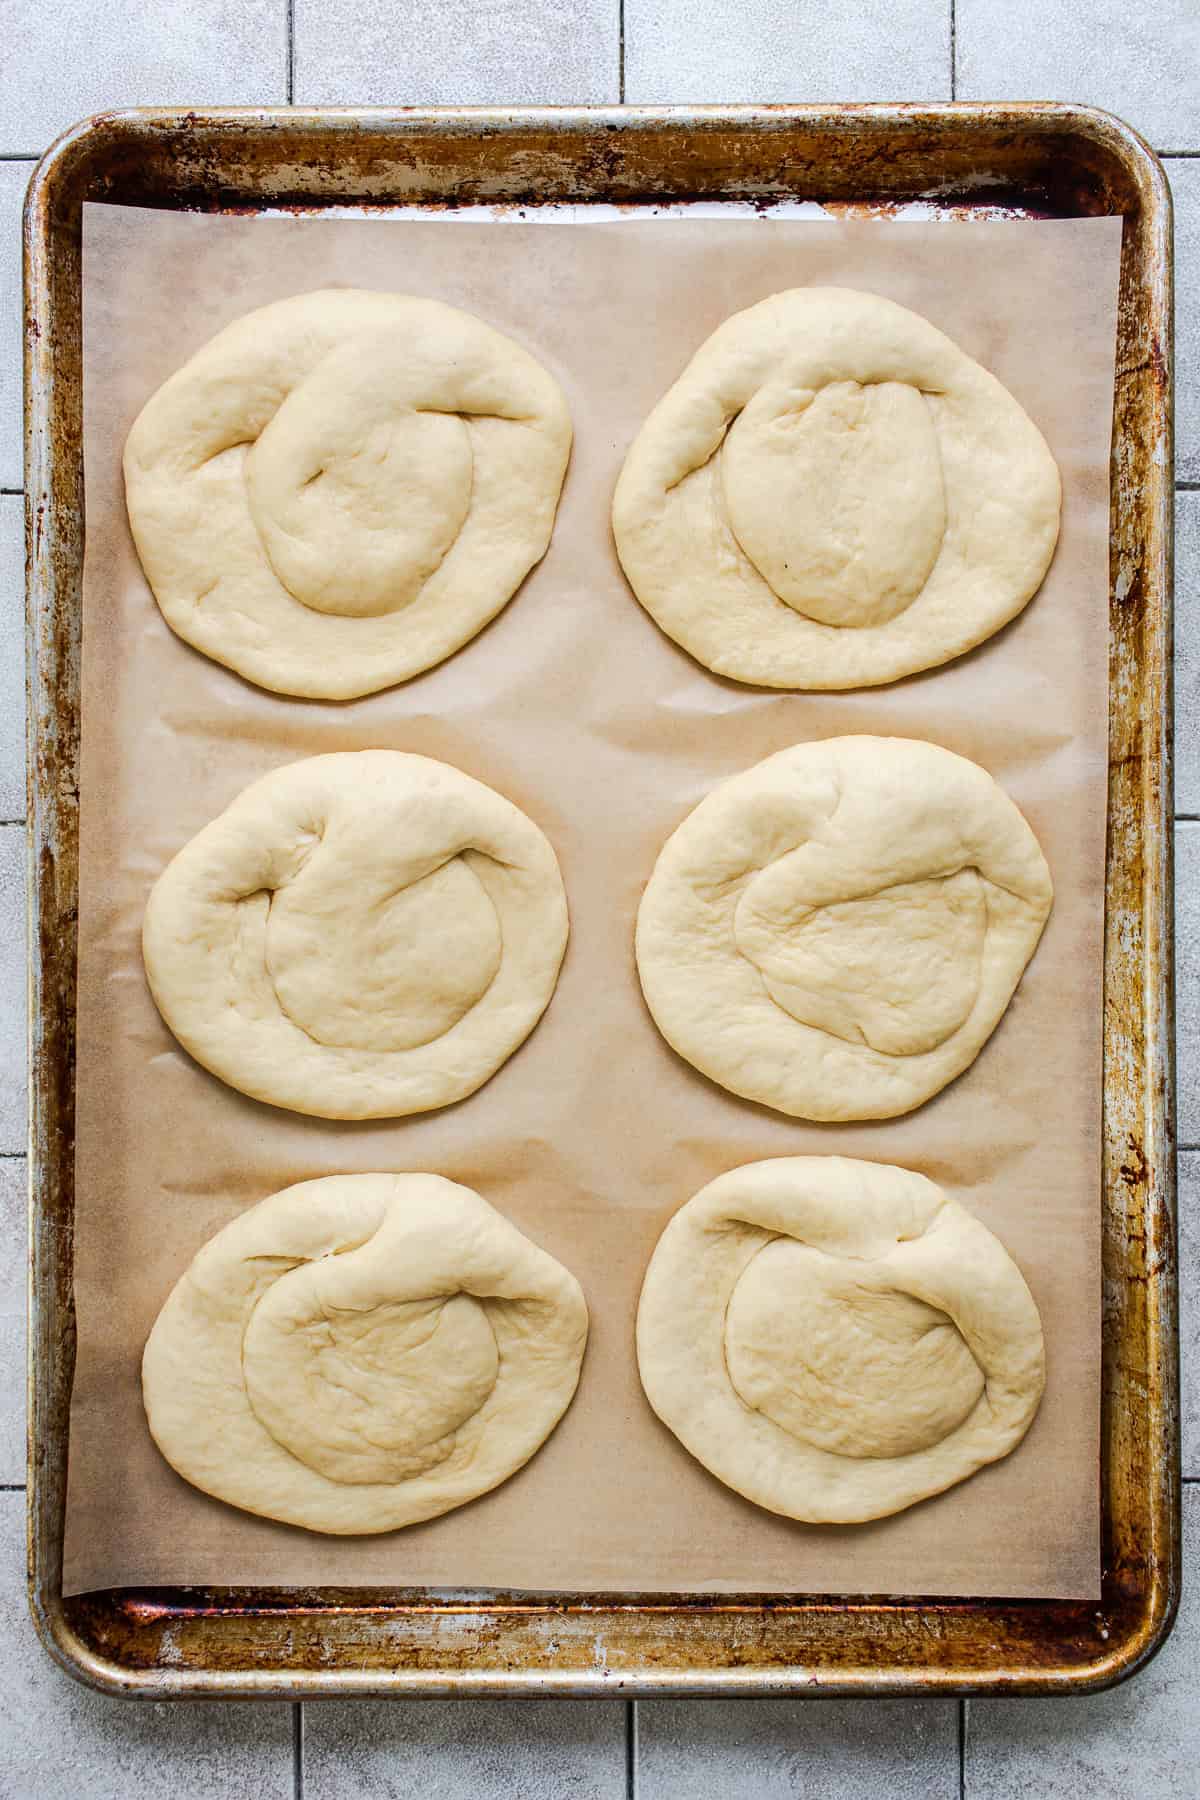
Set the shaped buns on a parchment-lined baking sheet, cover, and let them rise until almost doubled, about 1 to 1½ hours.
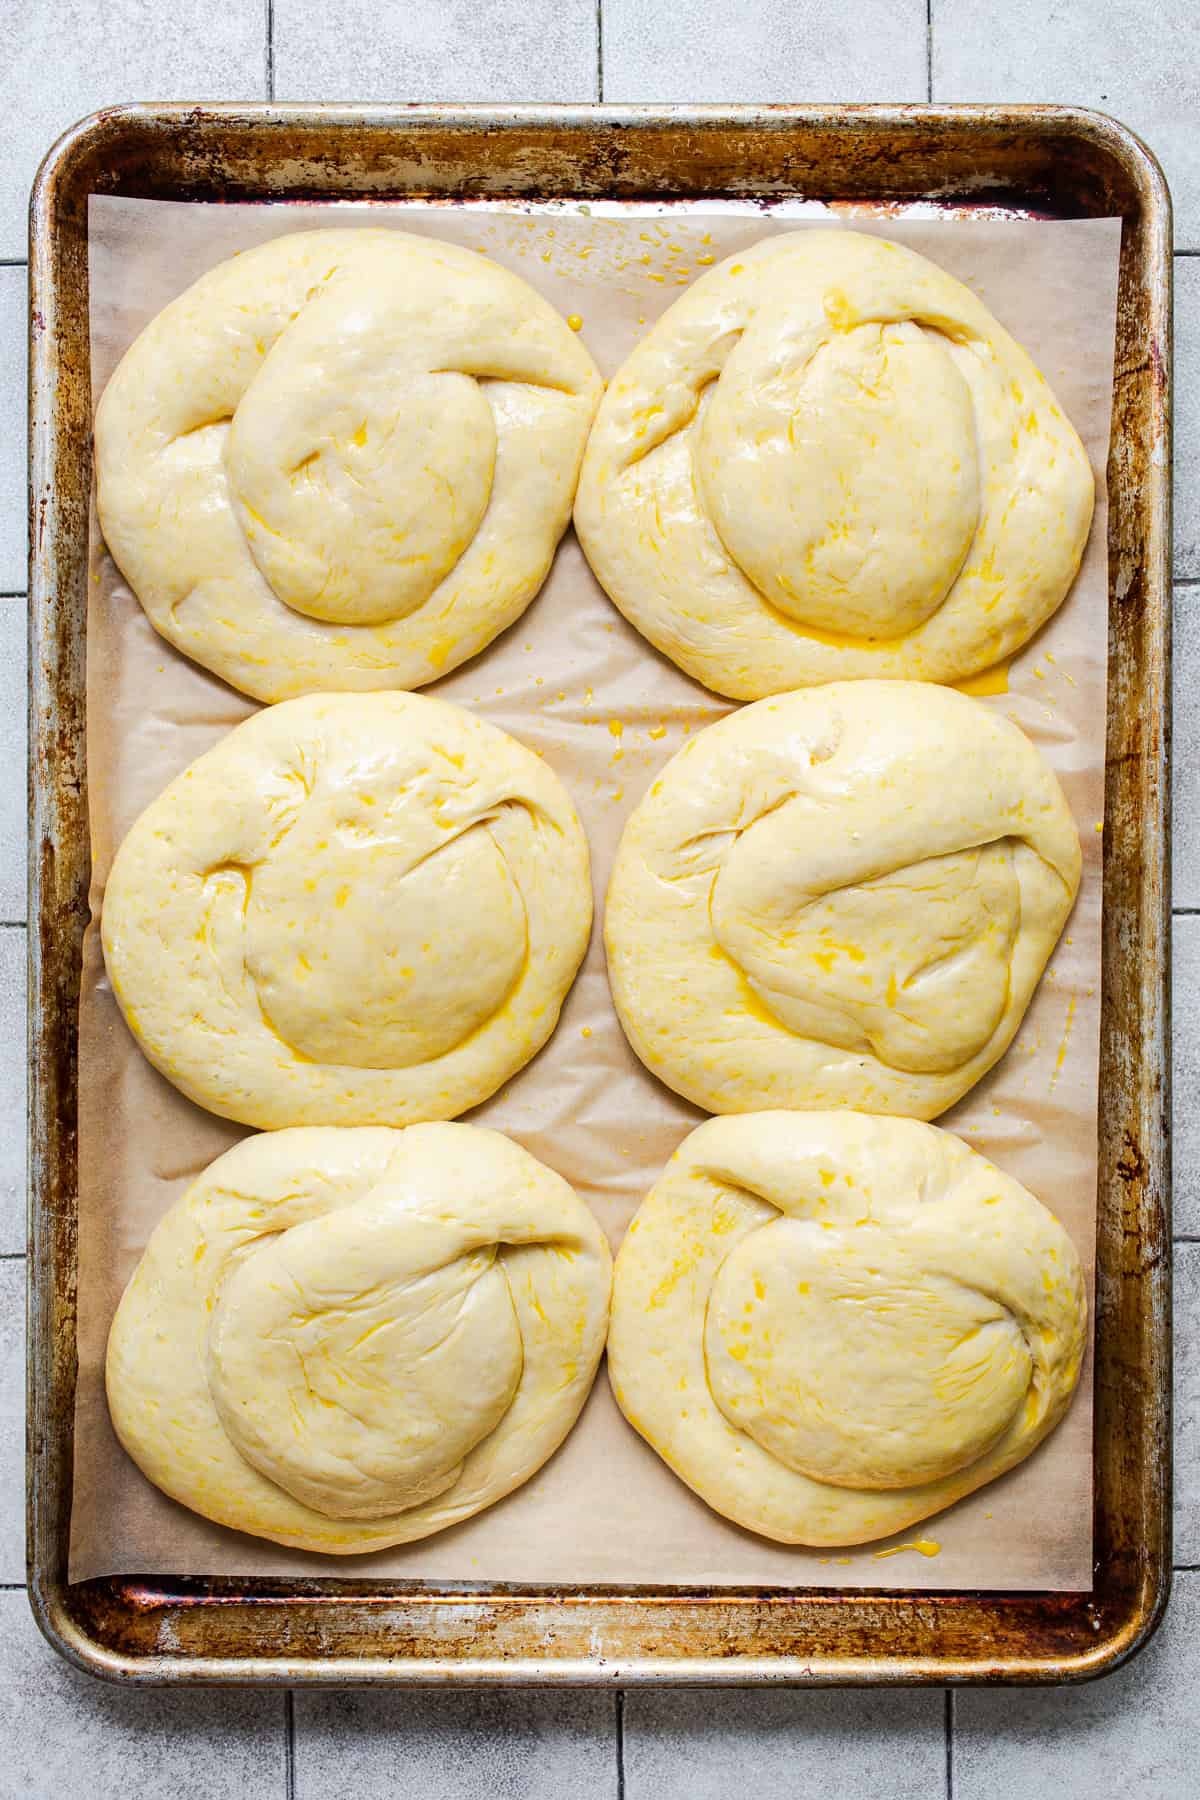
Brush the risen buns all over with egg wash, then cover the tops with sesame seeds.
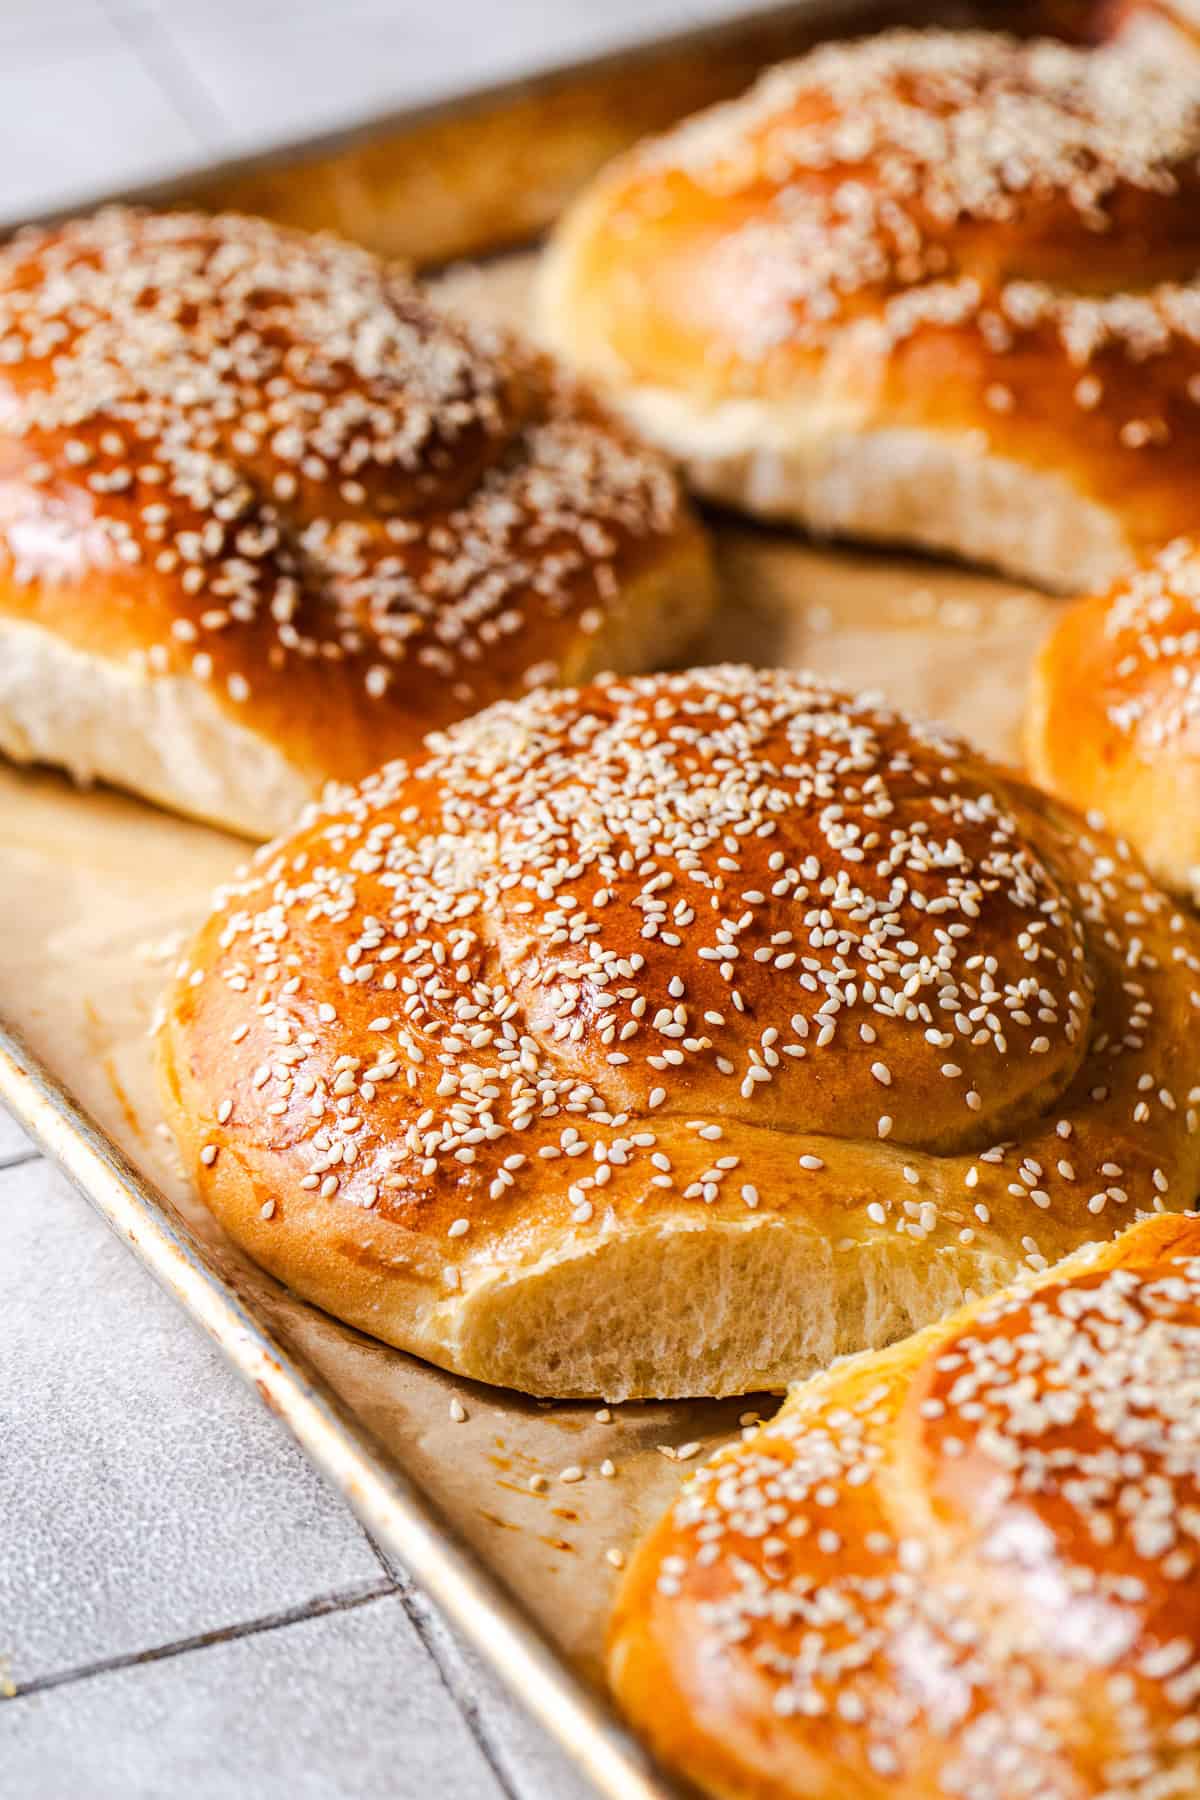
Bake at 350°F for 25 to 30 minutes until deep golden brown. Let them cool completely before slicing.
Recipe Tips
- Go for tacky, not sticky. After kneading, the dough should feel a little tacky but shouldn’t stick to your fingers. If it does, add more bread flour 1 tablespoon at a time.
- Seal the seams really well. When you fold the top piece over, press it down firmly so all the seams close up. If they’re loose, they’ll pull apart in the oven and you’ll end up with lopsided tops.
- Sprinkle the sesame seeds while the egg wash is still wet. The wash is what holds them on, so don’t let it dry first.
- Wait to slice until they’re completely cool. I know it’s tempting, but slicing warm bread smashes the crumb and makes it dense and gummy instead of light and fluffy.
Cemita Buns FAQs
A torta is any Mexican sandwich, usually made on a bolillo or telera and filled with just about anything, like jamón, milanesa, or carne asada. A cemita is a specific sandwich from Puebla made on this sesame bun, usually with milanesa, avocado, quesillo, chipotles, and pápalo.
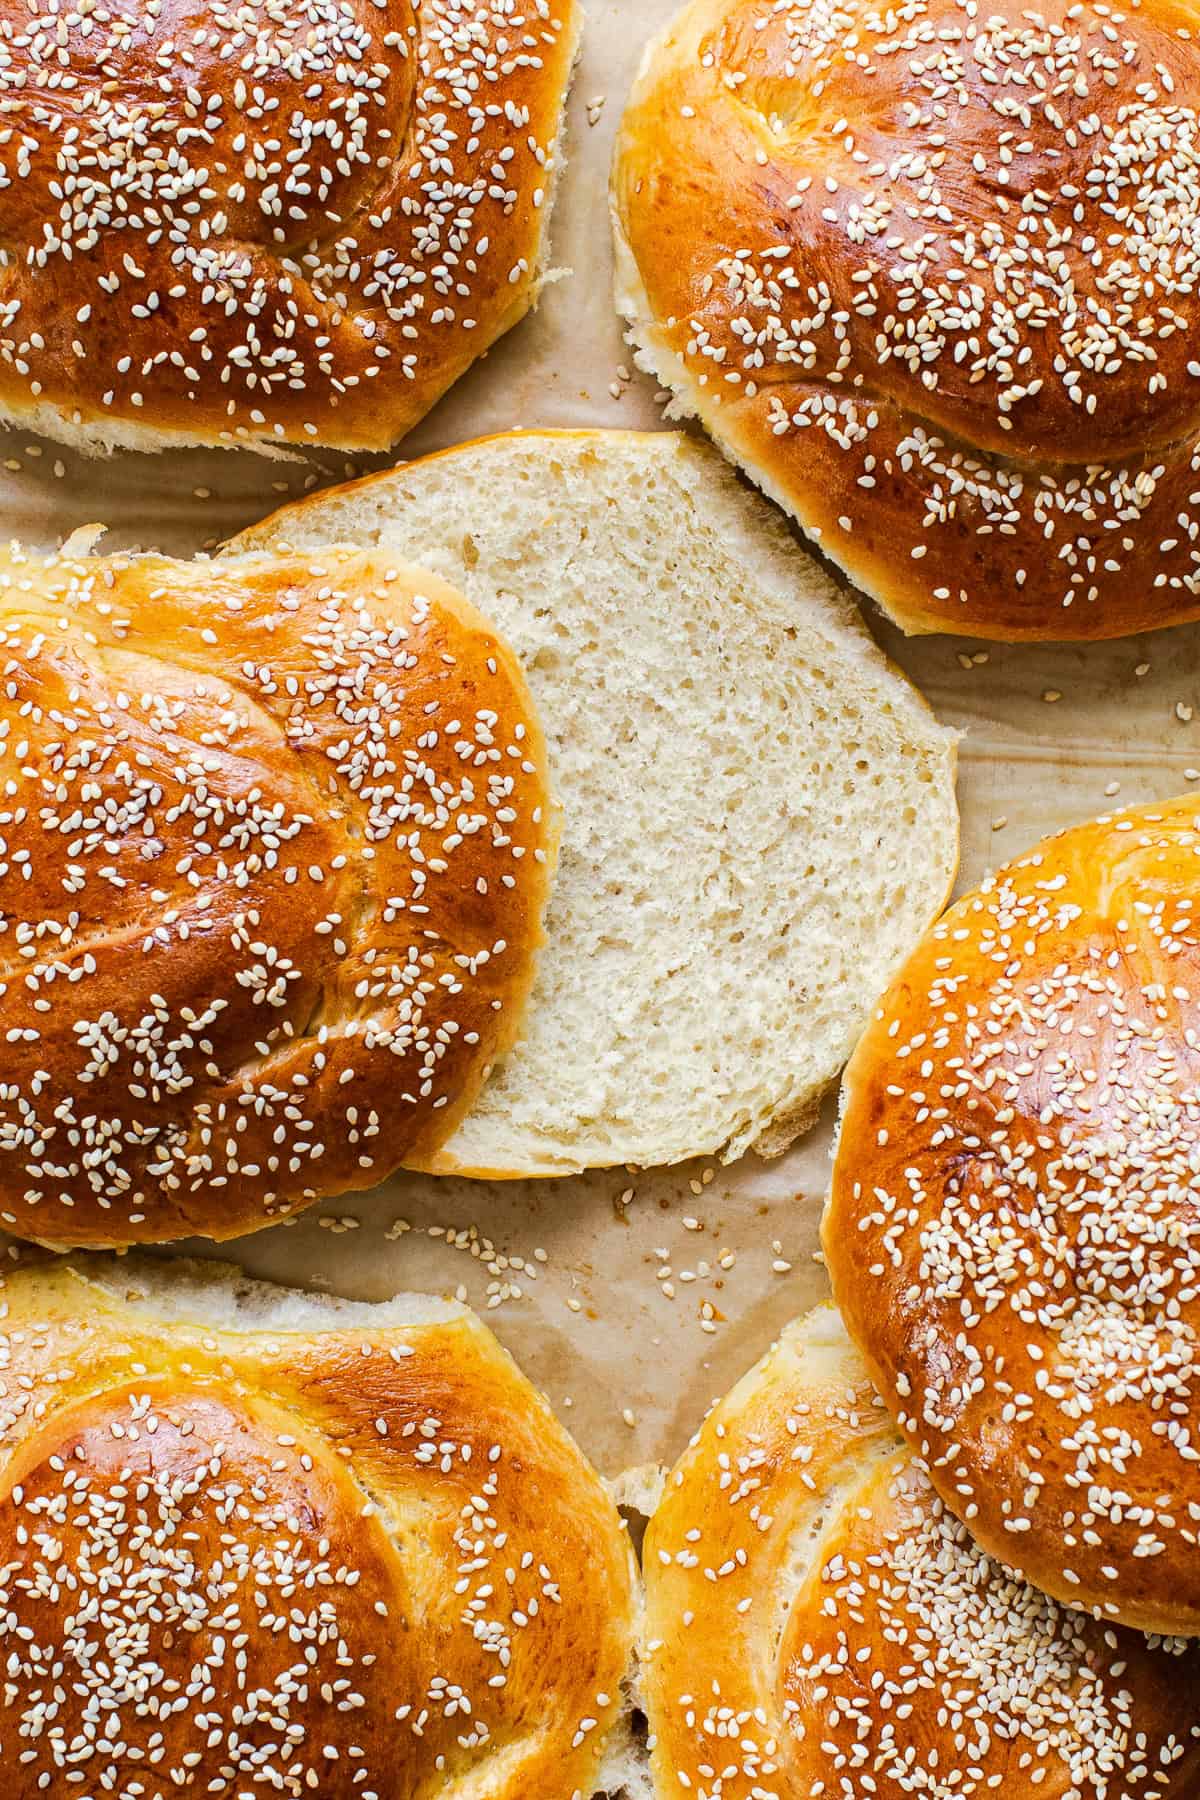
Your cemita buns should look like fluffy yet sturdy, golden versions of sesame hamburger buns. A golden crust, plenty of sesame seeds, and a large roll are key to a good cemita bun that holds up to all the toppings.
They’re made for cemitas poblanas, but they work for pretty much any sandwich. Try them for tortas de milanesa or even as burger buns.
Yes. Mix the dough in a large bowl and knead it by hand for about 10 minutes, until it’s smooth and slightly tacky.
-
Make the dough. Pour the water into a small heat-proof bowl and microwave on high for 20 seconds, or until it reaches 110-115°F. Stir in the yeast and 1 tablespoon of the sugar, then cover with plastic wrap and let it bloom for 10 minutes, until it’s foamy and frothy.
-
While the yeast is blooming, whisk together the flour, the remaining 2 tablespoons of granulated sugar, and the salt in the bowl of a stand mixer (or a large bowl).
-
Add the yeast mixture, the melted butter, and the egg. Using the dough hook attachment (or your hands), knead the dough on medium speed for 8-10 minutes, until it forms a smooth, slightly tacky but not sticky dough ball. If the dough is still too sticky, add more bread flour 1 tablespoon at a time.
-
1st rise. Transfer the dough to a greased bowl, cover with plastic wrap or a kitchen towel, and let it rest in a warm place until it doubles in size, about 1½ to 2 hours.
-
Shape the dough. (Step-by-step photos are in the blog post above.) Line a large baking sheet with parchment paper and set it aside. Punch down the dough and transfer it to a floured surface. Divide the dough into 6 equal portions and roll each into a ball.
-
Set a dough ball on the work surface. Rest the pinky side of your hand across it, about a third of the way in from one edge, and roll back and forth to squeeze that section thinner. You’ll end up with a small ball on top of a bigger ball, joined by a short neck, like a snowman.
-
Press the whole thing flat with your palm, keeping the snowman shape. The bottom should be about 5 inches across and the top a little smaller.
-
Pick up the small end, twist it a half turn so it flips over, and lay it down on top of the bigger end. Press the whole bun flat again to about 5½ to 6 inches, pinching the edges so the seams seal. You’ll see a curved ridge across the top where the two pieces meet. Repeat with the rest.
-
2nd rise. Transfer the shaped buns onto the prepared baking sheet. Cover with plastic wrap or a kitchen towel and allow them to rise in a warm place until almost doubled in size, about 1 to 1½ hours. During the last 20 minutes of rising, preheat the oven to 350°F.
-
Bake. Make the egg wash by whisking together the egg yolk and 2 teaspoons of water until combined. Brush the egg wash over the tops of the buns, then sprinkle generously with sesame seeds.
-
Bake for 25-30 minutes until golden brown. Let the buns sit on the baking sheet until they’re easy to handle, then move them to a wire rack and let them cool completely. Slice and serve as a sandwich or add your favorite fillings.
Prevent your screen from going dark
- Storing and freezing. Keep cooled buns in a zip-top bag or airtight container at room temperature for up to 4 days. To freeze, wrap each bun tightly and store in a freezer bag for up to 3 months, then thaw at room temperature.
- Yeast. Active dry yeast works in place of instant; it just takes longer to rise. Bloom it the same way and plan on extra time for both rises.
- Flour. All-purpose flour works if that’s what you have, but the buns will be softer and a little less sturdy for a big sandwich.
- Loose seams. If the seams aren’t fully sealed, the top may pull apart in the oven and bake up lopsided.
- Slicing. Slicing while warm makes the inside dense and gummy, so wait until they’re completely cool.
Serving: 1bun | Calories: 435kcal | Carbohydrates: 62g | Protein: 13g | Fat: 15g | Saturated Fat: 8g | Polyunsaturated Fat: 2g | Monounsaturated Fat: 4g | Trans Fat: 0.4g | Cholesterol: 89mg | Sodium: 408mg | Potassium: 152mg | Fiber: 3g | Sugar: 6g | Vitamin A: 403IU | Vitamin C: 0.01mg | Calcium: 64mg | Iron: 2mg
Nutrition information is automatically calculated, so should only be used as an approximation.
More Recipes To Try
Photography by Ashley McLaughlin.